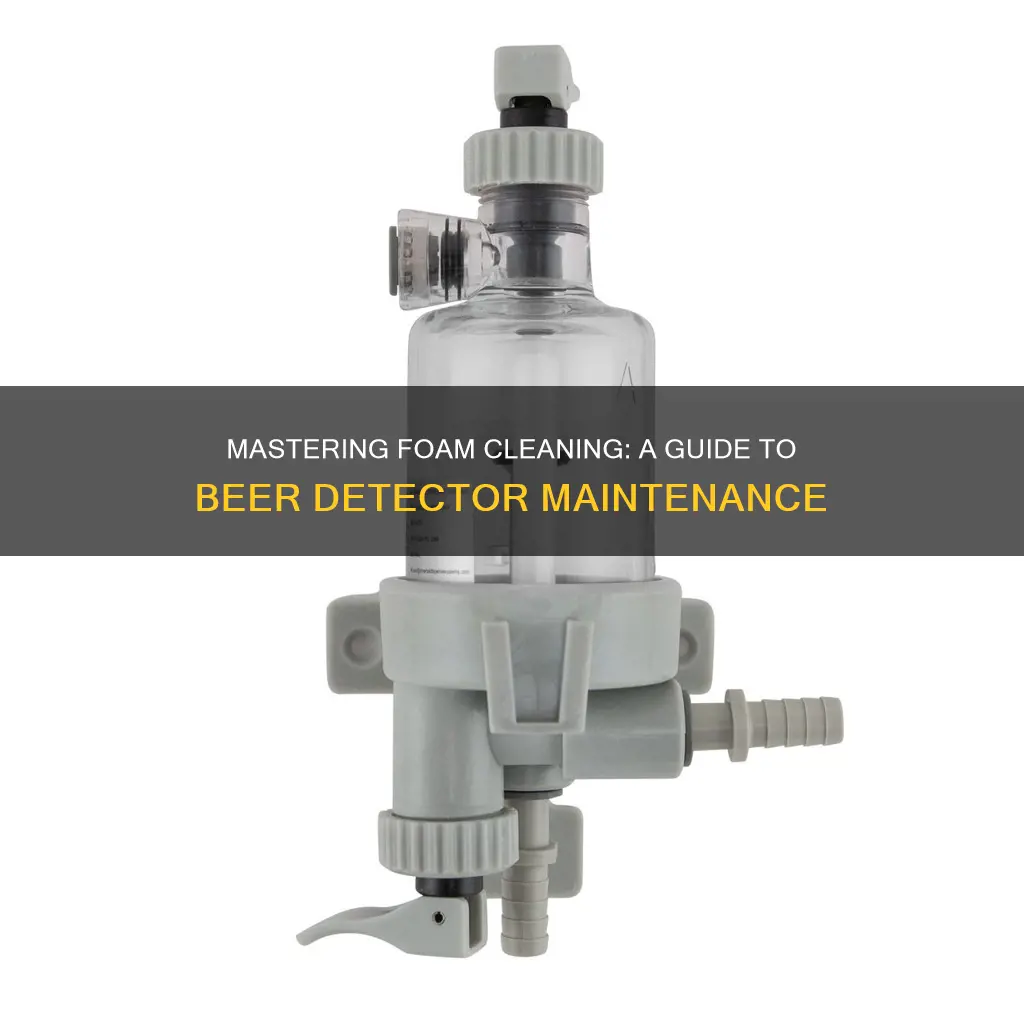
Cleaning a foam on beer detector is an essential step to ensure accurate and reliable measurements. This guide will provide a step-by-step process to effectively clean the foam detector, covering the necessary tools, materials, and techniques to remove any residue or contaminants that may affect the sensor's performance. By following these instructions, you can maintain the detector's precision and longevity, ensuring consistent and accurate readings for your beer analysis.
What You'll Learn
- Prepare Materials: Gather cleaning solutions, brushes, and tools for the foam detector
- Remove Debris: Use a soft brush to gently clear any visible dirt or residue
- Soak and Clean: Immerse the detector in a cleaning solution and scrub gently
- Rinse Thoroughly: Rinse the detector with clean water to remove any soap residue
- Dry and Inspect: Allow the detector to air dry, then check for any remaining issues
![]()
Prepare Materials: Gather cleaning solutions, brushes, and tools for the foam detector
To effectively clean a foam detector, it's crucial to have the right tools and materials ready. Here's a step-by-step guide on preparing the necessary items:
Gather Cleaning Solutions: Start by acquiring a suitable cleaning agent. A mild detergent or dish soap is ideal for this task. You can use a common household detergent like Dawn or any similar product. Alternatively, a specialized beer cleaning solution designed for brewing equipment can be used. Ensure you have enough of the chosen cleaning agent to cover the entire surface of the foam detector.
Prepare Brushes and Tools: Obtain a variety of brushes to tackle different cleaning needs. A soft-bristled brush is excellent for gentle cleaning and removing loose debris. For more stubborn dirt or residue, consider using a stiff-bristled brush. Additionally, gather tools such as a small spatula or a flat-edged screwdriver to help dislodge any built-up gunk. These tools will assist in reaching tight spaces and crevices.
Consider Additional Materials: Depending on the specific design of your foam detector, you might need extra materials. For instance, if your detector has a removable head or spout, you'll require a cleaning brush with a long handle to reach those areas effectively. Also, consider having a small container or basin to mix the cleaning solution, ensuring easy application.
By gathering these materials in advance, you'll be well-prepared to tackle the cleaning process, ensuring a thorough and efficient maintenance routine for your foam detector. Remember, proper cleaning will not only enhance the detector's performance but also extend its lifespan.
Fishy Brew: Uncovering the Truth Behind Beer's Surprising Ingredient
You may want to see also
![]()
Remove Debris: Use a soft brush to gently clear any visible dirt or residue
When it comes to maintaining the precision and longevity of your beer detector, keeping it free from debris is crucial. Here's a step-by-step guide on how to effectively remove any visible dirt or residue using a soft brush:
Step 1: Prepare Your Tools
Before you begin, ensure you have a soft-bristled brush that is gentle on the surface of the detector. A toothbrush or a specialized cleaning brush with fine bristles is ideal. Avoid using harsh brushes that might scratch the detector's surface.
Step 2: Power Down and Unplug
For your safety and to prevent any damage, always turn off the beer detector and unplug it from the power source before cleaning. This ensures that no electrical components are exposed to moisture or cleaning agents.
Step 3: Identify the Debris
Examine the detector's surface carefully to identify the debris or residue that needs to be removed. This could include dust, food particles, or any other foreign matter that has accumulated over time.
Step 4: Apply Gentle Pressure
Gently apply the soft brush to the affected areas, using light, circular motions. Be very careful not to apply too much pressure, as this might damage the detector's sensitive components. Focus on the areas where debris is most visible and persistent.
Step 5: Work in Sections
Break down the cleaning process into manageable sections. Start with one side of the detector and work your way around, ensuring that you cover every inch of the surface. This systematic approach ensures that no debris is missed.
Step 6: Rinse and Dry
After brushing, rinse the soft brush under clean water to remove any loosened debris. Then, gently dry the detector with a soft cloth to prevent water spots. Allow the detector to air dry completely before reassembling or using it again.
By following these steps, you can effectively remove debris and keep your beer detector in optimal condition, ensuring accurate readings and a longer lifespan for your investment. Remember, regular maintenance is key to preserving the quality of your beer detection system.
Shiner Bock: Lager or Not? Unraveling the Mystery
You may want to see also
![]()
Soak and Clean: Immerse the detector in a cleaning solution and scrub gently
To effectively clean a foam on beer detector, the 'Soak and Clean' method is a recommended approach. This process involves immersing the detector in a suitable cleaning solution and gently scrubbing it to remove any accumulated dirt, grime, or residue. Here's a step-by-step guide to ensure a thorough cleaning:
Preparation: Begin by gathering the necessary materials. You'll need a mild detergent or a specialized beer detector cleaning solution, warm water, a soft-bristled toothbrush or a cleaning brush with gentle bristles, and a clean cloth or towel. Ensure the area is well-ventilated to avoid inhaling any cleaning agents.
Immersion: Fill a clean sink or container with warm water and add a small amount of the chosen cleaning solution. Stir gently to create a soapy mixture. Carefully immerse the foam on beer detector into the solution, ensuring that all parts, including the sensors and foam head, are covered. Allow it to soak for a period of 10-15 minutes. This step is crucial as it loosens and dissolves any built-up contaminants.
Scrubbing: After soaking, gently remove the detector from the solution. Use the soft-bristled toothbrush or cleaning brush to scrub the detector's surface, paying close attention to the areas around the sensors and the foam head. Apply light pressure to avoid damaging the components. Work in a circular motion to ensure you reach all the nooks and crannies. If you encounter stubborn stains or residue, you may need to apply a bit more pressure, but always be cautious to prevent any damage.
Rinsing: Once you've scrubbed the entire detector, rinse it thoroughly under running warm water. Ensure that all soap and cleaning solution are removed to prevent any residue from affecting the detector's performance. Gently squeeze the water out of the detector, being careful not to twist or stretch the components.
Drying: After rinsing, pat the detector dry with a clean, soft cloth. Ensure there is no moisture left on the surface, as this could lead to corrosion. You can also use a hairdryer on a low setting to speed up the drying process, but maintain a safe distance to avoid overheating. Allow the detector to air dry completely before reassembling or using it again.
By following these steps, you can effectively clean and maintain your foam on beer detector, ensuring its longevity and optimal performance. Regular cleaning will help improve the accuracy of your beer detection and overall brewing experience.
High-Temperature Fermentation: Understanding the Risks and Consequences for Beer
You may want to see also
![]()
Rinse Thoroughly: Rinse the detector with clean water to remove any soap residue
Rinsing the beer detector thoroughly is an essential step in the cleaning process, ensuring that no soap residue remains on the device. This step is crucial as it helps to prevent any potential off-flavors or aromas that could be caused by the lingering soap. Here's a detailed guide on how to perform this task effectively:
Begin by filling a sink or basin with clean, fresh water at room temperature. Avoid using hot water as it may cause the foam to expand and potentially damage the detector. Ensure the water is free from any contaminants that could further dirty the device.
Next, gently place the beer detector under the running water. Hold it at an angle to allow the water to flow over all surfaces, including the foam chamber, sensors, and any nooks or crannies. The goal is to dislodge and wash away any soap particles that might have accumulated during the cleaning process.
As you rinse, pay close attention to the areas where soap is most likely to accumulate, such as the foam chamber's interior and the outer surfaces of the detector. These areas may require a bit more effort to ensure no residue remains. Use your fingers or a soft cloth to gently wipe down these spots, ensuring a thorough clean.
After a thorough rinse, it's important to dry the detector properly. Pat it dry with a clean towel, being careful not to leave any water spots. Proper drying will help prevent the growth of mold or mildew, which could compromise the detector's performance and accuracy.
By following these steps, you'll ensure that your beer detector is not only clean but also ready for optimal performance, providing accurate readings and enhancing your beer-tasting experience. Remember, proper maintenance and cleaning are key to the longevity and reliability of your beer detector.
Unraveling the Mystery: Beer and the 0.08 Limit
You may want to see also
![]()
Dry and Inspect: Allow the detector to air dry, then check for any remaining issues
After you've completed the cleaning process, it's crucial to let the beer detector air dry thoroughly. This step is often overlooked, but it's essential to ensure the device is completely dry before use. Moisture can damage the internal components and affect the detector's performance. Start by gently patting the exterior of the detector with a soft, lint-free cloth to remove any visible water. Pay close attention to the areas where water might have seeped in, such as the ports and buttons. Once the external surface is dry, carefully lift the cover (if applicable) and inspect the interior. Use a soft brush or compressed air to carefully remove any remaining moisture or debris. Ensure that all parts are completely dry before reassembling the detector.
Allowing the detector to air dry in a well-ventilated area is ideal. You can place it on a table or shelf, ensuring it's not in a confined space where moisture might accumulate. If you're in a hurry, you can use a fan to accelerate the drying process, but be cautious not to direct the airflow onto sensitive components. It's important to note that rushing the drying process might lead to water spots or damage, so patience is key.
Once the detector is completely dry, carefully inspect it for any signs of damage or malfunction. Check all connections and ensure that the internal components are in their correct positions. Look for any visible corrosion or residue, especially around the sensors and contacts. If you notice any issues, such as a sticky or unresponsive button, address them promptly. In some cases, you might need to disassemble the detector further to identify and resolve these problems.
During the inspection, pay attention to the overall condition of the detector. Check for any cracks or damage to the housing, as this could affect the device's functionality. Also, ensure that all labels and markings are still legible, as they provide important information about the detector's settings and calibration. If you find any issues during this stage, it's best to consult the manufacturer's guidelines or seek professional assistance to ensure proper repair or replacement.
Remember, proper drying and inspection are critical to maintaining the performance and longevity of your beer detector. By taking the time to follow these steps, you can ensure that your device operates accurately and reliably, providing you with accurate beer foam analysis.
Uncover the Secrets of Lagar Beer: A Traditional Craft
You may want to see also
Frequently asked questions
It is recommended to clean your foam on beer detector after every 5-10 uses. Regular cleaning ensures accurate measurements and maintains the quality of your beer. Over time, the foam can accumulate dirt, oils, and other contaminants, leading to inconsistent readings.
A simple and effective cleaning method is to use a mild detergent or dish soap diluted in warm water. Dip a soft-bristled toothbrush or a clean cloth into the soapy water, ensuring it's not too wet. Gently rub the foam surface, being careful not to apply excessive pressure. Rinse thoroughly with warm water to remove any soap residue, and allow it to air dry completely before reassembling.
No, it is not recommended to use a dishwasher for cleaning the foam on a beer detector. The high temperatures and harsh detergents in dishwashers can damage the sensitive components of the detector. Instead, opt for manual cleaning methods to ensure the longevity and proper functioning of your beer detector.