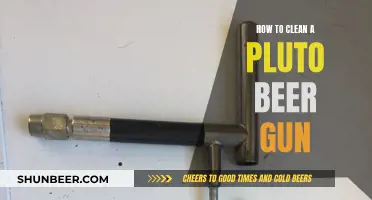
Maintaining a clean beer tap system is crucial for ensuring the best taste and quality of your beer. Over time, dirt, grime, and mineral deposits can accumulate, affecting the flavor and potentially causing blockages. This guide will provide a step-by-step process to effectively clean your beer tap system, covering everything from preparing the necessary tools and materials to the final rinse and drying process. By following these instructions, you can keep your tap system in top condition, ensuring a consistent and enjoyable drinking experience.
What You'll Learn
- Prepare the Equipment: Gather cleaning supplies, including brushes, brushes, and cleaning solutions
- Disassemble the System: Carefully remove the tap, hose, and any other removable parts
- Clean the Tap: Scrub the tap with a brush and cleaning solution to remove residue
- Rinse Thoroughly: Use a hose to rinse the tap and hose, ensuring no soap residue remains
- Reassemble and Test: Reattach the parts and test the tap to ensure proper flow and no leaks
![]()
Prepare the Equipment: Gather cleaning supplies, including brushes, brushes, and cleaning solutions
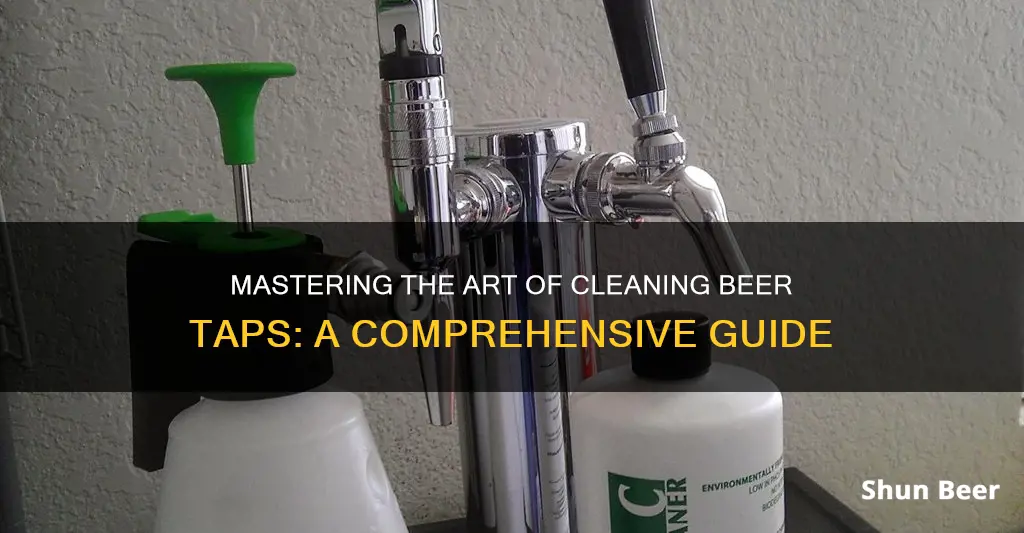
To effectively clean a beer tap system, it's crucial to have the right tools and supplies ready. Begin by gathering a set of brushes specifically designed for cleaning tap systems. These brushes should have firm bristles to ensure thorough cleaning without damaging the tap components. A small, narrow brush is ideal for reaching into tight spaces and removing any debris or buildup. Additionally, consider acquiring a larger, stiffer brush for more general cleaning and scrubbing.
Next, you'll need to assemble a cleaning solution. There are various options available, such as specialized beer tap cleaning kits that include a detergent and a degreaser. These kits often provide the necessary tools and solutions in one convenient package. Alternatively, you can opt for a homemade solution by mixing a mild dish soap with warm water. Ensure that the cleaning solution is gentle enough to avoid any damage to the tap system but effective enough to remove grime and residue.
Consider using a small, flexible brush designed for cleaning beer taps, as it can navigate the intricate parts of the tap system. This brush is particularly useful for dislodging any stubborn residue or buildup. Additionally, a standard bottle brush can be employed to clean the bottle or keg coupler, ensuring a comprehensive clean.
Remember, having the right equipment and supplies is essential for a successful cleaning process. By gathering these items beforehand, you'll be well-prepared to tackle the cleaning of your beer tap system, ensuring a fresh and enjoyable drinking experience.
Mastering the Art of Cleaning: Bullet Beer Tap Kit Guide
You may want to see also
![]()
Disassemble the System: Carefully remove the tap, hose, and any other removable parts
Disassembling the beer tap system is a crucial step in the cleaning process, as it allows you to access all the areas that need attention. Start by ensuring you have the necessary tools, such as a screwdriver or a specialized tap handle removal tool, depending on the type of tap you have. Begin by carefully removing the tap handle, if it's a separate piece, by unscrewing or unclipping it. This step is important as it provides access to the internal mechanisms of the tap. Once the handle is removed, you'll likely encounter a removable tap head or a collar that fits over the tap. Carefully pry this off using a flathead screwdriver or a tool designed for this purpose, being mindful of any seals or gaskets that might be present.
Next, focus on the hose. Depending on your setup, the hose might be a simple plastic or rubber tube, or it could be a more complex, coiled metal or flexible hose. If it's a tube, you can usually remove it by unscrewing or unclipping it from the tap. For more complex hoses, you might need to carefully pry them off, again being cautious of any seals. When removing the hose, inspect it for any signs of damage or buildup, as this could be a source of the issue.
Other removable parts might include the faucet aerator (if present), any filters, and even the entire tap body, depending on the model. For the faucet aerator, simply twist it off, being careful not to force it if it's stuck. Filters are often located near the tap and can be removed by unscrewing or unclipping them. The tap body might require more effort, especially if it's a built-in system. In such cases, you might need to carefully pry it open, ensuring you don't damage any internal components.
Throughout this process, it's essential to keep track of the various parts and their orientations. Take notes or take pictures to remember how everything fits together, especially if you're dealing with a complex system. This will make the reassembly process much easier and ensure that you don't miss any crucial components. Remember, the goal is to create a clean and functional system, so take your time and be methodical in your approach.
Exploring the Art of Mixed Fermentation Beer: A Unique Craft
You may want to see also
![]()
Clean the Tap: Scrub the tap with a brush and cleaning solution to remove residue
To ensure your beer tap system remains in top-notch condition and delivers the best taste, regular cleaning is essential. One of the most critical steps in this process is scrubbing the tap to remove any built-up residue. Here's a detailed guide on how to effectively clean the tap:
Gather Your Supplies: Before you begin, ensure you have the necessary tools and cleaning agents. You'll need a stiff-bristled brush specifically designed for cleaning, as regular brushes may not be effective enough. Opt for a brush with bristles that can reach into the narrow openings of the tap. Additionally, a mild, non-toxic cleaning solution is ideal. You can use a store-bought beer tap cleaner or create your own using a mixture of warm water and a small amount of dish soap.
Prepare the Tap: Start by turning off the beer tap's supply line to prevent any accidental spills. Then, remove the tap handle if possible, as this will provide better access to the tap's interior. If the handle is difficult to remove, you can still clean the tap without it, focusing on the spout and surrounding areas.
Scrub the Tap: Dip the brush into the cleaning solution, ensuring it's thoroughly soaked. Begin scrubbing the tap's exterior, paying close attention to the areas around the spout and any visible residue. The goal is to dislodge and remove any built-up beer, soap scum, or mineral deposits. Use gentle, circular motions to avoid damaging the tap's finish. For hard-to-reach areas, you might need to adjust the brush's angle or use a small tool to navigate the tap's intricate design.
Rinse Thoroughly: After scrubbing, rinse the tap thoroughly with warm water to remove any remaining cleaning solution and debris. Ensure that no soap or cleaning agent residue is left behind, as this can affect the taste of the beer. A thorough rinse will also help prevent any potential corrosion or damage to the tap's internal components.
Dry and Reassemble: Once the tap is clean and free of any residue, allow it to air dry completely. You can speed up the drying process by using a soft cloth to wipe the tap's exterior. Finally, reassemble the tap handle and secure it back in place. This completes the cleaning process, and your beer tap system is now ready for the next round of refreshing beverages. Regularly following this cleaning routine will help maintain the tap's performance and ensure the quality of your beer.
Mastering the Art of Cleaning a Beer Jockey Box: A Step-by-Step Guide
You may want to see also
![]()
Rinse Thoroughly: Use a hose to rinse the tap and hose, ensuring no soap residue remains
When it comes to maintaining a beer tap system, proper cleaning is essential to ensure the best taste and quality of your brew. One of the most critical steps in this process is rinsing the tap and hose thoroughly to eliminate any soap residue that could affect the beer's flavor. This simple yet crucial step often gets overlooked, but it plays a significant role in the overall cleanliness and longevity of your tap system.
To begin the rinsing process, start by disconnecting the tap from the beer line. This step is important to ensure you have easy access to the tap and hose for cleaning. Once disconnected, use a garden hose to spray water over the tap and the entire length of the hose. Apply a gentle, steady stream of water to ensure an even and thorough rinse. Pay close attention to the areas where the tap and hose connect, as these spots are prone to accumulating soap residue.
The goal of this rinsing process is to remove any soap or cleaning agent that might have been used during the maintenance or cleaning of the tap system. Soap residue can leave a soapy taste in the beer, which is undesirable. Therefore, it's crucial to ensure that no soap remains on the tap or in the hose. Use the hose to reach every inch of the tap and hose, making sure to direct the water flow in a way that dislodges and washes away any residue.
For an even more thorough clean, consider using a mild detergent or dish soap specifically designed for cleaning beer equipment. Apply a small amount of this solution to the tap and hose, and then rinse it off with the hose. This extra step can help to break down and remove any stubborn residue. Remember to rinse thoroughly again to ensure that no soap or cleaning agent remains, as this could lead to off-tasting beer.
After rinsing, allow the tap and hose to air dry completely before reconnecting them. Proper drying is essential to prevent the growth of mold and bacteria, which can contaminate your beer. By following this detailed rinsing process, you'll ensure that your beer tap system remains in excellent condition, providing you with consistently great-tasting beer.
Unraveling the Mystery: Why Beer Labels Matter
You may want to see also
![]()
Reassemble and Test: Reattach the parts and test the tap to ensure proper flow and no leaks
Reassembling and testing your beer tap system is a crucial step in ensuring a smooth and enjoyable drinking experience. After cleaning, it's essential to carefully put everything back together and verify its functionality. Here's a step-by-step guide to help you through this process:
Reattachment: Begin by laying out all the components you've cleaned. This includes the tap handle, the shaft, the gasket, and any other parts specific to your tap model. Carefully align the shaft with the tap handle, ensuring it fits snugly. Secure the shaft using the appropriate screws or fasteners, being mindful of the torque to avoid overtightening. Don't forget to reattach the gasket, which provides a seal between the tap and the faucet. Double-check that all connections are tight and secure.
Flow Testing: Once everything is reassembled, it's time to test the flow. Turn on the water supply and open the tap handle. Observe the water flow and listen for any unusual sounds. The goal is to ensure a smooth, consistent stream of water. Check for any blockages or restrictions in the flow, which could indicate a need for further cleaning or adjustment. If the flow seems weak, consider adjusting the handle position or tightening any loose connections.
Leakage Inspection: Proper sealing is critical to prevent leaks. After turning on the water, closely inspect the tap for any signs of leakage. Check the gasket and the threads where the tap connects to the faucet for any moisture or drips. Even a small leak can be a sign of an issue, so address it promptly. If you notice a leak, carefully tighten the connections or consider replacing the gasket if it appears damaged.
Final Adjustments: After ensuring there are no leaks, make any necessary fine-tunings. This might include adjusting the handle's position for better control or tightening any loose parts. Test the tap again to confirm that all issues have been resolved. Remember, a well-maintained tap system provides a seamless drinking experience, so take the time to get it right.
By following these steps, you'll be able to reassemble your beer tap system effectively and ensure it operates optimally, providing a delightful beer-drinking experience every time.
Mastering the Art of Pork Butt: Beer's Role in Pan Cooking
You may want to see also
Frequently asked questions
It is recommended to clean your beer tap system every 2-4 weeks to ensure the best possible taste and quality of your beer. Regular cleaning helps remove any built-up dirt, grime, and bacteria that can affect the flavor and hygiene of your setup.
You will require a few essential tools and supplies. These include a good quality beer tap cleaner or a mild detergent, a soft brush or sponge, a bucket or sink for cleaning, and a clean cloth or paper towel for drying. It's best to avoid harsh chemicals that might damage the tap components.
Cleaning your beer tap system is a task you can definitely handle yourself. Many homebrewers and beer enthusiasts follow simple cleaning routines. However, if you're unsure or dealing with a complex setup, consulting a professional or seeking guidance from online resources can be beneficial.
Start by disconnecting the beer line from the tap and running warm water through it to remove any loose debris. Then, use your chosen cleaner and gently scrub the tap, spout, and surrounding areas. Rinse thoroughly with warm water to eliminate any cleaning solution residue. Ensure you dry the system properly to prevent any mold or bacteria growth.
Yes, here are a couple of tips: always store your beer tap in a clean and dry environment, regularly check for any signs of wear and tear, and promptly address any issues. Additionally, consider using a beer line cleaner and conditioner to maintain the tap's performance and taste.