If you've ever found yourself with a broken beer tap, you know how frustrating it can be to get your favorite cold brew flowing again. Putting a beer tap back together requires a bit of patience and some basic tools. In this guide, we'll walk you through the process step-by-step, ensuring you can get your tap working like new in no time. From identifying the parts you need to understanding the proper assembly techniques, you'll be ready to tackle any beer tap repair with confidence.
What You'll Learn
- Disassemble: Carefully remove the tap handle, shank, and faucet from the beer line
- Clean: Rinse all parts with warm soapy water to remove dirt and residue
- Inspect: Check for any damage or wear and replace faulty parts
- Reattach: Secure the faucet, shank, and handle in the correct order
- Test: Turn on the tap to ensure it flows properly and is leak-free
![]()
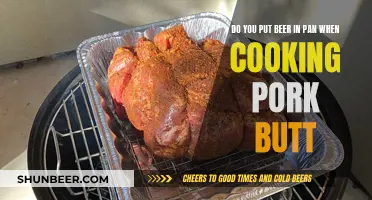
Disassemble: Carefully remove the tap handle, shank, and faucet from the beer line
To begin the disassembly process, you'll need to carefully remove the tap handle, shank, and faucet from the beer line. Start by identifying the tap handle, which is typically a lever or knob attached to the faucet. Use a screwdriver or a small tool to gently pry the handle off the faucet, being mindful of any screws or retaining clips that may secure it in place. Once the handle is removed, you should see the shank, a metal or plastic tube that connects the faucet to the beer line.
Now, focus on the shank. It is crucial to handle it with care to avoid any damage. Locate the connection point between the shank and the faucet. This connection is usually a threaded or bayonet-style mechanism. If it's threaded, you might need a wrench or a pair of pliers to unscrew it carefully. For bayonet-style connections, gently pull the shank away from the faucet, ensuring you don't force it. Once the shank is separated from the faucet, set it aside, keeping track of any small parts or o-rings that come with it.
Moving on to the faucet, you'll need to carefully detach it from the shank. As with the shank, identify the type of connection. If it's threaded, use a wrench or pliers to unscrew it. For bayonet-style faucets, gently pull it away from the shank, again being cautious not to force it. When removing the faucet, inspect it for any signs of wear or damage, especially around the spout and the o-rings that seal the faucet to the shank.
After successfully removing the shank and faucet, you should have access to the internal components of the beer tap. Take this opportunity to clean and inspect the entire system, ensuring there are no clogs or debris that could affect the beer's flow. Remember, the goal is to carefully disassemble the tap without causing any damage, so take your time and be gentle with each component.
The Perfect Gumbo: Beer's Role in Chicken and Sausage Delight
You may want to see also
![]()
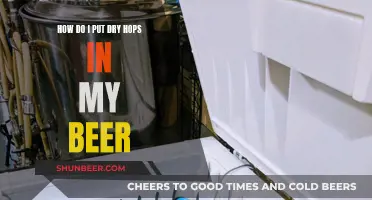
Clean: Rinse all parts with warm soapy water to remove dirt and residue
To begin the process of reassembling your beer tap, it is crucial to start with a clean slate. Cleaning all the parts is an essential step to ensure a proper and hygienic setup. Begin by gathering all the components of your tap, including the faucet body, spout, handle, and any additional parts specific to your model.
Next, fill a large sink or basin with warm water, adding a few drops of mild dish soap. Immerse the tap parts into the soapy water, ensuring they are fully submerged. The warm water will help to loosen any built-up dirt and grime, while the soap will effectively remove grease and residue. Use your hands or a soft-bristled brush to gently agitate the water and clean each part thoroughly. Pay close attention to nooks and crannies, as these areas can accumulate a lot of dirt.
As you clean, take note of any small parts that may require extra care. For instance, the handle might have a small screw or clip that holds it in place. Ensure you clean and inspect these tiny components to prevent any potential issues during reassembly. Rinse each part thoroughly under running warm water to remove any remaining soap and dirt.
Once all the parts are clean, it's time to dry them. Use a clean towel to pat dry each piece, ensuring no water spots remain. This step is important to avoid any water damage or corrosion when reassembling the tap. Make sure every surface is dry and free from moisture before proceeding.
By following this cleaning process, you'll ensure that your beer tap is not only functional but also clean and ready for use. This simple yet crucial step will contribute to a smooth and successful reassembly process, allowing you to enjoy your favorite beverage with confidence.
Guinness' Secret: Unveiling the Mystery of Beer's Manufacturing Dates
You may want to see also
![]()
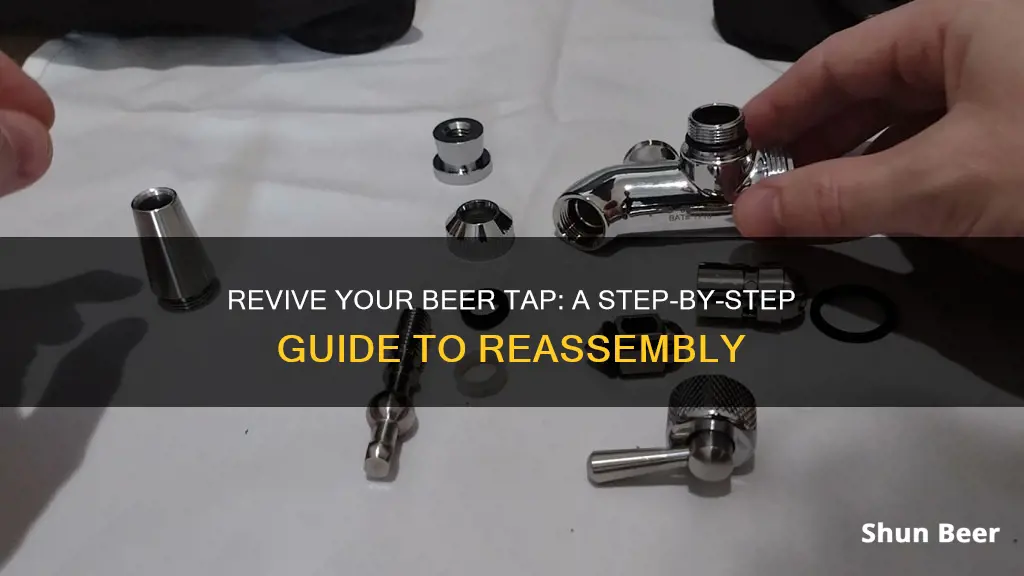
Inspect: Check for any damage or wear and replace faulty parts
When inspecting your beer tap, it's crucial to thoroughly examine each component for any signs of damage or wear. Start by removing the tap handle and disconnecting the beer line from the faucet body. This initial step allows for a comprehensive assessment of the tap's condition. Look for any visible cracks, chips, or corrosion on the faucet body, as these issues can compromise the tap's functionality and the quality of your beer. Inspect the handle for any loose screws or worn-out parts, as these may need to be tightened or replaced to ensure a secure and functional operation.
Pay close attention to the O-rings and seals, as these are critical for maintaining a tight seal and preventing leaks. Check for any signs of deterioration, such as cracks or excessive wear, as these can lead to beer escaping or air entering the line. If you notice any damaged seals, it's essential to replace them promptly to maintain the integrity of your beer-dispensing system.
The beer line itself should also be inspected for any kinks, tears, or blockages. Ensure that the line is free from any obstructions that could affect the flow of beer. If you find any damaged sections, carefully cut out the affected area and replace it with a new section of beer line. This process ensures that your beer tap remains in optimal condition and provides a consistent, smooth flow of your favorite beverage.
Additionally, examine the tap's mechanism, including the shank and valve, for any signs of wear or damage. The shank, which connects the tap to the keg, should be secure and free from any movement that could cause spillage. If you notice any loose connections or worn-out parts, it's imperative to tighten or replace them to ensure the tap's proper functioning.
By meticulously inspecting each component, you can identify and address any issues before reassembling the beer tap. This proactive approach ensures that your tap is reliable and ready to dispense your preferred beer with precision and efficiency. Remember, regular maintenance and prompt replacement of faulty parts are key to keeping your beer tap in excellent working order.
The Salty Truth: Do People Add Salt to Beer?
You may want to see also
![]()
Reattach: Secure the faucet, shank, and handle in the correct order
When reassembling a beer tap, it's crucial to follow a systematic approach to ensure a proper and leak-free connection. The process involves securing the faucet, shank, and handle in a specific order, which I'll guide you through step by step.
Begin by locating the faucet, which is the main component that controls the flow of beer. This part often has a unique design, with a spout and a mechanism to open and close the flow. Carefully inspect the faucet to identify any specific features or notches that will aid in its proper alignment.
Next, you'll need to attach the shank, which is a crucial intermediate piece. The shank connects the faucet to the handle and provides the necessary support for the entire assembly. Locate the shank's mounting points, which are typically located on the faucet's base or side. Align the shank's threads with the faucet's mounting holes and secure it using the appropriate screws or fasteners. Ensure that the shank is tightened securely but be cautious not to overtighten, as this can damage the faucet.
Now, it's time to attach the handle. The handle is the part that the user interacts with to dispense the beer. Locate the handle's mounting points, which are usually positioned on the opposite side of the shank. Align the handle with the shank and secure it using the provided screws or fasteners. Again, be mindful of the tightening force to avoid damage.
Finally, double-check the alignment and tightness of all components. Ensure that the faucet is properly seated and aligned with the shank, and that the handle is firmly attached. Test the tap by gently pulling the handle to ensure there are no leaks. If everything is correctly assembled, you should have a fully functional beer tap ready for use. Remember, taking your time and following these steps will result in a successful reattachment.
The Ultimate Guide to Pouring Beer in Bloody Marys
You may want to see also
![]()
Test: Turn on the tap to ensure it flows properly and is leak-free
Before you proceed with reassembling the beer tap, it's crucial to test its functionality to ensure it works as intended. This step is often overlooked, but it's essential to verify that the tap is leak-free and delivers a smooth flow of beer. Here's a detailed guide on how to test the tap:
Step 1: Prepare the Setup
Ensure you have a clean and dry workspace. You'll need a bucket or container to catch any potential leaks. Place it beneath the tap to catch any drips or spills. This step is important to avoid a messy cleanup later.
Step 2: Turn on the Tap
Locate the handle or knob that controls the flow of beer. Depending on the model, it might be a simple on/off switch or a knob with different settings. Turn it on and observe the flow. The tap should start dispensing beer smoothly without any sudden stops or gurgling sounds. If it does, there might be an issue with the internal mechanism.
Step 3: Check for Leaks
While the tap is running, inspect the connections and seals carefully. Check for any signs of leakage around the faucet head, where the hose connects, and at the base of the tap. Even a small leak can be a cause for concern. If you notice any moisture or beer escaping, you'll need to recheck your assembly and ensure all parts are properly sealed.
Step 4: Observe the Flow Rate
Pay attention to the beer's flow rate. It should be consistent and steady. If the flow is inconsistent, with varying speeds, it might indicate a problem with the tap's internal components. You can also try adjusting the flow control (if available) to see if it improves the consistency.
Step 5: Document and Troubleshoot
If the tap passes the test, great! If not, take notes on any issues you encountered. This information will be valuable when troubleshooting and reassembling the tap. Look for common problems like a clogged aerator, faulty seals, or loose connections. Addressing these issues will ensure a successful reassembly.
Remember, testing is a critical part of the process to ensure you have a fully functional beer tap. It might require a few attempts to get it right, but with patience and attention to detail, you'll be enjoying cold, refreshing beer in no time!
Uncover the Truth: Does Beer Add Water Weight?
You may want to see also
Frequently asked questions
Disassembling a beer tap is a straightforward process. Start by turning off the supply of beer and releasing any pressure in the line. Then, locate the handle and unscrew it to access the internal parts. Carefully remove the faucet head and any other removable components, such as the filter or carbonator. Clean each part thoroughly and inspect for any wear or damage.
Reassembling a beer tap typically requires a few basic tools. You'll need a set of screwdrivers, preferably a flathead and a Phillips head, to secure the handle and faucet head. A small wrench or pliers can be useful for tightening connections. Additionally, have some thread seal tape or pipe compound on hand to ensure a tight and leak-free seal when reconnecting the beer line.
Yes, you can reuse the original parts if they are in good condition. After cleaning, inspect each component for any signs of damage or wear. If a part is functioning properly and shows no signs of leakage or deterioration, it is likely safe to reuse. However, if you encounter any issues or suspect damage, it's best to replace those specific parts to ensure a reliable and consistent beer flow.