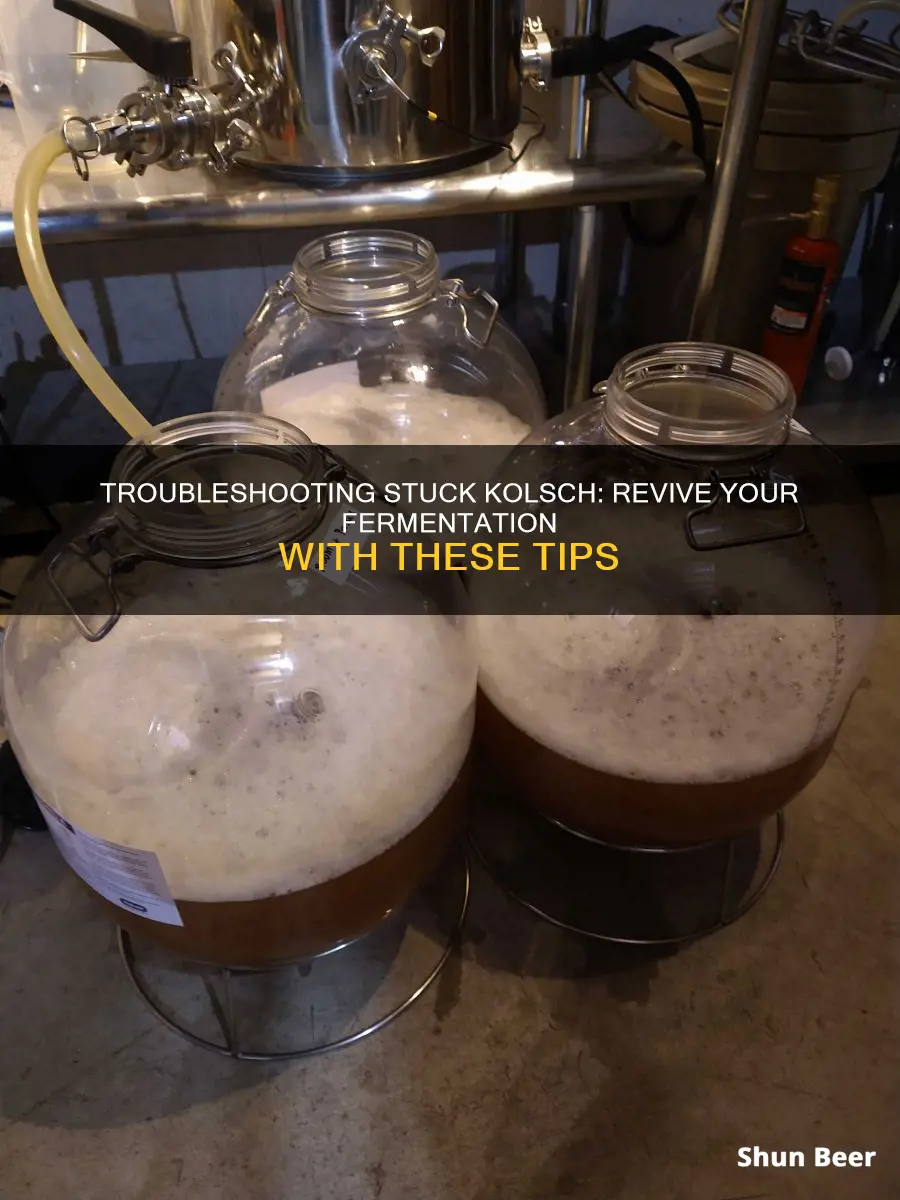
Kolsch beer fermentation can sometimes stall, leaving brewers perplexed. Restarting a stuck fermentation requires patience, precision, and a methodical approach. This guide will explore effective strategies to revive a dormant fermentation, ensuring your Kolsch beer reaches its full potential.
What You'll Learn
- Temperature Control: Maintain a consistent temperature between 65-70°F to revive fermentation
- Oxygenation: Increase oxygen levels by aerating the wort before pitching the yeast
- Nutrient Boost: Add yeast nutrients to provide essential compounds for yeast activity
- pH Adjustment: Adjust the pH to optimal levels (5.0-5.5) to enhance yeast performance
- Carbon Dioxide: Introduce CO2 to stimulate yeast activity and restart fermentation
![]()
Temperature Control: Maintain a consistent temperature between 65-70°F to revive fermentation
When dealing with a stuck fermentation in your Kolsch beer, temperature control is a critical factor that can make or break the revival process. The ideal temperature range for this style of beer is between 65-70°F (18-21°C), and maintaining this consistency is key to encouraging yeast activity and restarting the fermentation process. Here's a detailed guide on how to achieve this:
Understanding the Importance of Temperature: Yeast, the microorganisms responsible for fermentation, are highly sensitive to temperature changes. In a stuck fermentation, the yeast may have entered a dormant state or died off due to extreme temperatures, lack of nutrients, or other factors. By bringing the temperature back to the optimal range, you provide the yeast with the ideal conditions to resume their work. This is especially crucial for Kolsch beers, which typically ferment at lower temperatures compared to other styles, and require precise control to achieve the desired flavor profile.
Monitoring and Adjusting Temperature: Start by monitoring the temperature of your fermentation vessel regularly. Use a reliable thermometer to ensure accuracy. If the temperature deviates from the target range, take immediate action to correct it. During the revival process, you might need to adjust the temperature multiple times a day to maintain stability. For cooling, you can use a refrigeration system or an ice bath, ensuring that the temperature drop is gradual to avoid shocking the yeast. For warming, a heat source like a hot water bath or a heating pad can be used, again, allowing for gradual temperature increases.
Maintaining Consistency: Consistency is vital. Fluctuations in temperature can stress the yeast and potentially lead to further fermentation issues. Aim to keep the temperature as stable as possible within the 65-70°F range. If you have access to a temperature-controlled fermentation chamber, utilize it to provide a consistent environment. Regularly check and adjust the temperature to ensure it remains within the desired range, especially if your fermentation vessel is not well-insulated.
Reviving the Fermentation: As the temperature stabilizes within the optimal range, you should start to see signs of yeast activity. The fermentation should begin to progress, and you may notice a rise in the specific gravity of the wort, indicating sugar consumption. At this point, it's essential to continue monitoring the temperature and make adjustments as needed to maintain the desired range. This careful temperature management will help you successfully revive the stuck fermentation and produce a well-balanced Kolsch beer.
Remember, temperature control is a delicate process, and it may take some experimentation to find the exact conditions that work best for your specific batch of Kolsch beer. Patience and attention to detail are key during this revival process.
The Secret Behind Beer's Artificial Flavors and Colors: Who's Adding What?
You may want to see also
![]()
Oxygenation: Increase oxygen levels by aerating the wort before pitching the yeast
Oxygenation is a critical step in restarting a stuck Kolsch beer fermentation. When yeast is pitched into a wort, it requires a sufficient supply of oxygen to metabolize sugars and produce alcohol. If the oxygen levels are too low, the yeast may struggle to ferment effectively, leading to a stuck fermentation.
To increase oxygen levels, you can aerate the wort before pitching the yeast. This process involves introducing air into the wort to dissolve more oxygen. Here's a step-by-step guide on how to aerate your wort:
- Prepare an Aeration System: You can use a simple air stone or an aeration system specifically designed for brewing. An air stone is a small, porous stone that is placed in the wort, allowing air to pass through and dissolve in the liquid. Alternatively, you can use an aeration system that pumps air through a tube, creating a more controlled and consistent aeration process.
- Place the Air Stone: If using an air stone, submerge it in the wort, ensuring it is fully submerged. If you have an aeration system, follow the manufacturer's instructions to set it up and place it in the appropriate position in your fermenter.
- Turn on the Aeration: Once your aeration system is set up, turn it on and allow it to run for a specified period. The duration can vary depending on the system and the size of your batch, but typically, you'll want to aerate for at least 15-30 minutes. This allows the wort to become well-oxygenated, providing the yeast with the necessary oxygen for fermentation.
- Monitor Oxygen Levels: As you aerate, monitor the oxygen levels in the wort. You can use an oxygen meter or test strips to measure the dissolved oxygen concentration. Aim for a target level of around 5-10 mg/L of dissolved oxygen. This range ensures that the yeast has sufficient oxygen to begin fermentation.
- Pitch the Yeast: After aerating, pitch your yeast into the oxygenated wort. This step should be done carefully to avoid disturbing the oxygen levels. Ensure that the yeast is evenly distributed throughout the wort.
By increasing the oxygen levels through aeration, you provide the yeast with the necessary tools to restart fermentation. This technique is particularly useful when dealing with stuck fermentations, as it can help revive the yeast's activity and restore the brewing process. Remember to maintain proper sanitation and monitoring throughout the process to ensure a successful restart.
The Surprising Reason Green Olives Belong in Beer
You may want to see also
![]()
Nutrient Boost: Add yeast nutrients to provide essential compounds for yeast activity
When dealing with a stuck fermentation in your Kolsch beer, one effective strategy to consider is adding yeast nutrients. These nutrients are essential compounds that provide the yeast with the necessary building blocks to resume and complete the fermentation process. Here's a detailed guide on how to implement this approach:
Yeast nutrients are specifically formulated to offer a range of vitamins, minerals, and amino acids that yeast requires for optimal growth and activity. When your fermentation stalls, it often indicates that the yeast is lacking these essential elements, which are crucial for their metabolic processes. By adding yeast nutrients, you essentially give the yeast a helping hand, ensuring they have the resources to continue their work. This method is particularly useful for stuck fermentations caused by nutrient deficiencies, which can occur due to various factors such as poor yeast health, insufficient oxygen, or the presence of inhibitors in the water.
The process of adding yeast nutrients is straightforward. You can purchase yeast nutrient mixes specifically designed for beer fermentation, which typically come in liquid or powder form. These mixes usually contain a blend of vitamins, minerals, and trace elements that yeast needs. Simply follow the instructions on the packaging, as the dosage and timing may vary depending on the product and the specific conditions of your fermentation. Typically, you would add the nutrients during the initial stages of fermentation or as soon as you notice the fermentation has stopped.
It's important to note that while yeast nutrients can be highly effective, they should be used judiciously. Over-addition can lead to an imbalance in the beer's chemistry, potentially causing off-flavors or other undesirable characteristics. Always measure and add the nutrients carefully, ensuring you adhere to the recommended guidelines. Additionally, consider monitoring the fermentation closely after adding the nutrients to observe the yeast's response and make any necessary adjustments.
In summary, adding yeast nutrients is a practical and targeted approach to restarting a stuck Kolsch beer fermentation. By providing the yeast with the essential compounds they need, you can encourage their activity and help overcome the stagnation in the fermentation process. This method, combined with other troubleshooting techniques, can be a powerful tool in your brewing arsenal for addressing various fermentation challenges.
Unveiling the Mystery: Why Salt on Napkins Under Beer
You may want to see also
![]()
pH Adjustment: Adjust the pH to optimal levels (5.0-5.5) to enhance yeast performance
Adjusting the pH of your wort is a crucial step in ensuring optimal yeast performance and can be a powerful tool when dealing with a stuck fermentation. For a Kolsch beer, the target pH range is typically between 5.0 and 5.5. This slightly acidic environment is ideal for the yeast strains commonly used in this style, such as Topfer or American Ale yeasts.
To adjust the pH, you can use a few different methods. One common approach is to add a pH-adjusting agent, such as phosphoric acid (also known as food-grade phosphoric acid) or citric acid. These acids are carefully measured and added to the wort to lower the pH to the desired range. It's important to use precise measurements to avoid over-adjusting, as this can lead to a harsh, acidic beer.
When adding these acids, it's best to do so gradually and at low concentrations. Start with a small amount and stir well to ensure complete dissolution. Then, take a pH reading to confirm the change. You can continue to add small increments until you reach the target pH. Remember, the goal is to create an environment that encourages healthy yeast activity without compromising the beer's overall character.
Another technique is to utilize pH-adjusting ingredients during the brewing process. For instance, adding a small amount of lemon juice or a pinch of citric acid during the brewing process can help lower the pH naturally. This method provides a more subtle adjustment and can contribute to the beer's flavor profile. However, it requires careful monitoring to ensure the pH remains within the optimal range.
Maintaining the correct pH is essential for yeast health and activity. It ensures that the yeast can efficiently metabolize sugars and produce alcohol, which is crucial for a successful fermentation. By adjusting the pH to the ideal range, you're providing the yeast with the best possible conditions to work in, thus helping to resolve any fermentation issues and potentially saving your stuck fermentation.
The Surprising Reason to Heat Your Beer with a Poker
You may want to see also
![]()
Carbon Dioxide: Introduce CO2 to stimulate yeast activity and restart fermentation
If your Kolsch beer fermentation has stalled, introducing carbon dioxide (CO2) can be a powerful method to stimulate yeast activity and get the fermentation process back on track. This technique is particularly useful when the yeast has become inactive or when the fermentation environment is lacking in the necessary nutrients and gases. Here's a detailed guide on how to effectively use CO2 to restart your fermentation:
Understanding the Role of CO2: Yeast, the microorganisms responsible for fermentation, require a specific environment to thrive. They need a source of carbon and energy to produce alcohol and carbon dioxide as byproducts. When yeast becomes inactive or the fermentation slows down, it often indicates that the yeast has depleted its food source or that the environment is not conducive to its growth. Introducing CO2 can help address these issues. CO2 acts as a signaling molecule, encouraging yeast to become active and resume fermentation. It also helps to maintain the appropriate pH levels, which is crucial for yeast health.
Steps to Introduce CO2: 1. Identify the Cause: Before proceeding, it's essential to understand why the fermentation has stalled. Common reasons include yeast inactivity, nutrient depletion, or an overly acidic or alkaline environment. Testing the beer's pH and nutrient levels can provide valuable insights. 2. Prepare a CO2 Source: You can use a CO2 cylinder or a small tank specifically designed for brewing purposes. Ensure it is properly regulated to deliver a steady flow of CO2. Alternatively, you can use a small amount of dry ice, which will release CO2 as it sublimates. 3. Release CO2 Gradually: Introduce the CO2 into the fermenter slowly. Rapidly releasing large amounts of CO2 can cause an abrupt change in pressure, potentially damaging the fermenter or causing an explosion. Start with a small burst and monitor the yeast's response. 4. Maintain a Consistent Supply: Once the yeast starts to react, maintain a steady supply of CO2. This can be achieved by regularly releasing small amounts of CO2 over time, ensuring the yeast has a continuous supply of the gas.
Additional Tips: - Keep the fermenter's temperature stable, as temperature fluctuations can further inhibit yeast activity. - Consider adding a yeast food or nutrient supplement to provide the yeast with additional energy sources. - Monitor the fermentation process closely, as the yeast's activity may vary over time.
By introducing CO2, you are essentially giving the yeast a boost, encouraging it to become active and resume its fermentation duties. This method can be a quick and effective way to resolve a stuck fermentation, allowing your Kolsch beer to mature and develop its characteristic flavors. Remember, patience and careful observation are key when working with yeast, as each batch may have unique characteristics.
Unveiling the Light: Exploring Beer Fermentation in Darkness
You may want to see also
Frequently asked questions
Stuck fermentations can be frustrating, but there are a few strategies to try. First, ensure your yeast is still active by performing a yeast health check. You can do this by taking a small sample of the beer and adding a small amount of sugar to see if it ferments within a few hours. If the yeast is inactive, consider using a different yeast strain or rehydrating your yeast with warm water to revive it. Another approach is to adjust the fermentation temperature. Kolsch yeasts typically prefer cooler temperatures, so try lowering the fermentation temperature by a few degrees to encourage activity. Additionally, check for any signs of contamination, such as off-flavors or unusual yeast activity, and take appropriate measures to address the issue.
There are several reasons why a Kolsch fermentation might stall. One common issue is using old or inactive yeast, which may not have the necessary enzymes to break down the sugars in the recipe. Another potential cause is an overly high or low fermentation temperature, as Kolsch yeasts have specific temperature preferences. Additionally, poor aeration during the fermentation process can lead to a stuck fermentation. Make sure to properly oxygenate the beer by either using an airlock or a fermentation lock to allow for gas exchange.
Yes, yeast starters can be an effective way to revive a stuck fermentation. Prepare a yeast starter by mixing a small amount of your Kolsch yeast with warm water and a pinch of sugar. Allow it to sit until the yeast becomes active and begins to bubble. Then, transfer this yeast-rich liquid to your main fermentation vessel along with the rest of your beer ingredients. This method provides a healthy dose of active yeast, which can help kick-start the fermentation process. Remember to monitor the fermentation temperature and adjust as needed to ensure optimal yeast performance.