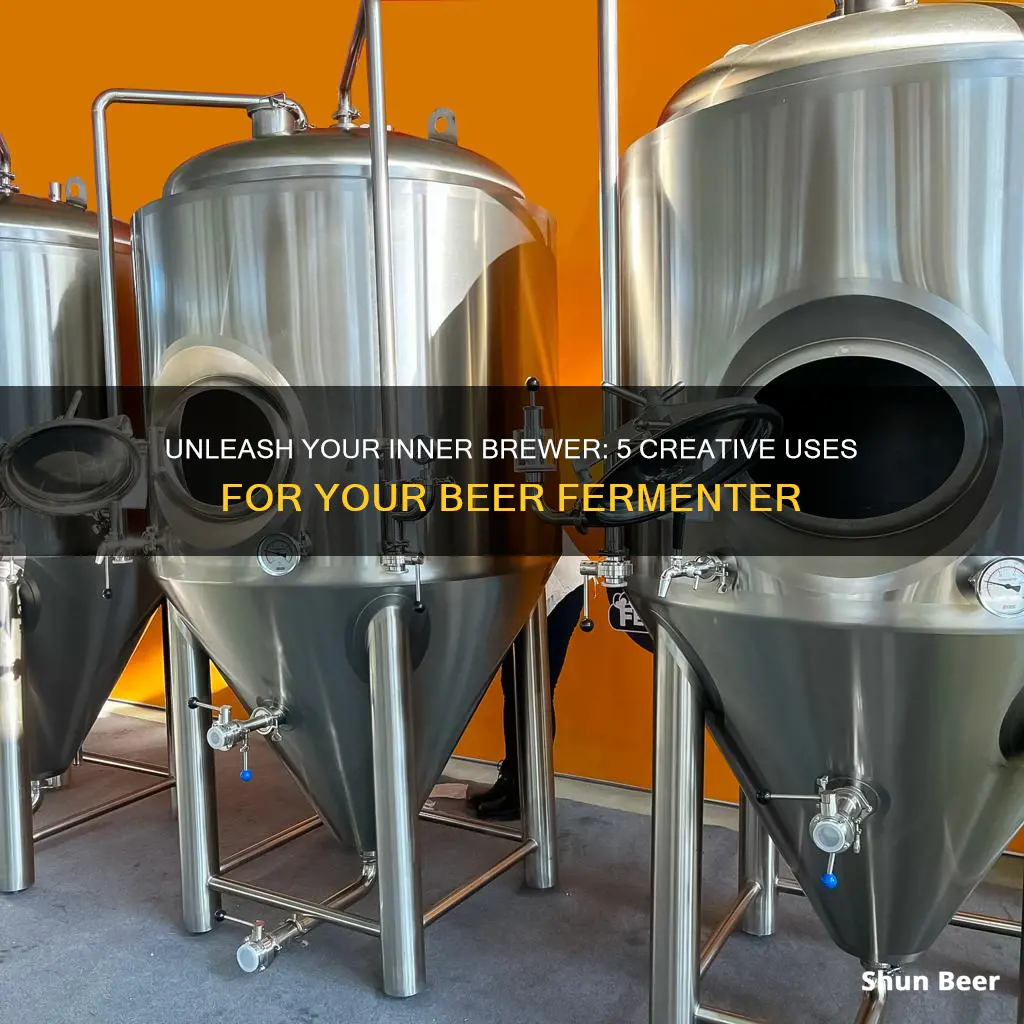
A beer fermenter is a crucial piece of equipment for homebrewers and commercial breweries alike. It serves as the vessel where the magic of fermentation happens, transforming sugary wort into delicious beer. But what should you do with a beer fermenter once the brewing process is complete? In this paragraph, we'll explore the various options and considerations for utilizing your fermenter, ensuring you get the most out of this essential brewing tool.
What You'll Learn
- Cleaning and Sanitization: Proper cleaning and sanitization techniques to prevent contamination
- Fermentation Process: Understanding the fermentation process and its key stages
- Yeast Selection: Choosing the right yeast strain for your beer style
- Temperature Control: Maintaining optimal temperature for fermentation success
- Bottling or Kegging: Techniques for transferring beer from the fermenter to the final container
![]()
Cleaning and Sanitization: Proper cleaning and sanitization techniques to prevent contamination
Cleaning and sanitization are critical steps in the brewing process, especially when it comes to using a beer fermenter. Proper cleaning ensures that no unwanted flavors or aromas are introduced to the beer, while sanitization prevents the growth of harmful bacteria and yeast that can ruin the fermentation process and the final product. Here's a detailed guide on how to properly clean and sanitize your beer fermenter:
Pre-Cleaning Preparation: Before you begin, ensure you have the necessary tools and supplies: a good quality beer brush, a sanitizing solution (such as iodine or a specialized beer sanitizer), a clean bucket or sink for rinsing, and a drying rack or cloth. It's also a good idea to wear gloves to protect your hands and to avoid cross-contamination.
Cleaning: The first step is to remove any visible debris, yeast, or sediment from the fermenter. Start by gently brushing the interior walls and bottom of the fermenter with the beer brush. This will help dislodge any settled particles. For glass or plastic fermenters, you can use a mild detergent or dish soap to help break down any residual sugars or proteins. Rinse thoroughly with warm water to remove any soap residue. For stainless steel fermenters, you can use a small amount of vinegar to cut through grime. Always rinse thoroughly to avoid any metallic taste in your beer.
Rinsing: After cleaning, it's crucial to rinse the fermenter multiple times with warm water to remove any cleaning solution and loose particles. This step ensures that no harsh chemicals or cleaning agents remain in the fermenter, which could negatively impact the beer's flavor.
Sanitizing: Sanitization is the process of killing bacteria and yeast that could interfere with the brewing process. There are two primary methods: chemical sanitization and heat sanitization. Chemical sanitization involves using a specialized beer sanitizer or iodine solution. Follow the manufacturer's instructions for dilution and application. Typically, you'll pour the sanitizer into the warm water used for rinsing and let the fermenter soak for the recommended time. Heat sanitization is another effective method. Fill the fermenter with a solution of water and a small amount of bleach (or a similar sanitizing agent) and heat it to a specific temperature for a set duration. Always refer to the manufacturer's guidelines for the correct temperature and time.
Drying: After sanitization, it's essential to dry the fermenter thoroughly. Moisture can encourage bacterial growth and may lead to off-flavors in the beer. Use a clean cloth or paper towel to wipe the interior and exterior of the fermenter, ensuring it is completely dry.
Regular Maintenance: Establishing a regular cleaning and sanitization routine is vital for consistent beer quality. Create a schedule that aligns with your brewing frequency, and always follow the same meticulous steps. This will help you maintain a clean and sanitized brewing environment, ensuring the best possible results from your beer fermenter.
The Beer Bag Conundrum: Uncovering the Mystery
You may want to see also
![]()
Fermentation Process: Understanding the fermentation process and its key stages
The fermentation process is a crucial step in the art of brewing, transforming simple ingredients into the delightful beverage we know as beer. It is a natural, biological process where yeast plays a pivotal role, converting sugars into alcohol and carbon dioxide. This intricate dance of science and nature occurs in a controlled environment, typically within a beer fermenter.
Understanding the fermentation process involves recognizing its key stages. The initial stage is the preparation of the wort, a sugary liquid extracted from malted grains. This wort is then transferred to the fermenter, a vessel designed to facilitate the fermentation process. The fermenter is usually made of glass or stainless steel, with a tight-fitting lid to prevent contaminants from entering.
Once the wort is in the fermenter, the yeast is added. This yeast is specifically cultivated for brewing and is responsible for the magical transformation. There are two primary types of yeast used in brewing: ale yeast and lager yeast. Ale yeast ferments at warmer temperatures, producing a fruitier and more robust flavor, while lager yeast works at cooler temperatures, resulting in a cleaner and crisper beer.
The fermentation process can be divided into two main phases. The primary fermentation phase is where the yeast consumes the sugars in the wort and begins to produce alcohol and carbon dioxide. This phase is crucial for developing the beer's flavor and character. After the primary fermentation, a secondary fermentation may occur, where the beer is conditioned and aged, allowing flavors to mature and refine.
During fermentation, it's essential to maintain a clean and sterile environment. Any contamination can lead to off-flavors or even a failed brew. Brewers often use techniques like sanitization and the use of specific yeast strains to minimize the risk of contamination. The fermenter's temperature and pressure must also be carefully controlled to ensure the yeast's optimal performance.
In summary, the fermentation process is a complex and fascinating journey, turning raw ingredients into a beverage with unique characteristics. It requires precision, attention to detail, and a deep understanding of the science behind brewing. With the right techniques and a bit of creativity, brewers can craft beers with distinct flavors and styles, all starting with the humble beer fermenter.
Mastering the Beer Transfer: Tips for a Smooth Secondary Fermentation
You may want to see also
![]()
Yeast Selection: Choosing the right yeast strain for your beer style
When it comes to brewing beer, yeast selection is a critical aspect that can significantly impact the final product's flavor, aroma, and overall character. Different yeast strains offer unique fermentation profiles, contributing to the diverse range of beer styles available today. Understanding the characteristics of various yeast strains is essential for any homebrewer or commercial brewer aiming to create beers that truly stand out.
The first step in yeast selection is to identify the beer style you want to brew. Each beer style has its own set of desired attributes, and the yeast you choose will play a pivotal role in achieving those characteristics. For instance, ales, such as pale ales and IPAs, often rely on high-alcohol-producing yeast strains like American Ale Yeast (Saccharomyces cerevisiae) to create a robust flavor profile and a distinct hop character. These yeasts ferment at higher temperatures, resulting in a faster fermentation process and a more aggressive flavor development. On the other hand, lagers, such as pilsners and wheat beers, typically use bottom-fermenting yeast strains like German Lager Yeast (Saccharomyces pastorianus) or American Lager Yeast. These yeasts ferment at cooler temperatures, leading to a slower process and a cleaner, crisper beer.
Another factor to consider is the yeast's attenuation, which refers to the percentage of fermentable sugars it can convert into alcohol. High-attenuating yeasts will produce a drier beer, while low-attenuating strains will result in a sweeter, more malty flavor. For example, British Ale Yeast (Saccharomyces cerevisiae) is known for its high attenuation, making it ideal for creating dry, crisp beers like pale ales and English-style IPAs. In contrast, Belgian Ale Yeast (Saccharomyces bayanus) has a lower attenuation, contributing to the rich, fruity, and often higher-gravity beers characteristic of Belgian styles.
Additionally, yeast strains possess unique flavor profiles that can enhance or detract from the beer's overall character. Some yeasts contribute esters, which give beers like Belgian tripels and lambics their distinctive fruity notes. Others may produce sulfur compounds, resulting in a "green" or "skunky" aroma, which is generally undesirable. Therefore, it's crucial to match the yeast's flavor profile with the desired beer style.
Lastly, the yeast's flocculation and sedimentation properties are essential considerations. Flocculation refers to the yeast's ability to clump together and settle during the fermentation process, which can impact the beer's clarity. Some yeasts are highly flocculent, making it easier to rack the beer and leaving minimal sediment behind. Sedimentation, on the other hand, relates to the yeast's tendency to form a layer at the bottom of the fermenter, which can be desirable in certain styles but may require careful management.
In summary, yeast selection is a nuanced process that requires a deep understanding of the beer style, yeast characteristics, and the desired outcome. By carefully considering the factors mentioned above, brewers can choose the right yeast strain to create beers that not only taste exceptional but also showcase the unique qualities of the yeast itself.
Unraveling the Mystery: Does Beer Add Pounds?
You may want to see also
![]()
Temperature Control: Maintaining optimal temperature for fermentation success
Temperature control is a critical aspect of the brewing process, especially when it comes to fermentation. The goal is to maintain a precise and stable temperature to ensure the yeast performs optimally and the beer develops the desired characteristics. Here's a detailed guide on how to achieve fermentation success through temperature management:
Understanding Yeast Preferences: Different yeast strains have specific temperature ranges in which they thrive. For beer fermentation, ale yeasts typically prefer warmer temperatures, usually between 65°F and 75°F (18°C and 24°C). On the other hand, lager yeasts are more active in cooler environments, around 50°F to 60°F (10°C to 15°C). It's essential to research the specific yeast you're using to understand its temperature requirements.
Setting Up a Fermentation Environment: When preparing your beer fermenter, consider the temperature control method you'll employ. You can opt for an external fermentation chamber or a dedicated brewing fridge/freezer. These devices allow you to set and maintain a consistent temperature, ensuring the yeast works efficiently. If you're using a regular refrigerator or freezer, make sure to set it to the appropriate temperature range for your yeast type.
Monitoring and Adjusting: During the fermentation process, regularly monitor the temperature inside the fermenter. This can be done using a precision thermometer or a digital temperature controller. If you notice the temperature deviating from the optimal range, take immediate action. For warmer yeasts, you might need to add a heating element to the fermenter or use a heat source nearby. For cooler yeasts, consider using a cooling system or placing the fermenter in a cooler area.
Stabilizing Temperature: Fluctuations in temperature can negatively impact fermentation. To prevent this, aim for a stable temperature environment. Insulate your fermenter if possible, especially if it's in an area with varying ambient temperatures. This insulation can help maintain the desired temperature, ensuring the yeast works consistently.
Post-Fermentation Considerations: After fermentation, the beer's temperature should be lowered to around 35°F to 40°F (2°C to 4°C) to slow down the aging process and allow flavors to mature. This temperature range is generally safe for long-term storage and can be maintained in a regular refrigerator. However, always monitor the temperature to ensure it doesn't drop too low, which could affect the beer's quality.
By focusing on temperature control, you can significantly impact the success of your beer fermentation. It allows for precise yeast management, resulting in a well-balanced and flavorful final product. Remember, each brewing session may require slight adjustments, so staying vigilant and making necessary modifications will contribute to your brewing prowess.
Mastering Beer Fermentation: Conical Fermenter Temperature Control Tips
You may want to see also
![]()
Bottling or Kegging: Techniques for transferring beer from the fermenter to the final container
When it comes to the art of brewing, the process doesn't end after fermentation. Transferring your beer from the fermenter to the final container is a crucial step that can significantly impact the final product. Whether you're using bottles or kegs, each method has its own set of techniques and considerations to ensure a smooth and successful transfer.
Bottling:
Bottling is a popular choice for homebrewers as it allows for easy storage and transport. Here's a breakdown of the process:
- Preparation: Before bottling, ensure your beer is properly carbonated and at the desired temperature. You'll also need to prepare your bottles by cleaning and sanitizing them. This step is crucial to prevent any off-flavors or contamination.
- Bottle Filling: There are two common methods for filling bottles: gravity and siphoning. Gravity filling involves using a bottle wand to guide the beer from the fermenter, allowing it to flow naturally. Siphoning, on the other hand, uses a siphon tube to transfer the beer, which can be more precise and controlled. Both methods require careful technique to avoid spilling or introducing oxygen.
- Bottle Conditioning: After filling, you'll want to add a small amount of sugar to each bottle. This initiates a secondary fermentation, which adds carbonation and contributes to the beer's flavor development. Allow the bottles to condition for a few weeks before opening to ensure a smooth and satisfying pour.
Kegging:
Kegging is an excellent option for those who want to serve their beer in a consistent and refreshing state. Here's how to do it:
- Keg Preparation: Kegs need to be properly sanitized and prepared for the beer. This includes rinsing the interior with hot water to remove any residual cleaning agents.
- Transfer Technique: Kegging typically involves using a keg coupler and a beer line. The coupler is attached to the fermenter, and the beer is transferred by opening the valve, allowing it to flow into the keg. This method requires precision to control the flow rate and ensure a smooth transfer.
- Carbonation and Serving: After kegging, the beer will naturally carbonate as it rests. You can adjust the carbonation level by adding a small amount of priming sugar during the transfer. Once carbonated, your beer is ready to be served through a keg tap, providing a fresh and crisp drinking experience.
Both bottling and kegging offer unique advantages and require specific techniques to ensure the beer's quality. Whether you choose one method over the other depends on your personal preferences, brewing goals, and the desired serving experience for your beer.
The Ideal Appearance of Beer During Fermentation: A Guide
You may want to see also
Frequently asked questions
A beer fermenter is a specialized container used for the fermentation process of brewing beer. It is designed to provide an optimal environment for yeast to convert sugars into alcohol and carbon dioxide, which is crucial for the fermentation stage of brewing. Having a dedicated fermenter allows you to control temperature, manage oxygen levels, and ensure a clean and sterile environment, resulting in a higher-quality brew.
While a regular pot or bucket can be used for brewing, it is not ideal for fermentation. These common household items may not provide the necessary insulation, temperature control, or the ability to manage oxygen levels effectively. A beer fermenter is specifically designed to maintain the right conditions for yeast activity, ensuring a successful fermentation process and a better-tasting beer.
Cleaning your fermenter is essential to prevent any off-flavors or contamination. Start by disassembling the parts (if applicable) and soaking them in hot, soapy water. Rinse thoroughly to remove any soap residue. Then, sterilize the components using a method like boiling or using a food-grade disinfectant. Ensure you follow brewing guidelines and best practices to maintain hygiene and the integrity of your beer.
Leaks can be a concern, especially if they go unnoticed during the fermentation process. If you notice a leak, immediately stop the fermentation and address the issue. Check for any damaged seals or gaskets and replace them if necessary. Ensure that your fermenter is properly sealed and consider using a bung or airlock to manage the release of carbon dioxide during fermentation.
Yes, a beer fermenter can be versatile and used for various purposes. You can use it for making other fermented beverages like mead, cider, or even kombucha. Additionally, it can be employed for non-alcoholic experiments, such as infusing fruit or creating flavored syrups. However, always ensure proper cleaning and sanitization before using it for different applications to avoid any cross-contamination.