Many homebrewers and craft beer enthusiasts have encountered the frustrating situation where their beer's fermentation process stalls or stops altogether. This can be a perplexing issue, especially for those new to the art of brewing. Understanding why beer fermentation may halt is crucial for troubleshooting and ensuring the production of a delicious, properly carbonated beverage. The following paragraph delves into the potential causes and provides insights into how to address this common challenge in the brewing process.
What You'll Learn
- Yeast Activity: Check yeast health and activity, ensuring it's not dead or dormant
- Temperature Control: Fermentation temperature must be consistent and within optimal range
- Oxygen Levels: Excess oxygen can inhibit fermentation; ensure proper aeration
- Nutrient Deficiency: Provide yeast with necessary nutrients for fermentation to proceed
- Contamination: Inspect for bacterial or wild yeast contamination, which can halt fermentation
![]()
Yeast Activity: Check yeast health and activity, ensuring it's not dead or dormant
When your beer fermentation process stalls, it's often due to issues with yeast health and activity. Yeast is the driving force behind fermentation, converting sugars into alcohol and carbon dioxide. If your yeast isn't functioning properly, fermentation will slow down or halt. Here's a detailed guide on how to check yeast health and ensure it's not dead or dormant:
Observe Yeast Appearance:
- Active Yeast: Healthy yeast will appear active and bubbly. You should see a visible increase in carbon dioxide production, indicated by bubbles rising to the surface of your wort.
- Dormant or Dead Yeast: If yeast is dormant or dead, you'll notice a lack of bubbling. The yeast may appear flat or sunken, and the fermentation process will be significantly slowed or stopped.
Perform a Yeast Health Test:
- Rehydration Test: If you've used dry yeast, rehydrate it according to the package instructions. Leave it to activate for a recommended time (usually 1-2 hours). If the yeast doesn't become frothy and bubbly during this period, it may be dead or inactive.
- Wort Temperature: Yeast activity is temperature-sensitive. If your wort is too cold, yeast activity will be slowed. Aim for the optimal temperature range for your chosen yeast strain (typically 65-75°F or 18-24°C).
Check Fermentation Progress:
- Specific Gravity: Monitor the specific gravity of your wort throughout fermentation. Healthy yeast will lower the specific gravity steadily as it consumes sugars. If the specific gravity remains constant or increases, it suggests yeast inactivity or other issues.
- Alcohol Content: After fermentation is complete, measure the alcohol content of your beer. If the alcohol level is significantly lower than expected, it could indicate yeast problems.
Revive Dormant Yeast (if possible):
- Warm Up: If your yeast is dormant, try warming your wort slightly (within safe limits) to stimulate yeast activity. However, be cautious not to overheat, as this can kill the yeast.
- Add More Yeast: As a last resort, consider adding a fresh batch of yeast to your fermenter. This can sometimes revive dormant yeast, but it's not guaranteed.
Troubleshooting Tips:
- Sanitation: Poor sanitation can lead to yeast stress and death. Ensure your equipment is clean and sanitized before and during fermentation.
- Oxygen: Yeast needs oxygen to survive. Make sure your yeast has adequate oxygenation, either through aeration or using an airlock.
- Nutrients: Yeast requires nutrients to function optimally. Consider adding a yeast nutrient supplement if your wort lacks essential minerals.
By carefully monitoring yeast activity and addressing potential issues, you can often revive a stalled fermentation and get your beer brewing again.
Mastering Beer Brewing: Techniques to Halt Secondary Fermentation
You may want to see also
![]()
Temperature Control: Fermentation temperature must be consistent and within optimal range
Temperature control is a critical aspect of brewing beer, and it becomes even more crucial when you're trying to understand why your beer has stopped fermenting. Fermentation is a delicate process where yeast consumes sugars and produces alcohol and carbon dioxide. The temperature at which this process occurs is vital, as it directly influences the yeast's activity and the overall quality of your beer.
The optimal temperature range for yeast fermentation is typically between 65°F and 75°F (18°C and 24°C). At these temperatures, the yeast is most active and efficient. If the temperature deviates significantly from this range, it can lead to a halt in fermentation. For example, if the temperature drops too low, the yeast becomes inactive, and fermentation slows down or stops. This is because low temperatures slow down the yeast's metabolic processes, making it difficult for the yeast to perform its job effectively. On the other hand, if the temperature rises too high, it can also be detrimental. High temperatures can cause the yeast to die or become inactive, leading to a similar fermentation issue.
Maintaining a consistent temperature is essential to ensure the yeast continues to work optimally throughout the fermentation process. Fluctuations in temperature can disrupt the yeast's activity, causing it to become stressed and less efficient. This can result in a variety of issues, such as off-flavors, reduced alcohol content, and a slow or incomplete fermentation process. To achieve consistent temperature control, brewers often use specialized equipment like fermentation chambers or temperature-controlled fermenters. These devices allow for precise temperature regulation, ensuring that the yeast has a stable environment to work in.
In addition to the optimal temperature range, it's also important to consider the duration of fermentation. Yeast typically requires a certain amount of time to complete the fermentation process. If the fermentation is interrupted or the temperature fluctuates, the yeast may not have enough time to finish its work, leading to an incomplete fermentation. This can result in a beer that is not fully fermented, leaving residual sugars and affecting the overall taste and quality.
In summary, temperature control is a critical factor in the fermentation process of beer brewing. By maintaining a consistent temperature within the optimal range, brewers can ensure that the yeast works efficiently, producing a high-quality beer. Fluctuations in temperature can disrupt the yeast's activity, leading to issues with fermentation and the final product. Understanding and managing temperature is a key skill for any brewer looking to produce consistent and delicious beers.
Uncorking the Mystery: Does Ancient Fermented Beer Boost BAC?
You may want to see also
![]()
Oxygen Levels: Excess oxygen can inhibit fermentation; ensure proper aeration
When it comes to brewing beer, oxygen levels play a crucial role in the fermentation process. While oxygen is essential for yeast to metabolize sugars and produce alcohol, an excess of it can actually inhibit fermentation and lead to a variety of issues. Understanding the impact of oxygen on fermentation is key to troubleshooting and ensuring a successful brew.
During the fermentation process, yeast consumes sugars and produces alcohol and carbon dioxide. This process is highly sensitive to oxygen levels. When oxygen is present in excess, it can lead to a phenomenon known as "oxygen inhibition." This occurs because oxygen can react with the yeast's metabolic byproducts, such as ethanol and acetaldehyde, forming compounds that are toxic to the yeast. As a result, the yeast's activity slows down, and fermentation stalls. This can be particularly problematic if you're aiming for a high-alcohol content in your beer, as the yeast may not be able to produce the desired levels of alcohol.
To prevent oxygen inhibition, it's important to ensure proper aeration techniques during the brewing process. Aeration involves introducing a controlled amount of oxygen into the wort (the sugary liquid extracted from the grains) to provide the yeast with the necessary oxygen for fermentation. However, excessive aeration should be avoided. When the wort is aerated too much, it can lead to an overproduction of oxygen, which, as mentioned earlier, can inhibit the yeast's activity. The ideal aeration level is often achieved through a process called "lagering," where the wort is left to rest in a cool, dark environment after boiling. This allows the sugars to dissolve and the wort to clarify, ensuring that the yeast has the right conditions to ferment effectively.
Maintaining the right balance of oxygen is crucial for successful fermentation. Brewers often use specialized equipment, such as fermenters with built-in aeration systems or airlocks, to control the oxygen levels in the brewing environment. These tools help to introduce oxygen gradually and ensure that the yeast receives an optimal amount for fermentation without overwhelming it with excess oxygen. Additionally, monitoring the fermentation process regularly and making adjustments as needed can help identify and rectify any oxygen-related issues.
In summary, while oxygen is essential for yeast fermentation, excessive oxygen can inhibit the process and lead to brewing challenges. Brewers should focus on achieving proper aeration techniques and maintaining the right balance of oxygen to ensure a successful fermentation. By understanding the impact of oxygen and implementing appropriate measures, you can troubleshoot and overcome issues related to fermentation, ultimately producing a high-quality beer.
Budweiser: A Fermented Beer or Not?
You may want to see also
![]()
Nutrient Deficiency: Provide yeast with necessary nutrients for fermentation to proceed
If your beer has stopped fermenting, one of the most common reasons is a nutrient deficiency. Yeast, the microorganism responsible for fermentation, requires specific nutrients to function optimally. These nutrients are essential for the yeast's growth, reproduction, and the production of alcohol and carbon dioxide. When these nutrients are lacking, the yeast's activity can slow down or cease, leading to a stuck fermentation.
The primary nutrients that yeast needs include sulfur, phosphorus, magnesium, and various B-vitamins. Sulfur, for instance, is crucial for the yeast's metabolic processes and the formation of certain enzymes. Phosphorus is vital for energy transfer and the synthesis of DNA and RNA. Magnesium acts as a cofactor for many enzymatic reactions, while B-vitamins, such as B1 (thiamine), B2 (riboflavin), and B7 (biotin), are essential for yeast growth and fermentation.
To address nutrient deficiency, you can add a yeast nutrient supplement to your brewing process. These supplements typically come in liquid or dry forms and are designed to provide a balanced mix of the necessary nutrients. When using a supplement, it's important to follow the instructions carefully, as over-supplementation can also be detrimental. Additionally, ensuring that your water is properly mineralized can also help prevent nutrient deficiencies, as hard water often contains beneficial minerals like calcium and magnesium.
Another approach is to adjust your brewing water profile. Adding specific minerals or adjusting the pH can help create an environment that better supports yeast activity. For example, adding a small amount of calcium or magnesium sulfate can provide additional sulfur, which is often a limiting nutrient in homebrewing. However, it's crucial to make these adjustments gradually to avoid shocking the yeast and potentially causing a negative impact on fermentation.
In summary, nutrient deficiency is a common issue that can halt the fermentation process in beer-making. By providing the yeast with the necessary nutrients through supplements or adjusting water profiles, you can encourage optimal yeast activity and resume the fermentation process. Regular monitoring of the fermentation process and making adjustments as needed will help ensure a successful brew.
Uncorking History: The Surprising Story of Women on Beer Labels
You may want to see also
![]()
Contamination: Inspect for bacterial or wild yeast contamination, which can halt fermentation
When you notice that your beer has stopped fermenting, one of the primary reasons could be contamination, which can occur in various forms. Bacterial contamination is a common issue in homebrewing and can lead to a halt in the fermentation process. Bacteria can enter the beer during the brewing process, often through poor sanitation practices or the use of contaminated equipment. These bacteria can produce organic acids, leading to a sour or acidic taste, and they can also compete with the yeast for nutrients, slowing down or stopping fermentation. Wild yeast contamination, on the other hand, can introduce off-flavors and aromas, making the beer taste "wild" or "brettanomyces," which is often undesirable.
To inspect for bacterial contamination, you should first examine the beer's appearance. Cloudy or hazy beer can be a sign of bacterial activity, as bacteria can cause the yeast to become active again, leading to a second fermentation. This is often referred to as a "lagering" or "second fermentation." If you notice any sediment or particles settling at the bottom of the fermenter, it could indicate bacterial growth. Additionally, a slight sulfur or rotten egg smell can be a sign of bacterial contamination.
If you suspect bacterial contamination, you should take immediate action. Start by sanitizing your equipment thoroughly, as bacteria can thrive in warm, moist environments. Use a good sanitizer like iodine or a chlorine bleach solution to clean all surfaces, including the fermenter, taps, and bottles. After sanitization, rinse the equipment with hot water to remove any residual sanitizer. It's also essential to check your yeast and ensure it is fresh and active. Bacterial contamination can be more challenging to treat once it has taken hold, so prevention is key.
Wild yeast contamination, often referred to as "brettanomyces," can also halt fermentation and produce undesirable flavors. This type of contamination can occur if wild yeast spores are present in the air or on your hands and are introduced during the brewing process. Brettanomyces yeasts can produce fruity, spicy, or even vinegar-like flavors, which are not typically desired in beer. To inspect for this type of contamination, you should look for a distinct, off-flavour in your beer, often described as a "brett" or "wild" character.
To address wild yeast contamination, you can try to eliminate the source of the contamination. This might involve improving your sanitization practices, using airlocks and bungs to prevent the introduction of wild yeasts, and ensuring that your brewing environment is clean and free from potential sources of contamination. In some cases, you may need to restart the fermentation process with a fresh yeast strain to overcome the contamination. Regularly inspect your beer during fermentation to catch any signs of contamination early and take appropriate action to ensure the desired flavor profile.
Uncorking the Mystery: Why Black Pepper Enhances Beer's Flavor
You may want to see also
Frequently asked questions
There could be several reasons for a beer that isn't fermenting. Firstly, check the yeast health and viability. Ensure you used fresh, high-quality yeast and followed the proper activation process. If the yeast is old or damaged, it may not work effectively. Additionally, monitor the temperature during fermentation. Yeast typically ferments best between 65°F and 75°F (18°C and 24°C). If the temperature is too cold, the yeast may become inactive, and if it's too warm, it can lead to off-flavors.
A cloudy appearance can be a sign of several issues. It might indicate that the yeast is still active and has not fully finished fermentation, which can delay carbonation. However, it could also suggest a problem with the brewing process, such as a lack of proper aeration or an imbalance in the yeast-to-sugar ratio. Ensure you properly aerated the wort and considered adjusting the yeast-to-sugar ratio for better clarity and carbonation.
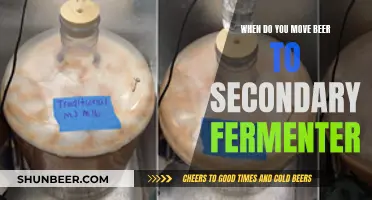
Oxygen exposure can indeed impact fermentation negatively. To minimize this, always use an airlock on your fermenter to allow carbon dioxide to escape while preventing oxygen from entering. Before bottling or kegging, ensure you rack the beer to a secondary fermenter or bottle/keg with a clean, sanitized transfer process to avoid any oxygen contamination.
Flat beer with no carbonation can be frustrating. Check the fermentation time and ensure it wasn't too short, as this can result in under-carbonation. If the beer has fermented for an adequate period, the issue might be with the carbonation process. Consider using a carbonation calculator to determine the appropriate level of priming sugar for your desired carbonation level. Additionally, ensure you properly carbonated the beer by keeping it at the right temperature and using a carbonator or natural carbonation methods.