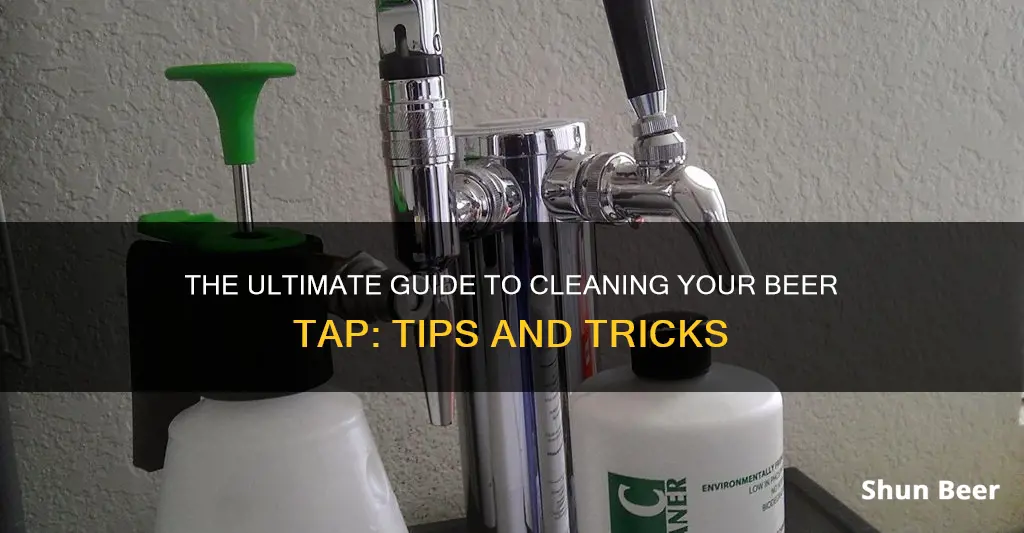
Cleaning a beer tap is essential to ensure the quality and taste of your beer. It helps to prevent the buildup of bacteria and sediment, which can affect the flavor and clarity of the beverage. This guide will provide a step-by-step process to effectively clean a beer tap, covering the necessary tools, materials, and techniques to maintain a clean and efficient system.
What You'll Learn
- Prepare the Tap: Gather cleaning supplies, including a brush, cleaner, and a bucket
- Disassemble Components: Carefully remove the tap handle, spout, and any other removable parts
- Clean the Interior: Use a brush to scrub the interior of the tap, removing any buildup
- Disinfect and Rinse: Apply a disinfectant and rinse thoroughly to eliminate bacteria
- Reassemble and Test: Reattach parts, ensuring a tight seal, and test the tap for functionality
![]()
Prepare the Tap: Gather cleaning supplies, including a brush, cleaner, and a bucket
To ensure your beer tap is clean and ready for the next pour, follow these steps to prepare it for cleaning:
First, gather the necessary supplies. You'll need a few essential items to tackle the job effectively. Start by acquiring a sturdy brush, preferably one with firm bristles, to remove any built-up residue or debris. A good-quality beer tap cleaner is also crucial; opt for a product specifically designed for tap maintenance. Additionally, a bucket will be your partner in the cleaning process, providing a convenient place to mix and hold the cleaning solution.
Once you have your supplies, it's time to get hands-on. Begin by disconnecting the tap from its source, ensuring you have easy access to the internal parts. This step is crucial for a thorough cleaning. Then, disassemble the tap into its components, including the faucet body, spout, and any removable parts. This process allows you to clean each section individually, ensuring no dirt or grime is left behind.
While you're at it, take the opportunity to inspect the tap's condition. Check for any signs of wear and tear, blockages, or damage. This inspection will help you identify areas that require extra attention during the cleaning process. Remember, a well-maintained tap will not only improve the taste of your beer but also extend its lifespan.
Now, fill your bucket with warm water and add a generous amount of the tap cleaner, following the product's instructions for the correct dilution ratio. Stir the solution to ensure it's well-mixed. This cleaning solution will effectively dissolve and remove any stubborn deposits. Immerse the tap components in the soapy water, allowing the cleaner to work its magic.
After a suitable soaking period, typically around 15-20 minutes, start scrubbing. Use your brush to gently clean each part, paying extra attention to the faucet body and spout, as these areas tend to accumulate the most grime. Rinse the tap thoroughly with clean water to remove any residue from the cleaning process. Finally, reassemble the tap, ensuring all parts are securely in place.
Why Beer's Magic Formula Makes You Sleep Soundly
You may want to see also
![]()
Disassemble Components: Carefully remove the tap handle, spout, and any other removable parts
When it comes to cleaning a beer tap, disassembling the components is a crucial step to ensure a thorough clean. This process allows you to access all the areas that need attention, including the tap handle, spout, and any other removable parts. Here's a detailed guide on how to carefully remove these components:
Start by identifying the tap handle, which is typically attached to the main body of the tap. It is usually a simple screw or clip mechanism that holds it in place. Carefully locate the screw or clip and use the appropriate tool to release it. Gently lift the tap handle away from the tap, taking note of its position and orientation. This step is important to ensure you can reassemble it correctly later.
Next, focus on the spout, which is the part that dispenses the beer. The spout is often connected to the main body by a small nut or screw. Locate this fastener and use a screwdriver or a spout wrench (if available) to loosen and remove it. Carefully pull the spout away from the tap, being mindful of any O-rings or seals that might be present. These seals are crucial for a tight seal, so handle them with care.
In addition to the tap handle and spout, there might be other removable parts, such as a ball valve or a filter basket. These components are often located near the bottom of the tap and can be removed by unscrewing or unclipping them. Take your time to identify and release any additional parts, as each might have a unique mechanism for removal.
As you carefully disassemble the tap, it's essential to keep track of the different parts and their positions. You can use a small label maker or a piece of tape to mark each component with its corresponding location. This will make the reassembly process much easier and ensure that everything is put back together correctly.
Remember, the goal is to create a clean and accessible environment for the cleaning process. By carefully removing the tap handle, spout, and other removable parts, you'll be able to reach all the nooks and crannies that might harbor dirt, grime, or old beer residue. This meticulous approach to disassembly is a key step in achieving a spotless and well-maintained beer tap.
Uncover the Magic: Exploring Fermentables in Beer Brewing
You may want to see also
![]()
Clean the Interior: Use a brush to scrub the interior of the tap, removing any buildup
To ensure your beer tap remains in top-notch condition, it's essential to clean its interior regularly. This process helps maintain the quality of your beer and prevents any unpleasant flavors or odors from developing. Here's a step-by-step guide on how to effectively clean the interior of your tap:
Start by gathering the necessary tools and materials. You'll need a small brush with firm bristles, preferably one designed for cleaning beer equipment. These brushes are typically made of materials like nylon or polypropylene, which are durable and effective for removing residue. Additionally, have some warm soapy water ready, as this will aid in the cleaning process.
Once you have your tools, begin by disassembling the tap. Carefully remove the faucet handle and any other removable parts. This step is crucial as it allows you to access the interior of the tap, where dirt, grime, and mineral deposits can accumulate. Take note of the order in which you remove each part to ensure you can reassemble it correctly later.
Now, it's time to scrub the interior. Immerse the brush in the soapy water and ensure it's thoroughly soaked. The brush should be soft enough to navigate the intricate parts of the tap without causing damage. Start at the base of the tap and work your way up, using the brush to remove any visible buildup. Pay close attention to the areas around the spout and the valve, as these are common spots for residue accumulation. Apply gentle, circular motions to ensure you're effectively cleaning the surface without scratching it.
As you scrub, you might notice a buildup of beer residue, which can be a mix of sugars, proteins, and other compounds. This residue can contribute to the off-flavors and odors you want to avoid. Be thorough in your cleaning, ensuring that you remove as much of this buildup as possible. If you encounter particularly stubborn residue, you can use a small amount of vinegar diluted in water to help dissolve it. However, be cautious not to use too much vinegar, as it can leave a strong smell in the tap.
After scrubbing, rinse the tap thoroughly with warm water to remove any soap residue and ensure that no cleaning agents are left behind. Make sure to dry the tap completely before reassembling it. Properly cleaning the interior of your beer tap is a simple yet crucial maintenance task that will keep your beer tasting fresh and ensure a pleasant drinking experience for your guests.
Genesee Beer: Unveiling the Lager-Pilsner Mystery
You may want to see also
![]()
Disinfect and Rinse: Apply a disinfectant and rinse thoroughly to eliminate bacteria
To ensure the highest level of cleanliness and hygiene for your beer tap, a thorough disinfection and rinse process is essential. This step is crucial to eliminate any bacteria, mold, or other contaminants that may have accumulated over time, ensuring that your beer remains fresh and flavorful. Here's a detailed guide on how to effectively disinfect and rinse your beer tap:
Disinfection Process:
- Choose a Disinfectant: Select a suitable disinfectant specifically designed for food-contact surfaces. Common options include chlorine bleach solutions, quaternary ammonium compounds (QUATS), or hydrogen peroxide-based disinfectants. Always follow the manufacturer's instructions and recommended dilution ratios. For instance, a typical bleach solution might be 1 tablespoon of bleach per gallon of water.
- Prepare the Disinfectant Solution: Mix the chosen disinfectant with water according to the instructions. Ensure the solution is properly mixed and reaches the desired concentration. Allow the solution to sit for a few minutes to activate the disinfectant's effectiveness.
- Apply the Disinfectant: Carefully pour or spray the disinfectant solution onto all accessible surfaces of the beer tap, including the spout, faucet, and surrounding areas. Make sure to cover any crevices or nooks where bacteria might hide. Allow the disinfectant to remain in contact with the surfaces for the recommended time, typically around 5-10 minutes. This contact time is essential to ensure the disinfectant penetrates and eliminates bacteria effectively.
- Rinse Thoroughly: After the disinfection process, it is crucial to rinse the beer tap thoroughly to remove any residual disinfectant and prevent any potential off-flavors in the beer. Use clean, warm water to rinse the tap. Ensure that you rinse from all angles, including the spout and faucet, to eliminate any remaining disinfectant and potential mineral deposits.
Rinse Techniques:
- Start by running warm water through the tap for a few seconds to loosen any loose particles or residue.
- Then, use a clean cloth or sponge to wipe down the tap, ensuring you cover all surfaces.
- Finally, run the water through the tap again, allowing it to flow freely for an extended period to ensure a thorough rinse.
By following this disinfection and rinse process, you can maintain a clean and hygienic beer tap, providing your customers with the best possible drinking experience. Regularly scheduled disinfection is key to preventing the growth of bacteria and ensuring the longevity of your beer equipment.
Mastering Beer Gravity: Electronic Testing Tips for Fermenters
You may want to see also
![]()
Reassemble and Test: Reattach parts, ensuring a tight seal, and test the tap for functionality
Reassembling and testing a beer tap after cleaning is a crucial step to ensure it functions properly and delivers a smooth, enjoyable drinking experience. Here's a detailed guide on how to approach this process:
Reattachment and Sealing:
After cleaning, it's essential to carefully reattach the parts of the tap. This includes the faucet handle, the spout, and any other components that were removed during the cleaning process. Pay close attention to the seals. These are critical to preventing leaks and ensuring a smooth flow of beer. Use a small amount of plumber's tape or thread seal tape around the threads of the tap and the connections to the keg or bottle. Wrap it clockwise, ensuring a tight and secure bond. For metal taps, you might also consider using a small amount of pipe compound or thread seal tape for added security.
Tightening and Alignment:
Once the parts are reattached, tighten all screws or fasteners securely. Over-tightening can damage the tap, so use a steady hand and a gentle, firm motion. Ensure that all parts are aligned properly. The faucet handle should be level and straight, and the spout should be vertical. Any misalignment can lead to uneven flow or potential damage during use.
Testing for Functionality:
Now it's time to test the tap's performance. Turn on the water supply and observe the flow. Check for any leaks around the seals and ensure that the water flows freely without any obstructions. If you have a draft beer setup, pour a small amount of beer into a glass to assess the carbonation and overall quality. Here are some key points to test:
- Flow Rate: Ensure the tap delivers a consistent and smooth flow of beer. No sudden gushes or slow drips.
- Carbonation: If applicable, check the beer's carbonation level. It should be appropriate for the style and your preferences.
- Temperature: If the tap is designed to chill or warm the beer, test its temperature control.
- Leakage: Inspect all connections for any signs of leakage. Even a small leak can be a sign of an issue.
Troubleshooting:
If you encounter any problems during reassembly or testing, address them promptly. Tighten loose connections, re-tighten screws, or adjust the alignment. If leaks persist, consider replacing the seals or seeking professional assistance. Remember, a well-reassembled and tested tap will provide a consistent and enjoyable drinking experience.
Uncorking the Mystery: Beer's Fermented Journey
You may want to see also
Frequently asked questions
It is recommended to clean your beer tap regularly, at least once a month, or more frequently if you notice any signs of buildup or residue. Regular cleaning ensures that your tap remains in good condition and provides the best possible taste experience for your beer.
Cleaning a beer tap involves a few simple steps. First, disconnect the tap from the beer line and remove any remaining beer. Then, use a mild detergent or dish soap mixed with warm water to create a cleaning solution. Apply this solution to the tap and use a soft brush or cloth to scrub the surface, paying attention to any nooks and crannies. Rinse thoroughly with warm water to remove any soap residue. Finally, allow the tap to air dry completely before reassembling.
Yes, vinegar can be an effective natural cleaner for your beer tap. Mix equal parts of vinegar and warm water, and use it to soak the tap for about 15-20 minutes. This will help dissolve any mineral deposits or buildup. After soaking, scrub the tap with a soft brush and rinse thoroughly. Vinegar's acidic nature makes it a great option for removing stubborn residue without harsh chemicals.