Kegerator beer lines require regular cleaning to maintain the quality and taste of the beer. Over time, sediment, proteins, and other contaminants can build up in the lines, leading to off-flavors and a less-than-perfect pour. Cleaning the beer lines is a crucial part of homebrewing and kegerator maintenance, ensuring that every sip of your favorite brew is as fresh and delicious as it should be. This guide will provide a step-by-step process to effectively clean your kegerator beer lines, helping you keep your beer tasting its best.
| Characteristics | Values |
|---|---|
| Cleaning Frequency | Every 2-4 weeks or after each major cleaning event (e.g., changing the keg) |
| Cleaning Method | Using a cleaning solution (e.g., 50/50 bleach and water, or a specialized beer line cleaner) and a cleaning brush or bottle brush |
| Cleaning Solution | 50/50 bleach and water, or a specialized beer line cleaner (e.g., Beer Line Cleaner, Kegerator Cleaner) |
| Cleaning Brush | Bottle brush or a specialized cleaning brush with firm bristles |
| Cleaning Process | 1. Rinse the beer line with warm water to remove any loose debris. 2. Mix the cleaning solution according to the instructions. 3. Pour the solution into the beer line, starting from the faucet and moving towards the keg. 4. Let it sit for the recommended time (usually 10-15 minutes). 5. Use the cleaning brush to scrub the line, ensuring all surfaces are cleaned. 6. Rinse the line thoroughly with warm water to remove any cleaning solution. 7. Dry the line and reconnect it to the kegerator. |
| Preventative Measures | Regularly inspect the beer line for any signs of buildup or contamination. Use a carbon filter to reduce the amount of sediment and carbon dioxide in the beer. |
| Additional Tips | Always clean the kegerator and beer line when switching between different beers to prevent cross-contamination. |
What You'll Learn
- Pre-Rinse: Use a brush to remove loose sediment from the lines before cleaning
- Chemical Clean: Employ a specialized beer line cleaner to dissolve and remove buildup
- Backflush: Push cleaning solution through the line to dislodge deposits
- Rinse Thoroughly: Ensure multiple thorough rinses to remove cleaning chemicals
- Regular Maintenance: Schedule routine cleaning to prevent buildup and maintain beer quality
![]()
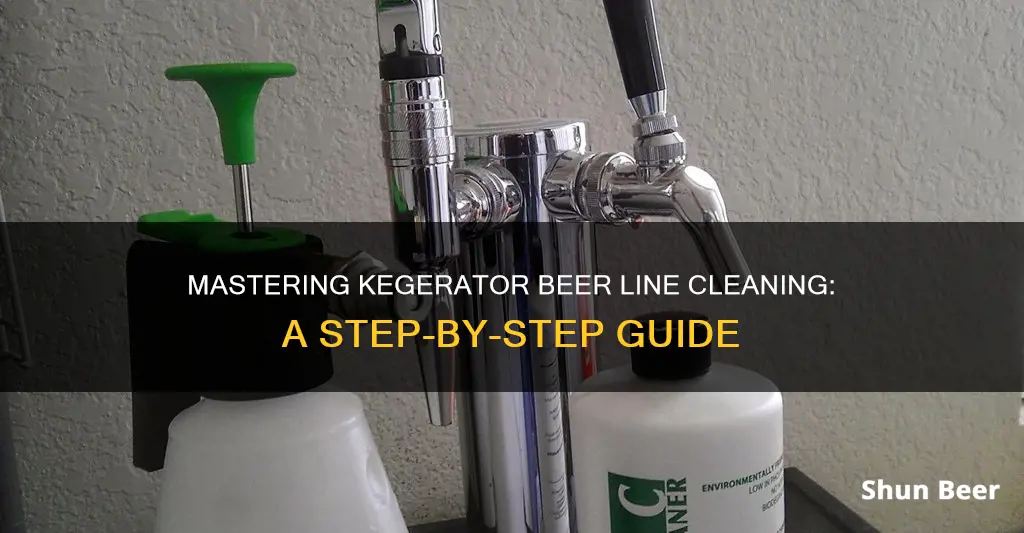
Pre-Rinse: Use a brush to remove loose sediment from the lines before cleaning
Before diving into the cleaning process, it's crucial to prepare your Kegerator by removing any loose sediment that might be present in the beer lines. This initial step is often overlooked but is essential for ensuring a thorough and effective cleaning. Sediment can accumulate over time, especially if your Kegerator is used frequently, and it can lead to off-tasting beer or even blockages.
To begin the pre-rinsing process, you'll need a small brush specifically designed for cleaning beer lines. These brushes are typically long and thin, allowing you to reach deep into the narrow lines. Start by removing the beer line from the Kegerator, being careful not to twist or kink the line. Then, gently insert the brush into the line, ensuring it is fully extended. Use the brush to scrub the interior of the line, paying extra attention to any areas where sediment might have settled. This might include the connection points, the middle section, and any bends or turns in the line.
The goal of this pre-rinsing is to loosen and remove any loose sediment particles that could otherwise interfere with the cleaning process. It's a simple yet vital step that ensures a more comprehensive clean. After brushing, you should notice a slight accumulation of sediment on the brush, indicating that it's working effectively. Once you've covered the entire length of the line, carefully remove the brush and rinse it under warm water to check for any remaining sediment.
Remember, this pre-rinsing technique is a crucial first step in the overall cleaning process, ensuring that you're not just moving sediment around but actually removing it. It's a small detail that can significantly impact the quality of your beer and the longevity of your Kegerator. By taking the time to properly pre-rinse, you're setting the stage for a more effective and thorough cleaning, ultimately enhancing the overall beer-drinking experience.
Uncover the Secrets of Lagar Beer: A Traditional Craft
You may want to see also
![]()
Chemical Clean: Employ a specialized beer line cleaner to dissolve and remove buildup
When it comes to maintaining the pristine condition of your kegerator's beer lines, a chemical clean is an essential step to ensure optimal beer quality and flavor. This method is particularly effective for tackling stubborn buildup and residue that can accumulate over time, affecting the taste and overall experience. Here's a comprehensive guide on how to perform this cleaning process:
Specialized beer line cleaners are designed to dissolve and break down the various deposits that can form within the intricate network of your beer lines. These deposits often include residual sugars, proteins, and other organic matter that can be left behind after each brew. By using a chemical cleaner, you can effectively remove these substances, ensuring that your beer flows smoothly and tastes fresh. It is crucial to choose a cleaner specifically formulated for beer lines, as some general-purpose cleaners may not be suitable and could potentially damage the lines.
The process begins with ensuring that your kegerator is properly set up and that the beer lines are connected securely. You'll then need to shut off the beer tap and disconnect the lines to access the entire system. Start by running warm water through the lines to pre-heat them, as this will help the cleaning process by allowing the chemicals to work more effectively. After pre-heating, slowly pour the recommended amount of the specialized cleaner into the beer line, ensuring an even distribution. The cleaner will begin to dissolve the buildup, and you might notice some foaming or bubbling, which is a normal part of the process.
Allow the cleaner to sit for a specified duration, which is typically around 15-20 minutes. This waiting period gives the chemicals ample time to penetrate and break down the deposits. After the allotted time, rinse the lines thoroughly with warm water to remove any remaining cleaner and the dissolved buildup. It is crucial to ensure that all traces of the cleaner are washed away to prevent any off-flavors in your beer.
Regularly performing chemical cleans will not only improve the taste of your beer but also extend the lifespan of your kegerator and beer lines. This method is a powerful tool in your kegerator maintenance arsenal, ensuring that you always serve the best possible beer to your customers or guests. Remember, proper cleaning techniques are key to maintaining a high-quality brewing experience.
Stout's Style: Ale or Lager? Unraveling the Brew's Mystery
You may want to see also
![]()
Backflush: Push cleaning solution through the line to dislodge deposits
Backflushing is a crucial step in the cleaning process of kegerator beer lines, ensuring that any built-up deposits, such as beer residue, yeast, and mineral deposits, are effectively removed. This method involves pushing a cleaning solution through the beer line to dislodge and flush out these deposits, leaving the line clean and ready for the next brew. Here's a detailed guide on how to perform a backflush:
- Preparation: Begin by ensuring you have the necessary supplies: a cleaning solution specifically designed for beer lines (often a mixture of water and a mild detergent or cleaner), a length of flexible tubing (such as a garden hose), and a source of compressed air or a small pump. It is essential to use a cleaner that is safe for beer and does not leave any harmful residues.
- Line Inspection: Before starting, inspect the beer line to identify the point of connection to the kegerator. Locate the tap handle and the line that runs from the tap to the keg. Make a mental note of any visible deposits or blockages, as these areas will require extra attention during the cleaning process.
- Backflush Process: Start by attaching one end of the flexible tubing to the beer line, ensuring a secure connection. Then, pour the cleaning solution into the line, typically starting at the tap handle end. Slowly and carefully push the solution through the line, using the tubing to guide it. The goal is to move the solution through the entire length of the line, including the coiled section and any dead ends. Apply gentle pressure to ensure the solution reaches all areas.
- Agitation: As you backflush, you may notice some deposits dislodging and moving through the line. This is a good sign, indicating that the cleaning process is effective. If you encounter any resistance or feel a buildup, use the tubing to gently agitate the line, loosening any stubborn deposits.
- Rinse and Repeat: After the initial backflush, it's crucial to rinse the line to remove any remaining cleaning solution and debris. Run clear water through the line, ensuring it flows freely. Repeat the backflush process with fresh cleaning solution if there are still deposits present. This iterative process ensures a thorough clean.
- Final Rinse: Once you've backflushed multiple times and no more deposits are visible, perform a final rinse with clear water to ensure no cleaning chemicals remain in the line. This step is vital to prevent any off-flavors from the cleaning process from affecting the beer's taste.
Backflushing is a meticulous process that requires patience and attention to detail. By pushing the cleaning solution through the line, you effectively dislodge and remove deposits, ensuring that your kegerator beer lines are clean and ready to deliver the perfect pour every time. Remember to always follow the manufacturer's guidelines for your specific cleaning solution and kegerator model.
Mastering the Art of Warming Up Your Fermenting Beer: A Guide
You may want to see also
![]()
Rinse Thoroughly: Ensure multiple thorough rinses to remove cleaning chemicals
When it comes to cleaning your kegerator beer lines, one of the most crucial steps is ensuring that you rinse them thoroughly to eliminate any cleaning chemicals. This process might seem simple, but it is often overlooked, and its importance cannot be overstated. Here's a detailed guide on why and how to perform this essential task:
Rinsing is a critical step in the cleaning process because it ensures that no harmful residues remain in the beer lines. Cleaning chemicals, such as detergents or disinfectants, are used to eliminate bacteria and other contaminants. However, these chemicals can leave behind a bitter or metallic taste if not properly removed. By rinsing thoroughly, you guarantee that the beer lines are free from any chemical traces, ensuring a clean and crisp taste in your beverage.
The process of rinsing should be meticulous and thorough. Start by running warm water through the beer lines, ensuring that you cover the entire length of the lines, including the taps and any fittings. Use a gentle, steady flow of water to avoid forcing air into the lines, which can lead to aeration and potential off-tasting. Allow the water to flow for a sufficient duration, typically around 5-10 minutes, to ensure that you flush out any remaining cleaning agents.
To enhance the rinsing process, consider using a specialized beer line cleaner or a mild dish soap. These products are designed to break down and remove any residual cleaning chemicals. After rinsing with just water, introduce a small amount of the cleaner, following the manufacturer's instructions. This additional step can provide an extra layer of assurance that all chemicals have been eliminated.
Finally, once you've completed the rinsing process, it's essential to verify the cleanliness of the beer lines. You can do this by sampling the beer or using a test kit to check for any remaining chemical residues. If you notice any lingering flavors or tastes, repeat the rinsing process until the water runs clear, indicating that all cleaning agents and residues have been removed.
By following these steps and emphasizing the importance of thorough rinsing, you'll ensure that your kegerator beer lines are clean, ready to deliver the perfect pour every time. This simple yet effective technique is a cornerstone of proper kegerator maintenance.
Uncorking the Mystery: Does Ancient Fermented Beer Boost BAC?
You may want to see also
![]()
Regular Maintenance: Schedule routine cleaning to prevent buildup and maintain beer quality
Regular maintenance is crucial for keeping your kegerator in top-notch condition and ensuring the beer flows smoothly. One of the most important aspects of this maintenance is scheduling routine cleaning to prevent the buildup of debris and contaminants that can affect beer quality. Beer lines, in particular, require regular attention as they are susceptible to residue accumulation, which can lead to off-tastes and a less-than-perfect pour.
The process of cleaning kegerator beer lines is relatively straightforward and can be done using a few simple tools and techniques. Start by disconnecting the beer line from the kegerator and the tap handle. This step is essential to ensure you can access the entire length of the line for cleaning. Next, use a specialized beer line cleaner or a mild detergent mixed with warm water. Apply the cleaner to the line, ensuring it coats the interior surface evenly. Allow the cleaner to sit for a few minutes to loosen any built-up residue.
After the cleaning agent has done its work, rinse the beer line thoroughly with warm water to remove any remaining detergent and loose particles. It's important to use warm water as it helps to dissolve and flush out any stubborn buildup. Once rinsed, use a brush or a specialized beer line cleaner tool to scrub the line, ensuring you reach all areas, including the tap handle and any bends or joints. This step is crucial to ensure no residue remains.
Finally, reassemble the beer line and kegerator, and test the system by pouring a small amount of beer to check for any leaks or issues. Regular cleaning, ideally every one to two months, will help maintain the freshness and quality of your beer. This simple maintenance routine will also extend the life of your kegerator and ensure a consistent, enjoyable drinking experience. Remember, proper cleaning prevents the need for more extensive repairs and keeps your beer tasting its best.
Mastering Beer Fermentation: The Ideal Specific Gravity
You may want to see also
Frequently asked questions
It is recommended to clean your Kegerator beer lines every 2-4 weeks to maintain the quality and taste of your beer. Regular cleaning helps remove any built-up residue, bacteria, and off-flavors that can accumulate over time.
The most effective cleaning method is to use a combination of a cleaning solution and a cleaning process. Start by flushing the lines with warm water to remove any loose debris. Then, use a cleaning solution specifically designed for beer lines, such as a mixture of bleach and water or a commercial beer line cleaner. Follow the instructions on the cleaner and use a cleaning wand or brush to scrub the lines thoroughly.
While vinegar can be used as a natural cleaning agent, it is not as effective as dedicated beer line cleaners. Vinegar may help remove some surface grime, but it doesn't penetrate and clean the lines as deeply. For better results, opt for a specialized cleaning solution that can reach and eliminate bacteria and mineral deposits.
There are a few signs that indicate your beer lines need cleaning. These include a noticeable change in beer taste, a cloudy appearance, or the presence of a bitter, metallic flavor. If you notice any of these issues, especially if they persist, it's a good indication that your lines need attention and a thorough cleaning.
Yes, there are several DIY cleaning solutions you can prepare at home. One popular method is to mix 1/4 cup of bleach with 1 gallon of warm water. This solution can be used to flush and clean the beer lines. Another option is to use a 50/50 mixture of bleach and water, which can be applied as a soak for more stubborn deposits. Always ensure you follow safety guidelines and test the solution on a small area before applying it to the entire line.