Checking the gravity of beer during fermentation is a crucial step in the brewing process, as it helps brewers monitor the progress of the fermentation and adjust the recipe as needed. This process involves measuring the specific gravity of the beer, which is a measure of its density compared to the density of water. By taking gravity readings at different stages of fermentation, brewers can ensure that the beer is fermenting properly and make any necessary adjustments to achieve the desired flavor and alcohol content. This guide will provide an overview of the techniques and tools used to check the gravity of beer during fermentation, offering a comprehensive approach to mastering this essential brewing skill.
What You'll Learn
- Visual Inspection: Look for cloudiness or sediment in the beer to gauge fermentation progress
- Specific Gravity Meter: Use a hydrometer to measure the beer's specific gravity before and after fermentation
- Temperature Impact: Note how temperature affects gravity readings during fermentation
- Fermentation Rate: Monitor the rate of gravity change to estimate fermentation completion
- Alcohol Content: Calculate the final alcohol content based on the initial and final gravity readings
![]()
Visual Inspection: Look for cloudiness or sediment in the beer to gauge fermentation progress
The visual inspection of beer during fermentation is a simple yet effective method to assess the progress of the process. As yeast consumes sugars and produces alcohol, the beer's clarity can provide valuable insights. When yeast is actively fermenting, it creates a fine sediment that settles at the bottom of the fermentation vessel. This sediment is a natural byproduct of the yeast's activity and can be a sign of healthy fermentation.
To perform a visual inspection, you'll need to carefully observe the beer's appearance. Start by taking a sample of the beer from the fermentation vessel and pouring it into a clear glass. The goal is to examine the beer's clarity and detect any signs of cloudiness or sediment. Healthy fermentation often results in a slightly hazy or cloudy appearance, especially in the initial stages. This cloudiness is caused by the yeast's activity and the formation of fine particles.
Over time, as the fermentation progresses, the beer should become clearer. If you notice an increase in cloudiness or the appearance of sediment, it may indicate that the yeast is still active and the fermentation is ongoing. However, if the beer becomes overly cloudy or if large sediment particles are visible, it could suggest that the yeast is no longer active or that the fermentation has been disturbed. In such cases, it might be necessary to take corrective action, such as adding more yeast or adjusting the fermentation conditions.
It's important to note that the visual inspection should be combined with other methods to get a comprehensive understanding of the fermentation process. Measuring the specific gravity or using a hydrometer can provide quantitative data, while the visual inspection offers a quick and intuitive assessment. By regularly monitoring both the visual and physical characteristics of the beer, you can effectively track the fermentation progress and make informed decisions to ensure a successful brew.
In summary, visual inspection is a valuable tool for monitoring beer fermentation. By observing cloudiness and sediment, you can gain insights into the yeast's activity and the overall health of the fermentation process. This simple technique, when combined with other measurement methods, allows brewers to make informed adjustments and achieve high-quality beer.
Uncovering the Magic: Rice Beer's Fermentation Process
You may want to see also
![]()
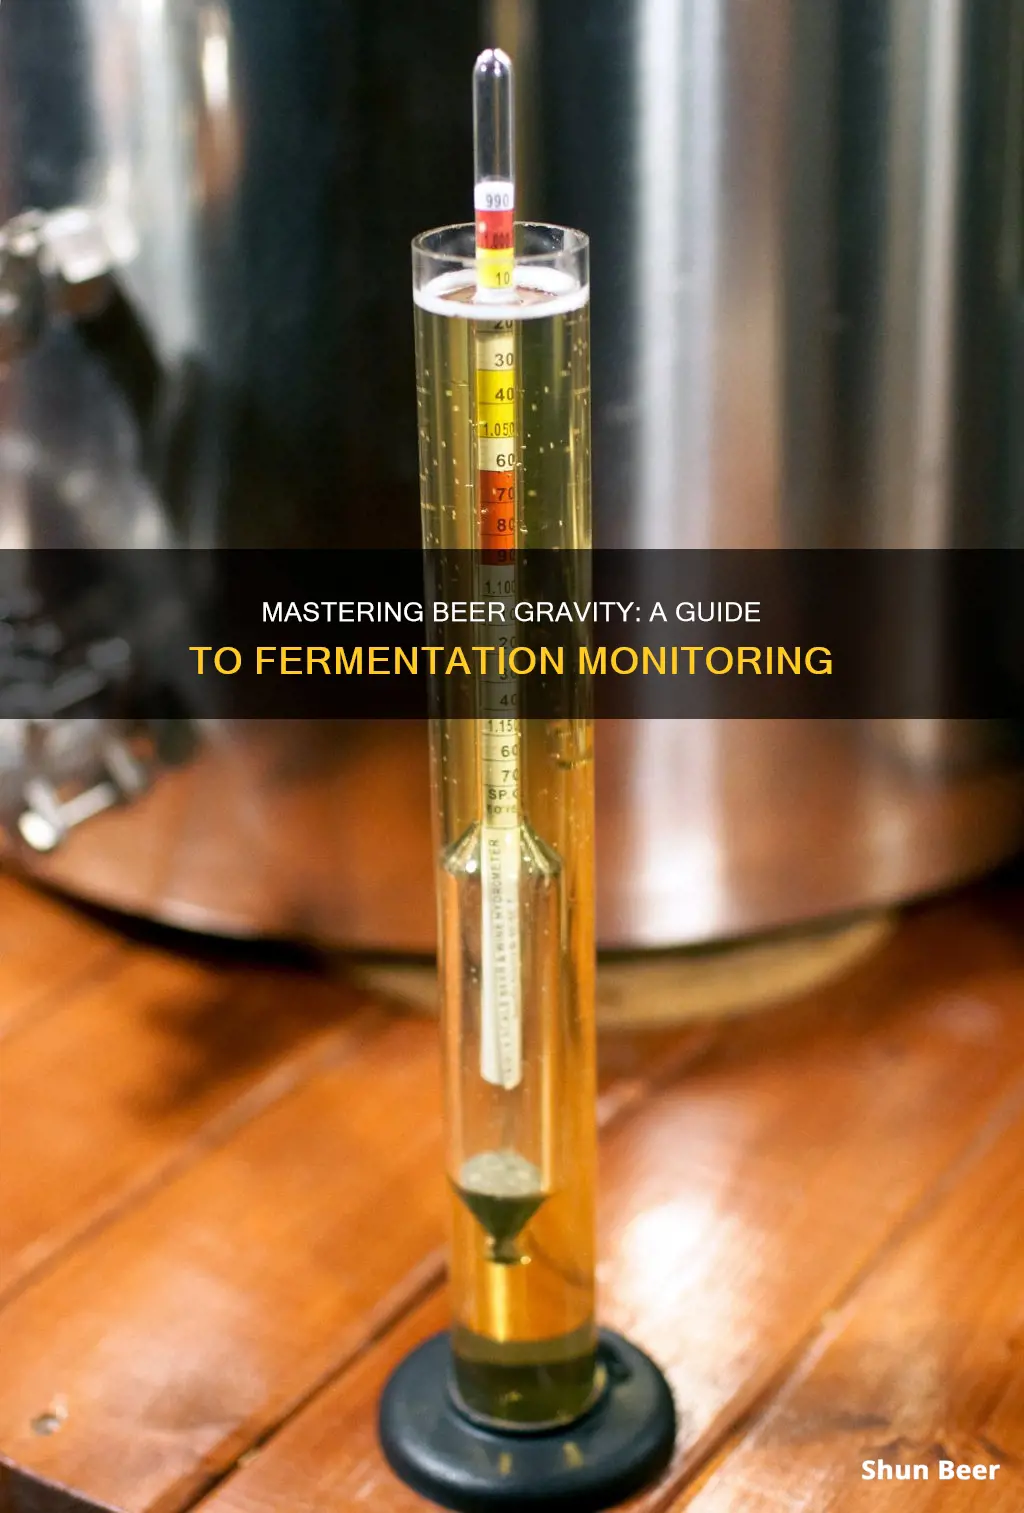
Specific Gravity Meter: Use a hydrometer to measure the beer's specific gravity before and after fermentation
The specific gravity of beer is a crucial metric for brewers, as it provides valuable insights into the fermentation process and the overall quality of the final product. Measuring specific gravity before and after fermentation using a hydrometer is a simple yet effective method to ensure your beer is on the right track. Here's a step-by-step guide to mastering this technique:
Understanding Specific Gravity: Specific gravity is a measure of the density of your beer compared to the density of water. It is expressed as a ratio, typically with a hydrometer reading. The higher the specific gravity, the more concentrated the beer's sugars, which can impact the flavor and alcohol content. During fermentation, yeast consumes these sugars, and the specific gravity should decrease as the process progresses.
Using a Hydrometer: A hydrometer is a precision instrument designed for this very purpose. It is a long, slender tube with a weighted end, allowing it to float in the beer. The hydrometer's scale is calibrated to read the specific gravity of the liquid. Before fermentation begins, take a sample of your wort (the sugary liquid before fermentation) and place it in a clean container. Immerse the hydrometer into the wort, ensuring it is fully submerged. Record the reading, as this will be your starting specific gravity.
During Fermentation: As fermentation commences, regularly take samples and measure the specific gravity. The frequency of these measurements can vary depending on your brewing setup and preferences. Typically, taking readings every 24-48 hours is a good practice. Submerge the hydrometer in the fermenting beer, and compare the reading to the initial one. You should observe a gradual decrease in specific gravity as the yeast works its magic.
After Fermentation: Once fermentation is complete, it's time for the final measurement. Take a sample of the fully fermented beer and measure its specific gravity. This reading will indicate the efficiency of your fermentation process. If the specific gravity is significantly lower than the initial reading, it suggests a well-fermented beer with minimal residual sugars. If the specific gravity is higher, it may indicate under-fermentation or the presence of unfermented sugars, which could affect the beer's flavor and clarity.
By employing this specific gravity measurement technique, you gain valuable feedback on the fermentation's progress and overall beer quality. It allows you to make informed decisions, adjust brewing processes if needed, and ultimately produce beers that meet your desired standards. Remember, consistency in measurements is key to mastering the art of brewing.
Lime Oil in Beer: A Refreshing Twist or a Disaster?
You may want to see also
![]()
Temperature Impact: Note how temperature affects gravity readings during fermentation
The temperature of the fermentation environment significantly influences the gravity readings of beer during the fermentation process. Gravity, often referred to as specific gravity, is a measure of the beer's density compared to that of water. When temperature increases, the molecules in the beer gain more kinetic energy, causing them to move faster and occupy a larger volume. This expansion results in a decrease in the beer's density and, consequently, a lower gravity reading. Conversely, at lower temperatures, the molecules slow down, leading to a higher density and a higher gravity measurement.
During fermentation, yeast plays a crucial role in converting sugars into alcohol and carbon dioxide. The yeast's activity is highly temperature-dependent. Warmer temperatures generally accelerate fermentation, leading to a faster increase in gravity as the yeast rapidly consumes sugars. However, excessively high temperatures can also cause the yeast to become inactive or die, halting the fermentation process and preventing further gravity changes. Therefore, maintaining an optimal temperature range is essential to ensure the yeast's efficient activity and accurate gravity measurements.
It is important to note that temperature variations can also affect the overall fermentation profile. Different beer styles may have specific gravity targets, and temperature control becomes critical to achieving these goals. For instance, a lager fermentation might require a colder temperature to maintain a higher gravity, while a wheat beer may benefit from a slightly warmer environment to encourage a lighter body and lower gravity. Brewers often use temperature-controlled fermentation vessels or adjust the fermentation schedule to manage gravity readings effectively.
Accurate gravity measurements are vital for beer quality and consistency. Temperature control is a key factor in achieving reliable results. Brewers should be mindful of the temperature impact on gravity readings and make adjustments as necessary to ensure the desired beer characteristics. This might involve monitoring temperature during fermentation and making slight temperature modifications to fine-tune the gravity profile.
In summary, temperature has a direct and significant effect on the gravity of beer during fermentation. Understanding this relationship allows brewers to manipulate temperature to achieve the desired gravity levels and beer styles. By controlling temperature, brewers can ensure the yeast's optimal performance and produce beers with consistent and desirable characteristics.
Unraveling the Mystery: Beer and the 0.08 Limit
You may want to see also
![]()
Fermentation Rate: Monitor the rate of gravity change to estimate fermentation completion
Monitoring the fermentation rate is a crucial step in the brewing process, allowing you to estimate when the fermentation process is complete. This technique is based on the principle that the specific gravity (gravity) of the wort (the sugary liquid extracted from malted grains) decreases as yeast consumes sugars and alcohol is produced. By regularly measuring the gravity of the wort, you can track the progress of fermentation and make informed decisions about when to bottle or keg your beer.
The process begins with an initial gravity reading, which is the specific gravity of the wort before fermentation starts. This initial gravity is typically higher, around 1.040 to 1.060, depending on the style of beer you're brewing. As fermentation progresses, the yeast consumes the sugars, and the gravity of the wort gradually decreases. The rate at which this gravity change occurs is what you're monitoring.
To check the fermentation rate, you'll need to take multiple gravity readings over time. It's recommended to take these readings at regular intervals, such as every 12-24 hours, depending on the yeast strain and the beer style. Record the gravity value each time you take a measurement. The goal is to observe a consistent and steady decrease in gravity, indicating active fermentation.
When the gravity readings start to stabilize and the decrease in gravity becomes minimal, it's a strong indicator that fermentation is nearing completion. At this point, you can safely assume that the yeast has consumed most of the available sugars, and the beer is ready for packaging. However, it's important to note that some yeast strains may take longer to complete fermentation, so monitoring the rate of gravity change is essential to ensure the beer's quality.
Additionally, monitoring fermentation rate can help you identify potential issues. If the gravity readings are not decreasing as expected, it could indicate a problem with the yeast, such as an infection or a lack of nutrients. Conversely, if the gravity drops too quickly, it might suggest an over-fermentation or the presence of wild yeast. By keeping a close eye on the fermentation rate, you can take corrective actions and ensure a successful brew.
The Tasty Pickles-Beer Duo: A Cultural Culinary Mystery
You may want to see also
![]()
Alcohol Content: Calculate the final alcohol content based on the initial and final gravity readings
To determine the final alcohol content of your beer, you can use the concept of specific gravity, which is essentially the ratio of the density of the beer to the density of water. This measurement is often referred to as 'gravity' in the brewing world. The initial gravity (SG_initial) is measured before fermentation begins, and the final gravity (SG_final) is measured after fermentation is complete. By calculating the difference between these two gravity readings, you can estimate the alcohol by volume (ABV) of your beer.
The formula to calculate the alcohol content is as follows:
ABV = (SG_initial - SG_final) * 131
Here's a step-by-step guide to help you with this calculation:
- Take the initial gravity reading of your beer before fermentation. This can be done using a hydrometer or a digital refractometer. Record this value as SG_initial.
- After fermentation is complete, take the final gravity reading. Again, use a hydrometer or refractometer to measure the specific gravity of the beer at this stage. Record this value as SG_final.
- Subtract the final gravity from the initial gravity: SG_initial - SG_final. This calculation will give you the gravity change during fermentation.
- Multiply the gravity change by 131. This factor is used because the specific gravity of water is 1.000, and the formula for alcohol by volume is derived from this base. The result will be the estimated alcohol content in percentage.
For example, if your initial gravity is 1.050 and the final gravity is 1.010, the calculation would be:
1.050 - 1.010) * 131 = 4.0% ABV
This means your beer has approximately 4.0% alcohol by volume. Remember that this is an estimate, and actual alcohol content can vary due to factors like yeast activity, temperature, and other brewing variables. It's a useful tool to help you understand the progress of your fermentation and the potential alcohol strength of your beer.
Unraveling the Magic: A Deep Dive into Beer Fermentation
You may want to see also
Frequently asked questions
Measuring the specific gravity (or density) of your beer is a common practice to monitor fermentation. You can use a hydrometer, which is a floating measuring tool, to check the gravity. Before fermentation, take a sample of your wort (the sugary liquid before fermentation) and measure its specific gravity. This initial reading is known as the original gravity (OG). As fermentation progresses, take regular samples and measure the specific gravity again. The final gravity (FG) will be lower than the OG, indicating the completion of fermentation.
Gravity measurements are essential for several reasons. Firstly, they help you understand the fermentation process and ensure it is proceeding as expected. If the gravity readings remain consistently high, it may indicate an issue with fermentation, such as a slow or stuck fermentation. Secondly, gravity measurements allow you to calculate the alcohol by volume (ABV) of your beer. The difference between the original and final gravity is used to estimate the alcohol content, which is crucial for recipe adjustments and achieving the desired flavor profile.
Yes, there are a few tips to ensure accurate results. Firstly, always take measurements at the same temperature as the fermentation vessel to avoid temperature-related variations. Secondly, ensure the hydrometer is clean and free of any residue before each measurement. Contaminants can affect the reading. Finally, take multiple samples at different times to get a comprehensive understanding of the fermentation curve. This will help you identify any anomalies and make informed decisions about the brewing process.