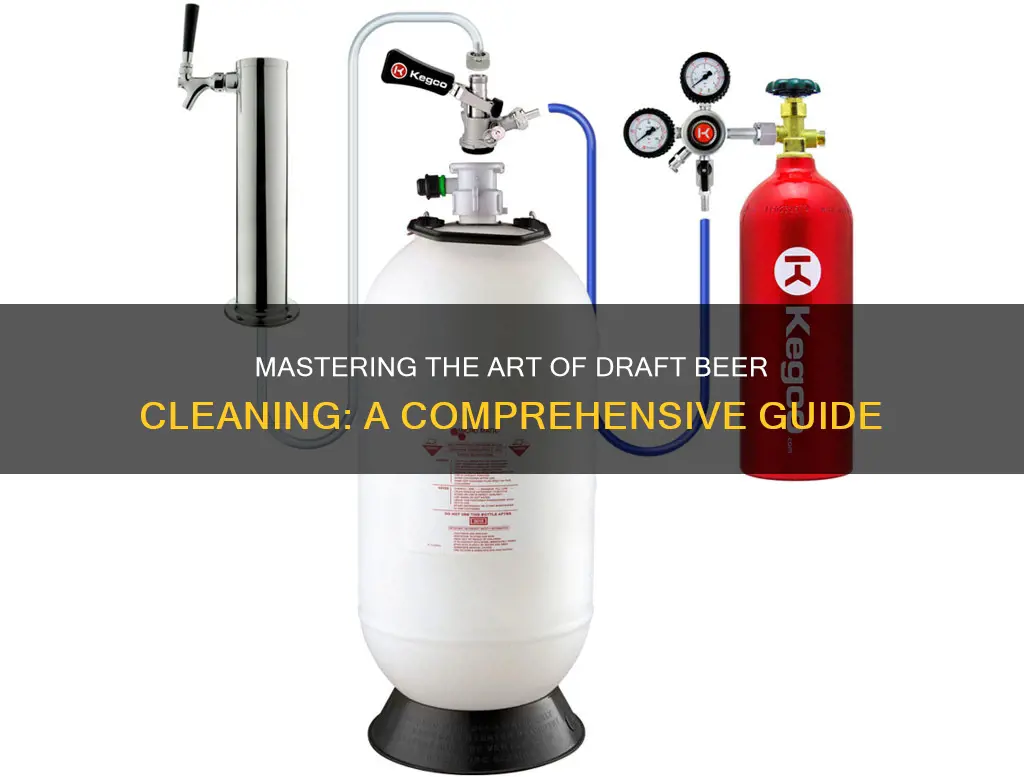
Maintaining a clean draft beer system is crucial for ensuring the best possible taste and quality of your beer. Over time, dirt, yeast, and bacteria can accumulate in the lines and taps, leading to off-flavors and a less-than-perfect drinking experience. This guide will provide a step-by-step process to effectively clean your draft beer system, covering everything from preparing the necessary supplies to the final rinse, ensuring your beer remains fresh and flavorful.
| Characteristics | Values |
|---|---|
| Cleaning Frequency | Every 1-2 weeks or after each major event (e.g., a large party) |
| Cleaning Method | Using a dedicated beer line cleaner, a mixture of warm water and a cleaning solution, or a beer line brush |
| Water Temperature | Warm water (around 100°F or 38°C) is ideal for cleaning |
| Cleaning Solution | Beer line cleaner or a mixture of warm water and a cleaning solution (e.g., 1/2 cup of bleach per 5 gallons of water) |
| Cleaning Process | 1. Rinse the beer lines with warm water. 2. Apply the cleaning solution and let it sit for a few minutes. 3. Use a beer line brush to scrub the lines. 4. Rinse the lines thoroughly with warm water. 5. Dry the lines and store them properly. |
| Preventative Measures | Regularly check for clogs and deposits, use a beer line conditioner, and store beer lines properly to prevent contamination |
| Tools Required | Beer line cleaner, beer line brush, warm water, cleaning solution, and a bucket or sink |
| Safety Precautions | Wear gloves and ensure proper ventilation when using cleaning chemicals |
| Environmental Impact | Use eco-friendly cleaning solutions and dispose of waste properly |
| Cost | Cleaning supplies can be purchased at a reasonable cost, and regular maintenance can prevent more expensive repairs |
What You'll Learn
- Sanitize the System: Use a sanitizing solution to kill bacteria and prevent contamination
- Clean the Kegerator: Regularly clean the kegerator to maintain temperature and humidity
- Filter Maintenance: Change filters regularly to prevent sediment and debris buildup
- Check for Leaks: Inspect for any leaks and address them promptly
- Disassemble and Clean: Disassemble components and clean thoroughly with a mild detergent
![]()
Sanitize the System: Use a sanitizing solution to kill bacteria and prevent contamination
Sanitizing your draft beer system is a crucial step in maintaining the quality and freshness of your beer. It's an essential process to ensure that bacteria and other contaminants don't ruin the taste of your brew. Here's a detailed guide on how to sanitize your system effectively:
Understanding the Importance of Sanitization: Before diving into the process, it's essential to understand why sanitization is necessary. Draft beer systems, especially those used in home breweries or bars, are susceptible to bacterial growth. Bacteria can thrive in the warm, moist environment of the system, leading to off-flavors, odors, and even potential health hazards. Regular sanitization helps eliminate these bacteria, ensuring that every pour delivers a clean, crisp beer.
Choosing the Right Sanitizing Solution: There are various sanitizing agents available, each with its own advantages. Chlorine-based sanitizers, such as chlorine tablets or liquid bleach, are commonly used and are effective at killing a wide range of bacteria. However, they can be harsh and may leave a residual taste in the beer. Quaternary ammonium compounds (QUATS) are another popular choice, offering a more gentle approach with long-lasting effects. These solutions are typically used in combination with a cleaner to ensure a thorough sanitization process.
Pre-Sanitization Preparation: Before sanitizing, ensure that all parts of the draft beer system are accessible and easily reachable. This includes the kegerator, beer lines, faucets, and any other components. Rinse the system with hot water to remove any loose particles or debris. This step is crucial as it prevents the sanitizing solution from reacting with these particles, which could lead to unwanted byproducts.
Sanitizing Process: Fill the system with the chosen sanitizing solution, following the manufacturer's instructions for the correct dosage. Typically, you'll want to fill the system to the point where the beer line begins. Let the solution sit for the recommended time, usually around 30 minutes to an hour. This allows the sanitizer to penetrate and kill the bacteria effectively. After the specified time, drain the solution and rinse the system thoroughly with hot water to remove any residual sanitizer.
Post-Sanitization Steps: After sanitization, it's essential to prime and purge the system to ensure the beer flows freely and is not contaminated. Prime the system by adding a small amount of beer to the kegerator and running it through the line. This step helps to remove any remaining sanitizer and prepares the system for serving. Finally, purge the lines by running water through the faucets until you see a steady stream of clear beer.
By following these steps, you can effectively sanitize your draft beer system, ensuring that every beer poured is fresh, clean, and free from unwanted bacteria. Regular sanitization is a simple yet powerful way to maintain the quality of your craft beer experience.
Uncorking the Mystery: Does Ancient Fermented Beer Boost BAC?
You may want to see also
![]()
Clean the Kegerator: Regularly clean the kegerator to maintain temperature and humidity
Regular cleaning of your kegerator is essential to ensure the longevity of your draft beer system and to maintain the quality of your brew. Kegerators are designed to store and serve beer at the optimal temperature and humidity, and keeping them clean is crucial to preserving these conditions. Over time, dirt, grime, and bacteria can accumulate, leading to off-flavors, poor foam quality, and even potential health hazards.
Start by unplugging the kegerator or turning it off to ensure safety. Use a mild detergent or a specialized kegerator cleaner, and warm water to clean the interior. Pay close attention to the coils and the compressor area, as these parts can accumulate a lot of dust and debris. For the coils, you can use a soft brush or a compressed air canister to remove any built-up dirt. Remember to wipe down all surfaces, including the shelves and the door seals, to eliminate any bacteria that may have formed.
The exterior of the kegerator should also be cleaned regularly. Use a mild soap and water solution to wash the outer shell, and ensure you dry it thoroughly to prevent water spots. For the tap and the coupler, which come into direct contact with the beer, use a specialized cleaner designed for these parts. These areas require extra care to maintain hygiene and prevent any contamination.
Maintaining the right temperature and humidity is key to keeping your beer fresh. Use a thermometer and a hygrometer to monitor these levels regularly. Adjust the settings as needed to ensure the kegerator is set to the optimal temperature (usually around 35-40°F) and humidity (around 50-60%). This will help preserve the beer's flavor and carbonation.
By following these steps and making regular cleaning a habit, you'll ensure that your kegerator remains in top condition, providing you with the best possible draft beer experience. It's a simple yet crucial aspect of beer appreciation and will undoubtedly enhance your overall enjoyment of the beverage.
Unraveling the Mystery: Is Fermented Malt Beverage (FMB) a Beer?
You may want to see also
![]()
Filter Maintenance: Change filters regularly to prevent sediment and debris buildup
Maintaining a clean draft beer system is crucial to ensuring the best possible taste and quality of your beer. One of the most important aspects of this maintenance is filter maintenance. Regularly changing filters is essential to prevent sediment and debris buildup, which can negatively impact the taste and flow of your beer. Here's a detailed guide on how to approach filter maintenance:
Understanding the Importance of Filter Maintenance:
Filters play a critical role in the draft beer system by trapping sediment, yeast, and other particles that could otherwise enter the beer line and affect its quality. Over time, these filters can become clogged with debris, leading to reduced beer flow, off-flavors, and even clogs that may require a complete system flush. Regular filter changes are a simple yet effective way to keep your draft beer system in top shape.
Frequency of Filter Changes:
The frequency of filter changes depends on several factors, including the type of beer you serve, the water quality in your area, and the volume of beer dispensed. As a general rule, it's recommended to change filters every 2-4 weeks. However, if you notice any signs of sediment or debris buildup, such as cloudy beer or reduced flow, it's best to change the filters immediately. Regularly monitoring the filters and cleaning them when necessary will help you maintain a consistent and high-quality beer experience.
Steps to Change Filters:
- Turn Off the Beer: Before you begin, ensure that the beer tap is turned off and the system is completely drained of beer to avoid any spills or mess.
- Locate the Filters: Identify the filters in your draft beer system. These are typically located near the beer line, often in a filter housing or a dedicated filter changer.
- Remove the Old Filters: Carefully remove the old filters, taking note of their position and orientation. You may need to use a filter wrench or a similar tool to unscrew or release the filters.
- Inspect and Clean: Examine the filters for any signs of sediment or debris buildup. Rinse the filters with warm water to remove any loose particles. For more stubborn buildup, you can use a mild detergent or a specialized beer line cleaner, following the manufacturer's instructions.
- Install New Filters: Once the old filters are clean or replaced, carefully insert the new filters into their designated positions. Ensure they are properly seated and secured.
- Test the System: After replacing the filters, turn on the beer tap and check for any leaks or unusual sounds. If everything is functioning correctly, your draft beer system is ready for use.
Additional Tips for Optimal Performance:
- Always use high-quality filters designed for draft beer systems to ensure the best filtration.
- Keep a record of filter changes and any issues encountered to identify patterns and potential problems.
- Regularly clean the beer lines and dispense valves to further enhance the system's cleanliness.
- Consider using a beer line sanitizer to prevent the growth of bacteria and maintain the purity of your beer.
By following these steps and maintaining a regular filter change schedule, you can ensure that your draft beer system provides a consistent and enjoyable drinking experience, with beer that tastes fresh and delicious every time.
Unraveling the Mystery: Signs Your Beer Needs More Fermentation
You may want to see also
![]()
Check for Leaks: Inspect for any leaks and address them promptly
Checking for leaks in a draft beer system is an essential step in the cleaning and maintenance process. Leaks can occur at various points in the system, including the taps, lines, and connections, and they can lead to a variety of issues, from wasted beer to potential health and safety hazards. Here's a detailed guide on how to inspect for and address leaks:
Inspecting for Leaks:
- Start by visually examining all the components of the draft beer system. Look for any signs of moisture or water accumulation around the taps, especially in the areas where the beer lines connect. Moisture could indicate a leak.
- Check the beer lines for any visible damage, such as punctures, tears, or kinks. These issues can cause air leaks and may also lead to water seeping into the lines.
- Examine the connections between different parts of the system. Tighten any loose connections and ensure that all fittings are secure. Over time, connections can become loose due to vibration and movement, leading to potential leaks.
- Pay close attention to the faucets and taps. Check for any signs of corrosion or damage around the spouts and handles. Even a small crack or hole can cause a significant leak.
- Use a wet cloth or paper towel to wipe the exterior of the beer lines and taps. If you notice any wet spots, it could indicate a hidden leak.
Addressing Leaks:
- If you find any leaks, it's crucial to act promptly. Start by turning off the beer supply at the source. This could be the keg tap or the main supply valve, depending on your setup.
- For minor leaks, you might be able to fix them temporarily by tightening connections or applying a small amount of plumber's tape or pipe compound. However, for more significant issues, it's best to consult a professional or replace the affected parts.
- In cases of persistent or major leaks, it is advisable to seek professional assistance. They can identify the root cause and ensure the system is safe and functional.
- Regularly scheduled maintenance checks are essential to prevent leaks. This includes tightening connections, replacing worn-out parts, and ensuring that all components are properly lubricated.
Remember, prompt action is key when dealing with leaks. Ignoring leaks can lead to more extensive damage and potential health risks. By regularly inspecting your draft beer system and addressing any leaks, you can ensure a consistent and enjoyable beer-drinking experience while also maintaining the system's longevity.
Lager vs. Stout: Unraveling the Beer Style Mystery
You may want to see also
![]()
Disassemble and Clean: Disassemble components and clean thoroughly with a mild detergent
Disassembling and cleaning your draft beer system is a crucial step in maintaining the quality and consistency of your beer. This process ensures that your system is free from any contaminants that could affect the taste and aroma of your brew. Here's a step-by-step guide on how to effectively disassemble and clean your draft beer system:
Step 1: Gather the Necessary Tools and Materials
Before you begin, ensure you have all the required tools and cleaning supplies. You will need a mild detergent specifically designed for food-grade applications, as these are safe for beer contact. Common choices include dish soap or specialized beer cleaning agents. Additionally, have a clean cloth or rag, a soft-bristled brush, and a bucket or large container for cleaning.
Step 2: Turn Off the Beer System and Drain the Line
Safety is paramount. Start by turning off the power or gas supply to your draft beer system to prevent any accidents. Then, open the tap and drain the beer line to remove any residual liquid. This step is essential to avoid mixing cleaning agents with the beer.
Step 3: Disassemble the Components
Carefully disassemble the draft beer system according to the manufacturer's instructions. This typically involves unscrewing or unclipping various parts such as the tap, beer line, carbonator (if applicable), and any other modular components. Keep track of the different parts and their corresponding positions to ensure proper reassembly later.
Step 4: Clean Each Component Thoroughly
Now, it's time to give each part a deep clean:
- Tap: Remove the tap and use the soft-bristled brush to scrub away any residue or buildup. Pay attention to the spout and any crevices where dirt might accumulate.
- Beer Line: Soak the beer line in the mild detergent solution for a few minutes, then rinse it thoroughly with warm water. Ensure no detergent residue remains.
- Carbonator: If your system includes a carbonator, disassemble it and clean each part separately. Use the brush to remove any deposits and rinse well.
- Other Components: Depending on your system's design, clean other parts like valves, filters, and storage tanks.
Step 5: Rinse and Dry
After cleaning, rinse each component with warm water to remove any detergent residue. Ensure no soap remains, as it can leave a bitter taste in the beer. Once rinsed, dry all parts thoroughly to prevent water spots and maintain hygiene.
Step 6: Reassemble and Test
Carefully reassemble the system, ensuring all parts are correctly aligned and secured. Test the system by running water through the line and checking for any leaks. If everything is in order, your draft beer system is now ready for use, delivering fresh, clean beer to your customers or home brew enthusiasts.
Mastering the Art of Cleaning 1-Micron Beer Filters: A Comprehensive Guide
You may want to see also
Frequently asked questions
Regular cleaning is essential to maintain the quality of your draft beer. It is recommended to clean your system every 2-4 weeks, or more frequently if you use it daily. The frequency may vary depending on the usage, water quality, and the type of beer you serve.
The most effective way to clean draft beer lines is by using a cleaning solution specifically designed for beer systems. You can use a combination of hot water and a cleaning agent, such as a beer line cleaner or a mixture of bleach and water. Start from the tap and work your way up the line, ensuring you clean all areas, including the faucet and the tap handle.
No, it is not recommended to use a dishwasher for cleaning draft beer systems. Dishwashers may not be able to reach all the nooks and crannies of the system, and the high temperatures can damage the beer lines and faucets. Instead, use a dedicated cleaning method and tools designed for beer equipment.
Cleaning the kegerator and dispense tube is crucial to prevent off-flavors and maintain beer quality. Use a cleaning solution and a brush to scrub the inside of the kegerator, including the walls and the door gasket. For the dispense tube, run a cleaning solution through it, ensuring it reaches all areas. Regularly descale the kegerator to remove any mineral deposits.