Fermenting beer is an art that requires precision and attention to detail, especially when it comes to temperature control. The process of fermentation is a delicate balance of science and tradition, and maintaining the right temperature is crucial for achieving the desired flavor and character in your beer. In this guide, we'll explore the techniques and tips for fermenting beer at the optimal temperature, ensuring a successful and flavorful brew.
What You'll Learn
- Ingredient Selection: Choose malt, hops, and yeast for fermentation
- Sanitation: Maintain a clean brewing environment to prevent contamination
- Temperature Control: Use a fermentation thermometer and a cooling system
- Fermentation Process: Monitor the fermentation schedule and adjust as needed
- Carbonation: Add sugar to the beer for natural carbonation
![]()
Ingredient Selection: Choose malt, hops, and yeast for fermentation
When it comes to brewing beer, the selection of ingredients is a crucial step that can significantly impact the final product's flavor, aroma, and overall quality. Here's a detailed guide on choosing the right malt, hops, and yeast for fermentation:
Malt: The malt is the foundation of your beer and primarily contributes to the sugar content, which is essential for fermentation. Different types of malt offer various flavors and characteristics. For a classic, crisp lager, consider using a combination of pilsner malt and a small amount of caramel malt for color and body. Pilsner malt provides a clean, crisp flavor, while caramel malt adds a subtle sweetness and color. For a more robust and complex beer, such as a dark ale, choose a mix of caramel malt, roasted barley, and chocolate malt. Caramel malt and roasted barley provide a rich, toasty character, while chocolate malt adds a smooth, slightly sweet note. Remember, the malt bill is a crucial factor in determining the beer's color, body, and overall taste profile.
Hops: Hops are essential for adding bitterness, flavor, and aroma to the beer. They also contribute to the beer's stability and act as a natural preservative. When selecting hops, consider the desired bitterness level and the specific hop varieties that complement your malt choice. Bittering hops are typically used during the early stages of the boil to contribute to the beer's bitterness. Popular choices include Cascade, Citra, and Mosaic hops. These varieties offer a range of bittering qualities and unique aromas. Aromatic or flavor hops are added later in the boil or during the whirlpool to provide more subtle, complex flavors and aromas. Examples include Citra, Mosaic, and Galaxy hops. Experimenting with different hop combinations can create unique and exciting beer profiles.
Yeast: Yeast is the microorganism responsible for fermentation, converting the sugars derived from malt into alcohol and carbon dioxide. The choice of yeast significantly influences the beer's flavor, aroma, and overall character. For lagers, a bottom-fermenting yeast like Saccharomyces pastorianus is commonly used, producing a clean, crisp flavor. For ales, top-fermenting yeasts such as Saccharomyces cerevisiae or Brettanomyces are popular. These yeasts offer a wide range of flavor profiles, from fruity and estery to dry and spicy. For example, Belgian yeasts like Wyeast 3522 or White Labs WLP657 produce fruity, spicy notes, while British ale yeasts like Wyeast 2067 or White Labs WLP001 provide a more neutral, balanced flavor.
In summary, ingredient selection is a critical aspect of brewing, allowing you to create beers with unique and desirable characteristics. Experimenting with different malt, hop, and yeast combinations can lead to the discovery of your perfect beer recipe. Remember, the art of brewing is both a science and a creative process, and these ingredients are the building blocks of your craft.
The Magic of Beer in Carne Asada: Unlocking Flavor Secrets
You may want to see also
![]()
Sanitation: Maintain a clean brewing environment to prevent contamination
Sanitation is a critical aspect of brewing beer, as it directly impacts the quality and safety of your final product. Maintaining a clean and sterile environment is essential to prevent contamination, which can lead to off-flavors, unpleasant aromas, and even spoilage. Here's a detailed guide on how to ensure proper sanitation during the beer-making process:
- Cleanliness Throughout the Process: Start by keeping your entire brewing area clean. This includes the brewing equipment, utensils, and even your hands. Before beginning the brewing process, give all surfaces a thorough wipe-down with a disinfectant solution. This is especially important if you've been working on other projects or tasks that might have introduced contaminants. Regular cleaning routines will help establish a habit of maintaining a sterile environment.
- Equipment Sterilization: Beer fermentation requires specific equipment, such as fermenters, carboys, and airlocks. Sterilize these containers using a process called autoclaving, which involves heating the equipment under pressure to kill all microorganisms. Alternatively, you can use a chemical sterilant specifically designed for food-grade applications. Ensure that all surfaces, including the inside of the containers, are thoroughly cleaned and sterilized to prevent any microbial growth.
- Water Quality: The water you use in brewing is another critical factor in sanitation. Hard water can leave mineral deposits, which may attract bacteria. Always use filtered or distilled water for brewing to ensure it is free from contaminants. Regularly test your water to monitor its quality and adjust your brewing process accordingly.
- Sanitary Practices: Implement strict personal hygiene practices. Wash your hands thoroughly with soap and warm water before handling any brewing equipment or ingredients. Avoid touching surfaces that will come into contact with the beer, and use disposable gloves if you prefer. Maintain a clean and organized workspace to minimize the risk of cross-contamination.
- Regular Cleaning and Disinfection: Establish a routine for regular cleaning and disinfection. After each brewing session, clean and sanitize all equipment and surfaces. This includes rinsing with hot water to remove any residual beer or ingredients, followed by a thorough disinfection using an appropriate sanitizing agent. This practice ensures that any potential contaminants are eliminated, especially in areas that are prone to bacterial growth, such as the tap or spigot of your fermenter.
- Temperature Control: Proper temperature control is essential for fermentation. Use a reliable thermometer to monitor the temperature of your wort and beer. Maintain a consistent temperature within the desired range for your specific beer style. Fluctuations in temperature can affect yeast activity and the overall fermentation process, potentially leading to contamination. Consider using a temperature-controlled fermentation chamber or a reliable cooling system to sustain the optimal temperature.
By adhering to these sanitation practices, you can create a clean and controlled environment, reducing the risk of contamination and ensuring a successful beer fermentation. Remember, proper sanitation is a cornerstone of brewing, contributing to the quality and consistency of your craft beer.
Chili Without Beer: Creative Alternatives for a Flavorful Dish
You may want to see also
![]()
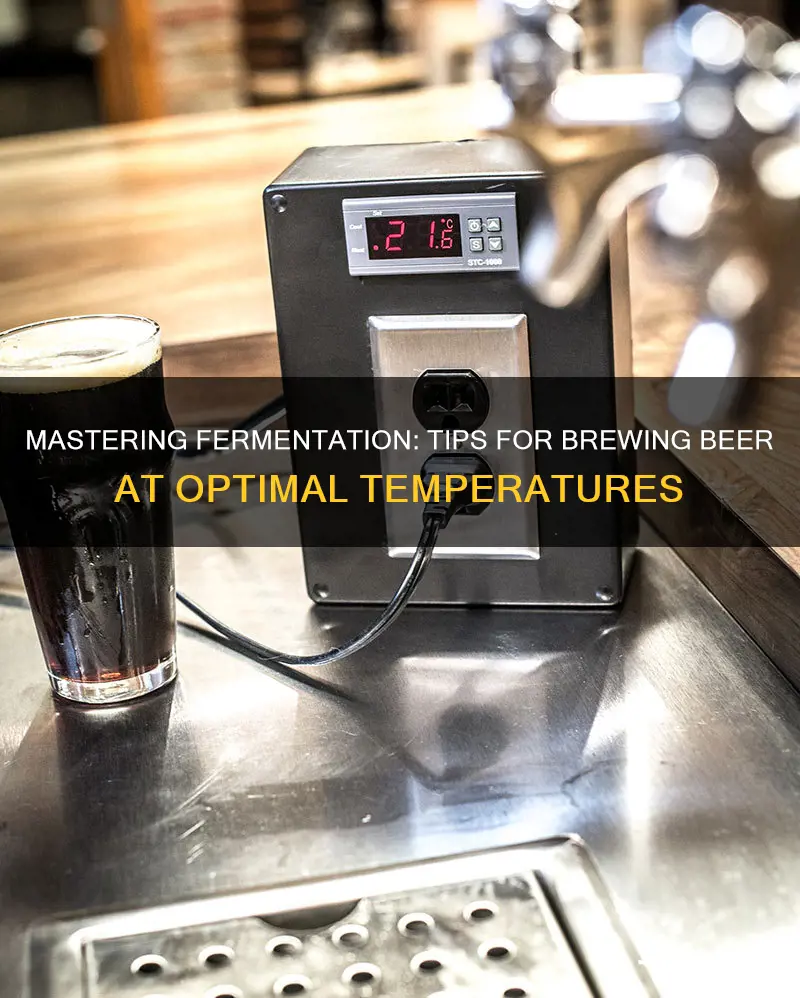
Temperature Control: Use a fermentation thermometer and a cooling system
When it comes to brewing beer, temperature control is crucial, especially during the fermentation process. Accurate temperature management can significantly impact the flavor, clarity, and overall quality of your beer. One essential tool for achieving this is a fermentation thermometer, which allows you to monitor the temperature of your wort (the sugary liquid extracted from malted grains) throughout fermentation. This is a critical step as it ensures that the yeast works optimally, producing the desired flavors and aromas.
A fermentation thermometer is designed to measure the temperature inside your fermentation vessel, typically a brew pot or a carboy. It provides real-time data, allowing you to make immediate adjustments if the temperature deviates from the target range. This is particularly important because yeast, the microorganism responsible for fermentation, is highly sensitive to temperature changes. Even slight variations can affect the fermentation rate and the final beer's character.
To maintain the ideal temperature, you'll need a cooling system. This could be as simple as an ice bath or as sophisticated as a dedicated brewing chiller. The choice depends on your brewing setup and the scale of your operation. For small-batch brewing, an ice bath is often sufficient. You can place the fermentation vessel in a bucket of ice or wrap it with ice-filled bags to rapidly cool the wort. This method is effective for quick temperature drops but may not provide precise control.
For more precise temperature control, especially in larger-scale brewing, a dedicated cooling system is recommended. These systems typically consist of a chiller, a heat exchanger, and a circulation pump. The chiller lowers the temperature of the water, which is then used to cool the wort. Heat exchangers transfer heat from the wort to the cooling water, ensuring efficient heat exchange. Circulation pumps maintain a consistent flow of water, preventing the wort from overheating.
Using a fermentation thermometer in conjunction with a cooling system allows you to fine-tune the temperature during fermentation. You can set the desired temperature and use the thermometer to monitor it, making adjustments as needed. This level of control is essential for producing consistent and high-quality beer. Remember, the goal is to create an environment where the yeast can work efficiently, converting sugars into alcohol and carbon dioxide without compromising the beer's flavor profile.
Brewing Basics: Adding Hops for Flavor and Aroma
You may want to see also
![]()
Fermentation Process: Monitor the fermentation schedule and adjust as needed
The fermentation process is a critical phase in brewing beer, and monitoring the schedule is essential to ensure a successful outcome. Here's a detailed guide on how to keep a close eye on the fermentation process and make necessary adjustments:
Understanding the Fermentation Schedule: Begin by familiarizing yourself with the typical fermentation schedule for the style of beer you are brewing. Different beer styles have varying fermentation times, which can range from a few days to several weeks. For instance, a light lager might ferment in 7-10 days, while a rich, dark ale could take 2-3 weeks. Understanding this schedule is the foundation of your monitoring process.
Signs of Active Fermentation: Active fermentation is indicated by a few key signs. Firstly, the yeast will start to consume sugars and produce alcohol and carbon dioxide. This can be observed through the beer's appearance, which may become slightly hazy due to yeast settling. Additionally, the beer's temperature will rise as the yeast becomes more active, typically to a range of 65-75°F (18-24°C). Monitoring these signs will help you determine when fermentation has begun.
Temperature Control: Maintaining a consistent temperature is crucial during fermentation. Use a reliable thermometer to monitor the beer's temperature regularly. If the temperature deviates significantly from the desired range, take corrective action. For example, if the temperature is too low, you can warm the fermenter gently, ensuring not to exceed the optimal range. Conversely, if it's too warm, consider using a cooler or moving the fermenter to a cooler area.
Adjusting the Fermentation Schedule: As you monitor the fermentation, you may need to make adjustments to ensure a clean and efficient process. If fermentation slows down significantly, consider adding more yeast or using a different strain. This can help revive the process. Additionally, keep an eye on the beer's clarity. If it becomes too cloudy, consider filtering or using a yeast-catching device to prevent unwanted sediment in the final product.
Final Stages and Bottling: As fermentation nears its end, the beer will become clearer, and the yeast will settle. This is the time to prepare for bottling or kegging. Ensure that the beer is properly carbonated and conditioned before packaging. Regularly check the fermentation vessel's airlock to prevent the buildup of pressure and potential overflow.
Monitoring the fermentation schedule and making adjustments as needed are essential skills for any home brewer. It ensures that your beer ferments cleanly and efficiently, resulting in a high-quality final product. Remember, each batch may vary, so staying vigilant and making informed decisions will contribute to the success of your brewing endeavors.
Unraveling the Mystery: Does Beer Add Pounds?
You may want to see also
![]()
Carbonation: Add sugar to the beer for natural carbonation
Carbonation is a crucial step in the beer-making process, and it can be achieved through a natural process called fermentation. This method involves adding sugar to the beer, which then undergoes a chemical reaction, producing carbon dioxide and alcohol. The carbonation process is an essential part of the fermentation cycle, as it contributes to the beer's overall flavor, mouthfeel, and refreshment.
When preparing for carbonation, it's important to use the right type of sugar. The most commonly used sugar in beer fermentation is sucrose, also known as table sugar. This sugar is easily metabolized by yeast, which is the microorganism responsible for fermentation. During the fermentation process, yeast consumes the sugar and converts it into alcohol and carbon dioxide. The amount of sugar added is crucial; too little may not produce enough carbonation, while too much can lead to an overly sweet beer. A typical ratio is to add 1-2 tablespoons of sugar per liter of beer, but this can vary depending on the style and desired carbonation level.
The carbonation process begins after the beer has been fermented. It is essential to keep the beer at the right temperature during this stage. Yeast continues to work on the residual sugars, producing more carbon dioxide. The beer is then left to mature, allowing the carbonation to develop naturally. This method is known as natural carbonation and is a common practice in craft brewing. The temperature at which the beer is stored during this period is critical. Warmer temperatures can speed up the carbonation process, but they may also cause the beer to become too carbonated, leading to a sharp, biting sensation. Cooler temperatures, around 15-20°C (59-68°F), are ideal for slower, more controlled carbonation, resulting in a smoother, more balanced beer.
To sustain the desired temperature, you can use a fermentation fridge or a dedicated beer cooler. These appliances are designed to maintain a consistent temperature, ensuring the beer ferments and carbonates optimally. It's important to monitor the temperature regularly and adjust as needed. After the fermentation process, the beer is ready for carbonation. The natural carbonation process can take several days to a week, depending on the temperature and the yeast's activity.
In summary, adding sugar to the beer is a simple yet effective way to achieve natural carbonation. By using the right type of sugar and maintaining the appropriate temperature, brewers can create a delicious, naturally carbonated beer. This method is a cornerstone of traditional brewing and is favored by many craft brewers for its simplicity and the unique character it imparts to the final product.
Uncorking the Magic: Exploring Beer Fermentation Times
You may want to see also
Frequently asked questions
Beer fermentation is the process of converting sugars derived from grains into alcohol and carbon dioxide. Yeast plays a crucial role in this process, and it thrives within a specific temperature range. Temperature control is essential because it directly impacts the fermentation rate and the quality of the beer. Yeast fermentation slows down significantly at lower temperatures, leading to longer fermentation times and potentially off-flavors. Conversely, higher temperatures can cause the yeast to become inactive or even die, resulting in a stuck fermentation or a flat beer.
Creating a controlled environment for fermentation is key to successful beer-making. You can use a fermentation chamber or a dedicated brewing fridge/freezer to maintain a stable temperature. Start by cooling your brewing water to the desired fermentation temperature, typically around 65-75°F (18-24°C). Then, transfer your fermented wort (the sugary liquid after mashing) into a sanitized fermenter. Insulate the fermenter with a foam or bubble wrap to minimize heat loss. Consider using a fermentation lock to allow carbon dioxide to escape while keeping oxygen out. Regularly monitor the temperature and adjust as needed to maintain the desired set point.
Inconsistent temperature control during fermentation can lead to several problems. One common issue is a slow or stuck fermentation, where the yeast becomes inactive or dies due to extreme temperatures. This can result in a flat beer or one with off-flavors. Another potential problem is the growth of wild yeast or bacteria, which can be encouraged by temperature fluctuations, leading to a 'wild' or 'brett' flavor profile, which may or may not be desired. Inconsistent temperatures can also affect the clarity of the beer, as temperature variations can cause different proteins and solids to precipitate out of the wort.
Yes, several tools and techniques can assist in temperature management. Using a fermentation thermometer is essential to monitor the temperature accurately. You can employ a fermentation lock, which allows carbon dioxide to escape while maintaining an oxygen-free environment, promoting healthy yeast activity. Additionally, consider using a temperature-controlled brewing system or a dedicated brewing fridge, which can maintain a consistent temperature throughout the fermentation process. For larger batches, a heat exchanger or a temperature-controlled recirculating chiller can be used to precisely control the wort temperature during the brewing process.