Wild fermentation is an art that can transform ordinary beer into a unique, complex, and captivating beverage. This process involves using wild yeast and bacteria, often found in the air, water, or previous batches, to create a spontaneous fermentation. It's a challenging but rewarding technique that can result in beers with distinct flavors, aromas, and textures. This guide will explore the basics of wild fermentation, including the necessary ingredients, equipment, and techniques to get you started on your wild beer journey.
What You'll Learn
- Selecting Yeast Strains: Choose wild yeast strains based on desired flavor profiles and fermentation temperatures
- Pre-fermentation Preparation: Sanitize equipment, prepare media, and maintain optimal temperature for yeast activation
- Fermentation Process: Monitor pH, temperature, and oxygen levels during fermentation to ensure successful beer production
- Aging and Conditioning: Age beer in barrels or tanks to develop complex flavors and smooth out harsh notes
- Bottling and Carbonation: Bottle beer, add priming sugar, and carbonate naturally for a refreshing, wild-fermented beer
![]()
Selecting Yeast Strains: Choose wild yeast strains based on desired flavor profiles and fermentation temperatures
When embarking on a wild beer fermentation journey, selecting the right yeast strains is crucial to achieving the desired flavor profiles and overall character of your brew. Wild yeasts, often associated with natural, spontaneous fermentation, can bring unique and complex flavors to your beer, but they require careful consideration and understanding of their characteristics. Here's a guide to help you choose the yeast strains that will shape your wild beer:
Understanding Flavor Profiles: Wild yeasts are known for their ability to produce distinct and often fruity, spicy, or estery flavors. Some strains are renowned for their contribution to specific beer styles. For instance, the *Brettanomyces* genus is famous for its role in producing Belgian farmhouse ales, offering flavors of banana, clove, and a distinct earthy character. On the other hand, *Lactobacillus* strains are responsible for the sour notes in certain styles, creating a refreshing and tangy beer. Researching and understanding these flavor profiles will help you select yeasts that align with your desired beer style.
Fermentation Temperatures: Different yeast strains have optimal temperature ranges for fermentation. Wild yeasts, being naturally occurring, often thrive in warmer conditions compared to traditional ale yeasts. For example, *Brettanomyces* species typically perform best in the 70-85°F (21-29°C) range, while *Lactobacillus* strains may prefer slightly lower temperatures around 68-77°F (20-25°C). It's essential to choose yeasts that can not only produce the desired flavors but also survive and ferment effectively within the temperature range you plan to use.
Experimentation and Regional Considerations: Wild beer fermentation is an art, and experimentation is key. Consider starting with commercially available wild yeast cultures or strains commonly used in the style you're aiming for. For instance, if you're making a Belgian-style ale, *Brettanomyces bruxellensis* or *Brettanomyces lambicus* could be excellent choices. Additionally, take into account the regional characteristics of your brewing environment. Local wild yeasts and bacteria can contribute unique flavors and may be more resilient to specific conditions, making your beer truly distinctive.
Hybrid Approaches: For those who want to combine the benefits of both wild and cultivated yeasts, hybrid approaches are possible. You can co-ferment with a selected yeast strain and then introduce wild yeasts to add complexity. This method allows for more control over the fermentation process while still incorporating the unique characteristics of wild fermentation.
In summary, selecting yeast strains for wild beer fermentation is a creative process that requires a deep understanding of the desired flavors and fermentation conditions. By carefully choosing yeasts based on their flavor profiles and temperature preferences, you can craft beers with remarkable complexity and character. Remember, wild fermentation is an art, and each brew will have its own unique story to tell.
Crafting a Beer Cap Map: A Guide to Organizing Your Collection
You may want to see also
![]()
Pre-fermentation Preparation: Sanitize equipment, prepare media, and maintain optimal temperature for yeast activation
Sanitizing your equipment is a critical step in the pre-fermentation process, as it ensures that no unwanted bacteria or wild yeast strains contaminate your beer. Start by thoroughly cleaning all surfaces that will come into contact with the beer, including fermenters, carboys, pipes, and bottles. Use a mild detergent and warm water to remove any residual sugars or proteins, then rinse thoroughly to eliminate any soap residue. For an extra layer of protection, consider using a food-grade disinfectant, such as iodine or a quaternary ammonium compound (QUAT), to sanitize the equipment. Pay close attention to nooks and crannies, as these areas can harbor bacteria. Allow the equipment to air dry completely before proceeding.
The next step is to prepare your media, which will provide the necessary nutrients for the yeast to thrive and produce the desired flavors. For a wild fermentation, you might use a simple sugar syrup or a pre-made media blend. Dissolve a specific amount of sugar (e.g., 100 grams of dextrose or maltose) in a liter of water, then add a pinch of yeast nutrients, such as vitamin B or trace minerals. This mixture will serve as the initial food source for the yeast. Ensure that the media is at room temperature or slightly warm, as this will help activate the yeast more quickly.
Maintaining the optimal temperature for yeast activation is crucial. Different yeast strains have specific temperature requirements, but generally, a range of 20-25°C (68-77°F) is ideal for wild yeast fermentation. Yeast that is too cold may become dormant, while too warm can lead to rapid, uncontrolled fermentation. Place your yeast starter or media in a warm location, such as an incubator or a sunny windowsill, to bring it to the desired temperature. Once the temperature is optimal, transfer the yeast-rich media to your fermenter, ensuring that you do not disturb the yeast too much.
Additionally, consider using a yeast starter to provide a head start for your fermentation process. A yeast starter is a small batch of beer that is fermented in advance, allowing the yeast to multiply and become more active. This can be especially useful for wild yeast strains, which may take longer to activate. To make a yeast starter, simply transfer a small amount of the prepared media to a small fermenter, add a small amount of yeast, and let it ferment for a few days. This will give you a healthy population of yeast ready for your main fermentation. Remember to monitor the starter's progress and adjust the temperature as needed to keep the yeast happy and active.
The Art of Fermentation: Brewing Beer's Magic
You may want to see also
![]()
Fermentation Process: Monitor pH, temperature, and oxygen levels during fermentation to ensure successful beer production
The fermentation process is a critical phase in brewing, especially when employing wild yeast strains, as it directly influences the beer's flavor, aroma, and overall quality. Monitoring pH, temperature, and oxygen levels is essential to ensure a successful fermentation and a well-crafted beer. Here's a detailed guide on how to approach this:
PH Management:
PH level is a crucial factor in fermentation, as it affects yeast activity and the overall beer profile. Wild yeast strains often require a more acidic environment compared to traditional brewing yeasts. Aim for a pH range of 2.8 to 3.2, which is slightly more acidic than the typical beer pH of 3.0 to 4.5. You can adjust the pH by adding specific acids or bases during the brewing process. For instance, lactic acid can be added to lower the pH, creating a more favorable environment for wild yeast fermentation. Regularly testing the pH during fermentation allows you to make precise adjustments, ensuring the yeast remains active and healthy.
Temperature Control:
Temperature plays a pivotal role in fermentation, impacting yeast activity and the beer's overall character. Wild yeast fermentation often thrives in cooler temperatures, typically between 60-65°F (15-18°C). Maintaining this temperature range is crucial, as it encourages the desired wild yeast activity while preventing the growth of unwanted bacteria. Use a reliable fermentation thermometer and ensure your brewing setup is insulated to minimize temperature fluctuations. Regularly monitoring the temperature will help you make any necessary adjustments to keep the fermentation process on track.
Oxygen Management:
Oxygen is essential for yeast respiration, but excessive levels can lead to off-flavors and unwanted microbial growth. During wild yeast fermentation, it's best to keep oxygen levels low. This can be achieved by using an airlock on your fermenter, which allows carbon dioxide to escape while preventing oxygen from entering. Additionally, consider using a fermentation lock or a bung with a rubber gasket to further reduce oxygen exposure. Monitoring oxygen levels can be done by observing the airlock's activity and ensuring the yeast is actively consuming sugars and producing alcohol.
Throughout the fermentation process, it's vital to maintain a clean and sterile environment to prevent contamination. Regularly sanitize your equipment and be mindful of any potential sources of infection. By closely monitoring pH, temperature, and oxygen levels, you can ensure that your wild yeast fermentation proceeds smoothly, resulting in a unique and flavorful beer. Remember, each brewing session may present different challenges, so adaptability and attention to detail are key to success.
Mastering Beer Gravity: Electronic Testing Tips for Fermenters
You may want to see also
![]()
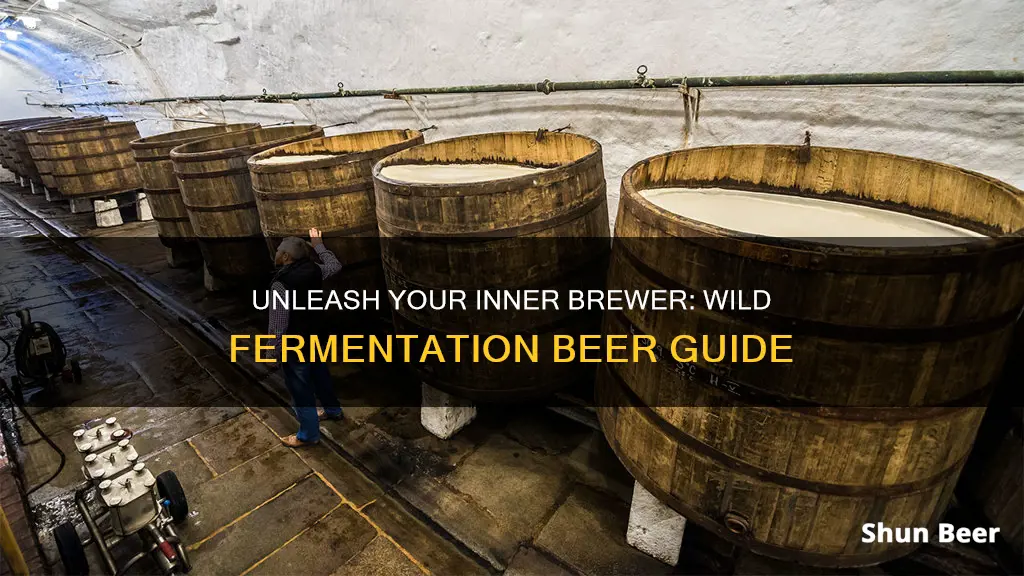
Aging and Conditioning: Age beer in barrels or tanks to develop complex flavors and smooth out harsh notes
Aging and conditioning beer is a crucial step in the fermentation process, especially when aiming to create unique and complex flavors. This technique involves allowing the beer to mature and develop over time, often in specialized containers like barrels or tanks. The extended aging period serves multiple purposes, primarily enhancing the beer's overall character and reducing any harsh or bitter notes that might be present after primary fermentation.
When you age beer, you're essentially giving it time to undergo a secondary fermentation, which can occur naturally or through careful intervention. During this stage, the beer's flavors become more nuanced and well-rounded. The process begins by transferring the beer from the primary fermentation vessel to a clean, sanitized aging container. This transfer ensures that the beer is free from any residual yeast or bacteria that might interfere with the aging process.
Barrels, particularly those made from oak, are a popular choice for aging beer. Oak imparts a unique character to the beer, adding subtle flavors of vanilla, spice, and a hint of smokiness. The porous nature of oak allows for the gradual absorption of flavors, which can result in a smoother, more complex beer. However, using barrels requires careful consideration of the beer style and the desired outcome. For instance, a strong, robust beer might benefit from the robust flavors of oak, while a lighter, more delicate beer could be enhanced by the subtler notes of oak aging.
Tanks, on the other hand, offer a more controlled environment for aging. They provide a larger surface area for the beer to come into contact with the air, facilitating the oxidation of flavors. This process can be carefully managed by controlling the temperature and oxygen exposure, allowing for the development of specific flavor profiles. Aging in tanks is particularly useful for experimenting with different beer styles and creating unique, signature flavors.
The duration of aging can vary significantly depending on the beer style and the desired outcome. Some beers might benefit from just a few weeks of aging, while others could benefit from several months or even years of maturation. During this time, the beer's flavors evolve, and the harsh, raw notes from primary fermentation are smoothed out. This process is an art, requiring careful monitoring and an understanding of the beer's unique characteristics to achieve the desired flavor profile.
Freezing Beer: What You Need to Know About the Results
You may want to see also
![]()
Bottling and Carbonation: Bottle beer, add priming sugar, and carbonate naturally for a refreshing, wild-fermented beer
Bottling and carbonation are crucial steps in the process of creating a refreshing, wild-fermented beer. Here's a detailed guide on how to achieve this:
Bottling: After the primary fermentation is complete, it's time to bottle your beer. This step requires precision to ensure a successful carbonation process. Start by carefully transferring the beer from the fermenter to the bottles, leaving some headspace at the top. This headspace is essential for the addition of priming sugar. Rinse the bottles with some of the beer to sanitize them and prevent any contamination. This step is often overlooked but is crucial for the beer's quality.
Adding Priming Sugar: Priming sugar is a vital ingredient in the carbonation process. It provides the yeast with a food source, allowing it to produce carbon dioxide and carbonate the beer. Add a specific amount of priming sugar to each bottle, following the recipe guidelines. The amount can vary depending on the beer style and your desired carbonation level. For a wild-fermented beer, you might want to consider using a higher ratio of priming sugar to encourage a more natural, subtle carbonation.
Natural Carbonation: Once the bottles are filled and sealed, the magic happens. The yeast in the spent grain or dregs of the fermenter will continue to work on the priming sugar, producing carbon dioxide. This natural carbonation process can take a few days to a week, depending on the temperature and yeast activity. Store the bottles in a cool, dark place during this time. The yeast will gradually convert the sugar into carbon dioxide, slowly carbonating the beer.
Carbonation and Aging: After the priming sugar has been added, it's essential to wait patiently. The beer will start to carbonate naturally, and you'll notice a slight hissing sound as the carbon dioxide is released. This process can take a few days, and during this time, the beer will also age, developing complex flavors. Once the carbonation is stable, you can enjoy your wild-fermented beer, which will have a unique, refreshing character.
Remember, wild-fermentation is an art, and each batch may require slight adjustments. Take notes during the process to refine your techniques and create the perfect wild-fermented beer. This method allows for a natural, subtle carbonation, resulting in a beer that is both refreshing and true to the wild fermentation process.
Unraveling the Mystery: Beer and the 0.08 Limit
You may want to see also
Frequently asked questions
Wild fermentation is a technique in brewing that involves using wild yeast and bacteria cultures, often found in the air, water, or previous brew batches, to ferment the beer. This process adds unique flavors and aromas, creating a more complex and natural beer profile.
Before starting, ensure you have a clean and sterile brewing environment. Sanitize all equipment and ingredients to prevent any unwanted contaminants. Prepare a starter culture or use a reputable wild yeast strain to begin the fermentation process.
Wild fermentation offers a distinct flavor profile, often resulting in fruity, spicy, or earthy notes. It can enhance the beer's complexity, character, and natural flavors. This method is highly regarded by craft brewers for its ability to create unique and memorable beer styles.
While the base ingredients for beer remain the same, wild fermentation often relies on the natural yeast and bacteria present in the environment. You can enhance the process by adding specific wild yeast strains or bacteria cultures to target desired flavor profiles.
Wild fermentation can be unpredictable, and managing temperature and oxygen levels is crucial. Controlling the fermentation environment and timing is essential to avoid off-flavors or a stuck fermentation. Proper monitoring and adjustment of conditions are key to success.