Carbonation is what gives beer its fizz and its head. The process of priming your beer is all about adding carbonation to your brew. This is done by adding a small amount of sugar to the beer after fermentation. The yeast leftover in the beer from the fermentation process will eat away at the added sugar, producing carbon dioxide gas, which remains in the beer until it's ready to pour. This process is called bottle priming or bottle conditioning.
| Characteristics | Values |
|---|---|
| Purpose of priming | To add carbonation to beer |
| How it works | Adding sugar to beer after fermentation causes yeast to produce carbon dioxide gas, which creates carbonation |
| When to prime | After fermentation |
| Priming equipment | Bottling bucket with a spigot, food-grade tubing, siphon or racking cane, bottling wand |
| Priming sugar types | Corn sugar, table sugar, dried malt extract, honey, candy syrup, brown sugar, maple syrup, agave syrup, Belgian candi sugar |
| Priming methods | Bottle priming, batch priming |
| Bottle priming process | Dissolve sugar in boiling water, cool it down, pour into bottling bucket, transfer beer from fermenter to bottling bucket, bottle, cap, and store |
| Bottle priming time | 2-3 weeks at 65-70°F |
| Batch priming | Calculate amount of sugar for the whole batch, transfer beer to a secondary fermenter, add priming sugar, stir, bottle |
What You'll Learn
![]()
The role of priming sugar
Priming sugar is an essential component of the priming solution used in the bottle priming process. Bottle priming, also known as bottle conditioning, is the most common carbonation method for beginner homebrewers and is also utilised by many experienced homebrewers and commercial breweries.
The priming solution is created by mixing dissolved sugar with beer. This solution is then transferred to bottles and secured with an airtight seal. The yeast leftover in the beer from the fermentation process consumes the added sugar, producing carbon dioxide gas (CO2) and creating carbonation.
There are several types of sugar that can be used for priming, each impacting the final product in different ways. Corn sugar (dextrose/glucose) and cane sugar (sucrose/table sugar) are the most popular choices due to their consistency, neutrality, ease of handling, and quick fermentation. Other options include dried malt extract (DME), honey, candy syrup, brown sugar, maple syrup, agave syrup, and Belgian candi sugar, which can add unique characteristics to the beer.
The amount of priming sugar used is crucial to achieving the desired carbonation level. Too much sugar can lead to over-priming, resulting in excessive foam or even bottle explosions, while too little sugar may result in flat beer. Calculating the right amount of sugar takes into account factors such as beer temperature, sugar type, beer volume, and desired carbonation level. Online calculators and carbonation priming charts are useful tools for determining the correct amount of priming sugar.
To prepare the priming solution, the chosen sugar is dissolved in boiling water, cooled, and then added to the bottling bucket. The beer is carefully transferred from the fermenter to the bottling bucket, ensuring slow transfer to prevent oxidation. The mixture is then bottled, capped, and stored.
The bottle priming process typically takes about two to three weeks for carbonation to occur when stored at temperatures between 65-70 degrees Fahrenheit. It is recommended to test carbonation levels periodically by refrigerating and sampling bottles at different intervals.
Underground Beer Coolers: Do They Keep Drinks Chilled?
You may want to see also
![]()
How to prime your beer for bottle conditioning
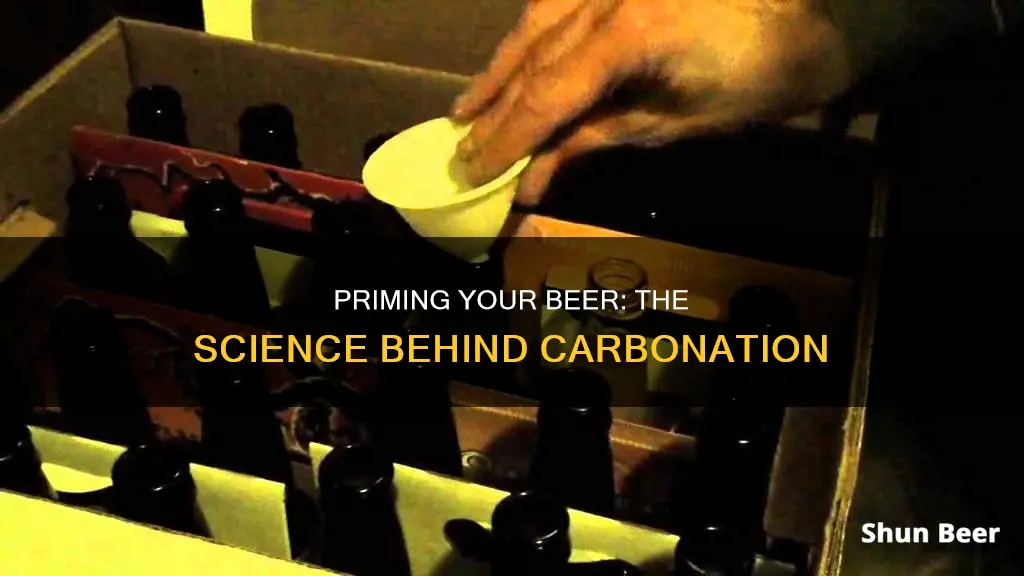
Bottle conditioning is the process of carbonating beer while it's in the bottle. It's a common method for beginner homebrewers, but also used by experienced homebrewers and commercial breweries. The process involves adding a dose of sugar to the beer, which the yeast ferments to create carbon dioxide gas, resulting in carbonation. Here's a step-by-step guide to priming your beer for bottle conditioning:
Step 1: Sanitation
First, ensure that all equipment that will come into contact with the beer during the process is properly cleaned and sanitized. This includes the bottling bucket, siphon, transfer hoses, bottles, caps, and filling wand.
Step 2: Transfer Beer to Bottling Bucket
Transfer the beer from the fermenter into a bottling bucket with volume markings. Record the bottling volume, as this will be needed for priming sugar calculations.
Step 3: Prepare Priming Sugar Solution
The next step is to prepare the priming sugar solution. Dissolve the recommended amount of priming sugar in boiling water, then cool it down to around 80 degrees Fahrenheit. Common types of priming sugar include corn sugar (dextrose), table sugar (sucrose), and dry malt extract (DME). You can also use carbonation tablets or honey, but these may require different calculations.
Step 4: Add Priming Sugar to Beer
Add the prepared priming sugar solution to the beer in the bottling bucket. Gently stir the mixture with a sanitized spoon to ensure proper mixing of the sugar. Be sure to dissolve the sugar uniformly to avoid bottle-to-bottle inconsistencies in carbonation levels.
Step 5: Bottle and Cap
Using a bottle filler wand, fill the sanitized bottles with the primed beer, leaving about ¾ to 1 inch of headspace to allow for proper carbonation. Cap the bottles securely.
Step 6: Store in a Warm Location
Store the bottles in a warm location, a few degrees above fermentation temperature, to ensure that the yeast completely ferments the newly added sugar. It is recommended to wait at least a week or two before trying the first beer to allow for adequate carbonation.
Additional Considerations:
- Beer temperature, sugar type, beer volume, and desired carbonation level are important factors to consider when calculating the amount of priming sugar to add.
- If the beer has been aging for an extended period (3 months or more) before bottling, consider adding a small, fresh dose of yeast to the bottling bucket to ensure successful bottle conditioning.
- Avoid rushing the process, as improper bottle priming can ruin an otherwise great beer.
The Magic Behind Beer Ripples: How Does It Work?
You may want to see also
![]()
Different priming sugars
There are several types of sugar that can be used to prime your beer, each requiring a different calculation for maximum efficacy. Here are some of the most popular options:
Corn Sugar (Dextrose)
Corn sugar is a popular choice for priming beer. It is used to make a priming solution at bottling, which produces carbon dioxide (CO2) in the bottle. Corn sugar is also known as dextrose and is usually available in 1 lb, 4 lb, and 50 lb bags. It is a neutral sugar that does not alter the flavour of the beer. The general rule of thumb for corn sugar is to use 3/4 cups (6 ounces, or 113 grams) for every 5 gallons of beer.
Table Sugar (Sucrose)
Table sugar is another option for priming beer. It has no water content, so a different calculation is needed to determine the amount of sugar needed. The general rule of thumb for table sugar is to use 2/3 cup (5.3 ounces, or 150 grams) for every 5 gallons of beer.
Dry Malt Extract (DME)
Dry malt extract is a bit different from corn sugar and table sugar as it requires additional calculations to determine the correct amount of carbonation it will create. The apparent fermentability or apparent attenuation of the DME should be multiplied by 0.82 to find the true fermentability or true attenuation. This value is then used in the calculation to determine the amount of priming sugar needed. The general rule of thumb for DME is to use 1 1/4 cups (181 grams) for every 5 gallons of beer.
Honey
Honey has been used in brewing for a long time, adding flavour and character to the beer. However, it is a bit more difficult to work with as a priming agent due to its varying density, composition, and viscosity. The general rule of thumb for honey is to use 1/2 to 1 cup for every 5 gallons of beer. To calculate the precise amount of honey needed, you need to determine its specific gravity and compare it to that of a sucrose solution.
Carbonation Tablets
Carbonation tablets are an easy and convenient option for priming your beer. They eliminate the need for calculations and reduce the risk of bottle bombs due to over-priming. They can be added directly to the bottles at bottling time, making it as easy to prime one bottle as it is a dozen.
Bottom-Fill Beer: How Does It Work?
You may want to see also
![]()
The carbonation process
There are two main methods for bottle priming: individually priming each bottle and batch priming the whole batch. For individual priming, a measured dose of priming sugar is added to each bottle, which can be done by hand or with carbonation tablets. This method is generally considered an older technique and may result in inconsistent carbonation between bottles. However, it can produce great beer with proper care.
Batch priming, on the other hand, involves calculating the total amount of sugar needed for the entire batch and adding it to the fermentor. This method requires extra equipment, such as an extra fermenting bucket and an auto-siphon for transferring the beer. It is important to stir the priming sugar thoroughly to ensure even distribution.
The type of sugar used for priming can vary. Corn sugar (dextrose) and table sugar (sucrose) are the most common choices due to their neutrality, ease of handling, and quick fermentation. Other options include dried malt extract (DME), honey, and candy syrup, which can add unique characteristics to the beer but may take longer to carbonate.
Regardless of the method chosen, sanitation and attention to detail are critical to avoid creating "bottle bombs" caused by excess pressure from carbonation. Additionally, proper calculation of the priming sugar dosage is essential to achieving the desired carbonation level without over-priming or under-priming the beer.
After priming, the beer should be stored in a warm place, a few degrees above fermentation temperature, to ensure complete fermentation. It is recommended to wait at least two weeks before testing the carbonation level by refrigerating and opening a bottle. The beer may need additional time to fully carbonate, depending on the temperature and desired level of carbonation.
Snail Solution: Beer Trap's Effectiveness and Efficiency
You may want to see also
![]()
Avoiding bottle bombs
Bottle bombs are a very real danger when brewing beer at home. They can be caused by a number of factors, but the good news is that they can be consistently avoided. Here are some detailed tips to help you avoid bottle bombs:
Use High-Quality Ingredients
The quality of brewing ingredients has improved significantly over the years, but it is still important to be careful when purchasing. Always use fresh malts and malt extract, as older liquid and dried malt extract will ferment much more slowly than all-grain wort. Yeast also has a limited shelf life, so pay attention to the dates and use within the recommended period.
Allow the Beer to Ferment Completely
One of the main causes of bottle bombs is bottling beer before it has finished fermenting. It is important to be patient and allow a minimum of two weeks for average beer to ferment before bottling, and even longer for high-gravity beer. Use a hydrometer to ensure that the specific gravity shows no changes for three or more days before bottling.
Use Good Quality Bottles and Inspect Them
Poor quality bottles can be a recipe for disaster. Avoid using twist-off bottles, as they are too thin and may not seal properly. Select thick, reusable bottles designed for beer and always clean and inspect them thoroughly before use. Immediately discard any cracked, chipped, or thin bottles.
Calculate and Weigh the Right Amount of Priming Sugar
Sugar density can vary depending on the manufacturer, so it is important to weigh your priming sugar instead of just measuring by volume. Use a spreadsheet, online calculator, or brewing software to calculate the exact weight of priming sugar needed for your batch. This will help you avoid over-carbonation and reduce the risk of bottle bombs.
Store Your Beer in a Cool, Dark Place
Light and heat are natural enemies of finished beer. They can break down critical flavor compounds, promote additional fermentation, and increase CO2 pressure in the bottle, leading to potential explosions. Always store your beer in a cool, dark place to maintain optimal flavor and avoid bottle bombs.
Other Considerations
In addition to the above, here are some extra tips to keep in mind:
- Sanitation is crucial: Ensure that everything that comes into contact with the beer after boiling is properly sanitized to prevent bacterial infections, which can lead to bottle bombs.
- Mix priming sugar correctly: Ensure that the priming sugar is properly mixed and distributed evenly between bottles. Priming tabs can also be used to make the process foolproof.
- Choose the right yeast: Be careful when adding a new yeast for bottle conditioning, as a yeast with a much higher attenuation rate than your primary yeast can lead to excessive fermentation and increased pressure in the bottles.
- Use the right bottles: Beer bottles are designed to hold the pressure of carbonated beer. Avoid using the wrong type of bottles, such as those meant for twist-off caps or non-reusable bottles.
Beer Mail: Shipping Alcohol Straight to Your Doorstep
You may want to see also
Frequently asked questions
Priming is when you put sugar back into your beer to reactivate the yeast in the bottle, which will make it carbonated.
The yeast leftover in the beer from fermentation eats away at the added sugar in the bottle and produces carbon dioxide gas, which remains in the beer until it’s ready to pour.
There are two ways to prime your beer: by individually priming every bottle or by priming the whole batch. Both methods will produce a great final product if done correctly.