Low-temperature fermentation is a unique and fascinating process in brewing, offering a distinct flavor profile and a more delicate approach to beer production. This method involves fermenting beer at temperatures as low as 50°F (10°C), which significantly slows down the fermentation process and allows for a more controlled and nuanced flavor development. Keeping the beer at a low temperature during fermentation requires careful attention to detail and specific techniques to ensure the beer's quality and character. In this guide, we will explore the essential steps and considerations for successfully fermenting beer at low temperatures, providing valuable insights for brewers seeking to experiment with this intriguing brewing technique.
What You'll Learn
- Fermentation Temperature Control: Maintain a consistent low temperature (around 55°F) using a fermentation chamber or temperature-controlled fermenter
- Cooling System: Employ a cooling system like a heat exchanger or immersion chiller to rapidly cool the wort
- Fermenter Insulation: Insulate the fermenter to minimize heat loss and maintain a stable low temperature
- Monitoring: Regularly check the temperature with a precision thermometer to ensure it stays within the desired range
- Time Management: Ferment at low temperatures for a longer duration to allow for slow, controlled yeast activity
![]()
Fermentation Temperature Control: Maintain a consistent low temperature (around 55°F) using a fermentation chamber or temperature-controlled fermenter
To achieve and maintain a low fermentation temperature, especially around 55°F (13°C), for your beer, you'll need to employ specific techniques and equipment. One of the most effective methods is to use a fermentation chamber or a temperature-controlled fermenter. These tools are designed to provide a stable environment for yeast to work its magic without the interference of external temperature fluctuations.
A fermentation chamber is essentially a dedicated space where you can control the temperature and humidity to create optimal conditions for fermentation. This can be a small, portable unit or a larger, more industrial setup, depending on your brewing needs. The key is to ensure that the chamber's temperature is set to your desired low temperature and maintained throughout the fermentation process. Many chambers also offer additional features like digital controls, alarms, and the ability to monitor the internal environment, making it easier to manage the fermentation process.
For those who prefer a more integrated solution, a temperature-controlled fermenter is an excellent investment. This type of fermenter is designed with a built-in temperature control system, allowing you to set and maintain the desired temperature without the need for an external chamber. These fermenters often come with features like digital displays, temperature probes, and the ability to adjust the temperature over time, ensuring a precise and consistent environment for your yeast.
When using either a fermentation chamber or a temperature-controlled fermenter, it's crucial to set the temperature accurately. Aim for a consistent 55°F (13°C) to promote a slow, controlled fermentation. This lower temperature range is particularly beneficial for styles like wheat beers, lagers, and certain fruit-forward beers, as it helps to retain the natural flavors and aromas while reducing the risk of off-flavors.
Additionally, proper insulation is key to maintaining the desired temperature. Ensure that your fermenter or chamber is well-insulated to minimize heat loss and keep the internal environment stable. Regularly monitoring the temperature and making adjustments as needed will also help you fine-tune the process and ensure the best results for your low-temperature fermentation.
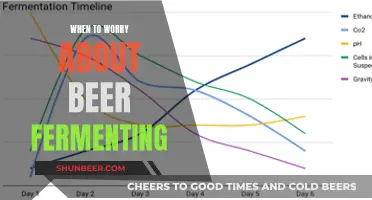
Mastering Beer Gravity: A Guide to Fermentation Monitoring
You may want to see also
![]()
Cooling System: Employ a cooling system like a heat exchanger or immersion chiller to rapidly cool the wort
When it comes to brewing low-temperature fermenting beers, rapid and precise temperature control is crucial. One effective method to achieve this is by utilizing a cooling system specifically designed for the brewing process. Here's a detailed guide on how to employ a cooling system to rapidly cool your wort:
Heat Exchanger: A heat exchanger is an excellent tool for cooling your wort efficiently. This system works by transferring heat from the wort to a cooling medium, typically a liquid or a gas. Here's how you can set it up: First, choose a heat exchanger that suits your brewing setup. It can be a plate and frame exchanger, a coil and shell exchanger, or even a simple plate heat exchanger. Ensure it has a sufficient surface area to handle the wort's volume and temperature requirements. Connect the heat exchanger to your wort's flow path, allowing the wort to pass through it. As the wort circulates, it will lose heat to the cooling medium, rapidly lowering its temperature. This method is highly effective and allows for precise control, making it ideal for low-temperature fermenting beers.
Immersion Chiller: Immersion chillers provide another efficient way to cool your wort. This method involves submerging a cooling coil or a heat exchanger directly into the wort. Here's a step-by-step process: Prepare a cooling coil made of a material that is compatible with brewing, such as copper or stainless steel. Ensure the coil has a good surface area to maximize heat transfer. Immerse the coil into the wort, making sure it is fully submerged. As the wort circulates around the coil, it will absorb heat from the surrounding cooling medium, typically water or a cooling liquid. This process can be enhanced by using a pump to circulate the wort, ensuring efficient heat exchange. Immersion chillers are known for their rapid cooling capabilities and are a popular choice among homebrewers.
When implementing these cooling systems, it's essential to monitor the wort's temperature closely. Use a reliable thermometer to ensure the wort reaches the desired low-temperature fermentation range. Rapid cooling is key to preventing unwanted microbial growth and promoting the desired fermentation characteristics. Additionally, consider the size of your brewing system and the volume of wort to determine the appropriate cooling capacity.
Remember, the goal is to create an environment that encourages slow and controlled fermentation at lower temperatures. By employing these cooling systems, you can achieve the desired fermentation profile for your low-temperature fermenting beer, resulting in a unique and flavorful brew.
The Surprising Effect of Eye Drops in Beer: A Tasty Experiment
You may want to see also
![]()
Fermenter Insulation: Insulate the fermenter to minimize heat loss and maintain a stable low temperature
Insulating your fermenter is a crucial step in achieving and maintaining the low temperatures required for successful low-temperature fermentation. This process is particularly important for beer styles that benefit from cooler fermentation temperatures, such as wheat beers, lagers, and some fruit-forward ales. Here's a detailed guide on how to effectively insulate your fermenter:
Choose the Right Insulation Material: The key to successful insulation is selecting a material that provides excellent thermal resistance. Fiberglass batting or foam insulation are popular choices for fermenters. Fiberglass batting offers good coverage and can be easily cut to fit the shape of your fermenter. It is lightweight and affordable, making it a cost-effective option. Alternatively, insulation foam, often used in building applications, provides a more rigid and compact insulation solution. This type of foam can be cut to size and offers a seamless fit, ensuring minimal heat loss.
Prepare the Fermenter for Insulation: Before applying insulation, ensure your fermenter is clean and dry. Any moisture or dirt can compromise the insulation's effectiveness. If your fermenter has a lid, ensure it is secure and fits snugly to prevent heat escape. Consider using a rubber gasket or sealing tape around the lid's perimeter for a tighter seal.
Application Technique: Start by cutting the insulation material to fit the fermenter's interior dimensions. For a more professional look and improved insulation, consider using a vapor barrier, which is a thin plastic sheet that prevents moisture absorption. Apply the insulation material, ensuring full coverage of the fermenter's walls and bottom. Use a staple gun or tape to secure the insulation in place, especially at corners and seams. For a more seamless finish, you can use insulation tape or caulk to fill any gaps.
External Insulation: Don't forget the exterior of your fermenter. Apply insulation to the exterior walls and top, if applicable. This additional layer will help maintain the desired temperature and protect the fermenter from external environmental factors. You can use the same insulation material as before or opt for a different type, such as expanded polystyrene (EPS) foam sheets, which are lightweight and easy to work with.
Maintain and Monitor: Regularly inspect your insulated fermenter to ensure the insulation remains intact. Over time, insulation can become compressed or damaged, leading to heat loss. Replace any damaged sections and consider reapplying insulation if the fermenter is moved or handled frequently. Additionally, monitor the fermentation temperature using a reliable thermometer to ensure it stays within the desired range.
By properly insulating your fermenter, you create an effective barrier against heat transfer, allowing for precise temperature control during low-temperature fermentation. This process is essential for producing beers with the desired character and quality, especially for styles that benefit from cooler fermentation temperatures. Remember, consistent insulation and temperature management are key to achieving the best results in your brewing endeavors.
Mastering Pressure Fermentation: A Guide to Craft Beer Magic
You may want to see also
![]()
Monitoring: Regularly check the temperature with a precision thermometer to ensure it stays within the desired range
Monitoring the temperature during the fermentation process is crucial for achieving the desired results in low-temperature fermentation. This technique is particularly important for styles like wheat beers, lagers, and certain fruit-forward beers, where maintaining a precise temperature range is essential for flavor development and yeast activity. Here's a detailed guide on how to effectively monitor and control the temperature:
Precision Thermometer: Invest in a high-quality precision thermometer specifically designed for brewing. This tool is your key to success in temperature control. It should have a narrow temperature range, typically around 0-50°C (32-122°F), with a resolution of 0.1°C or better. This level of precision is vital for accurate monitoring. Place the thermometer in the fermenter, ensuring it is in direct contact with the beer to get an accurate reading.
Regular Checks: Set a strict schedule for temperature checks. For the first few days of fermentation, take temperature readings every 2-3 hours. This frequent monitoring is essential to catch any deviations early on. As the fermentation progresses, you can reduce the frequency to every 4-6 hours, but continue to check at least 4-6 times a day. Consistency is key to maintaining control over the process.
Desired Temperature Range: Different beer styles have specific temperature requirements for optimal fermentation. For example, lagers typically ferment best between 10-15°C (50-59°F), while wheat beers may prefer a slightly warmer range of 15-20°C (59-68°F). Research your specific beer style and set the temperature accordingly. If you're using a fermentation fridge, ensure it is set to the desired temperature and maintain it consistently.
Adjustments and Corrections: If the temperature deviates from your target range, take immediate action. If it's too warm, consider using a cooling system like a fermentation fridge or a water bath. For cooler temperatures, you might need to add a heating element to your fermenter. Always make small adjustments and monitor the results to avoid drastic temperature fluctuations.
Record Keeping: Maintain a log of temperature readings and any adjustments made. This practice will help you identify patterns and make informed decisions. Over time, you'll develop a better understanding of how your specific setup responds to temperature changes, allowing you to fine-tune your process. Regular monitoring and adjustments will contribute to a successful fermentation and a delicious, well-balanced beer.
Brewing 101: The Art of Adding Lactose to Beer
You may want to see also
![]()
Time Management: Ferment at low temperatures for a longer duration to allow for slow, controlled yeast activity
Low-temperature fermentation is a technique used by brewers to create unique and complex flavors in beer. This method involves fermenting the beer at a lower temperature than traditional fermentation, typically around 55-65°F (13-18°C). While it might seem counterintuitive to slow down the fermentation process, this technique offers several advantages and can result in a more nuanced and flavorful beer. The key to success with low-temperature fermentation is time management, ensuring that the yeast has ample time to work its magic without compromising the beer's quality.
The first step is to understand the yeast's behavior at lower temperatures. Yeast activity slows down significantly as temperatures drop, which means the fermentation process will take much longer than at higher temperatures. This extended fermentation period allows for a more gradual and controlled transformation of sugars into alcohol and carbon dioxide. During this time, the yeast can produce a wider range of esters and other flavor compounds, contributing to the beer's character.
To manage this process effectively, brewers should aim for a longer fermentation schedule. Typically, a low-temperature fermentation can take anywhere from 2 to 4 weeks, depending on the style and desired outcome. During this time, regular monitoring is essential. Check the beer's progress by taking gravity readings and observing the yeast's activity. This will help you determine when the fermentation is complete and when to bottle or transfer the beer to the next stage of the brewing process.
Maintaining a consistent low temperature is crucial. Fluctuations in temperature can disrupt the yeast's activity and lead to off-flavors. Use a reliable refrigeration system to keep the fermentation vessel at a steady low temperature. Additionally, consider using a fermentation lock to prevent oxygen from entering the system, as this can introduce unwanted flavors and aromas.
In summary, low-temperature fermentation is an art that requires patience and precise time management. By allowing the yeast to work slowly and controlledly, brewers can unlock a beer's full potential, resulting in a unique and memorable flavor profile. This technique showcases the versatility of brewing and the intricate relationship between temperature, time, and yeast activity.
Fermenting Beer in Florida Heat: Tips for Success at 72°F
You may want to see also
Frequently asked questions
Low-temperature fermentation typically occurs between 50°F and 65°F (10°C and 18°C). This range is crucial for yeast health and activity, ensuring a successful fermentation process.
Consistency is key! Use a fermentation fridge or a dedicated cooling system to regulate the temperature. Regularly monitor the temperature and adjust as needed to keep it within the desired range. Insulate your fermentation vessel and keep it away from heat sources to minimize temperature fluctuations.
Low-temperature fermentation can enhance beer flavor and aroma by slowing down yeast activity, allowing for more complex flavor development. It also helps in retaining carbonation and can result in a cleaner, crisper beer profile. This technique is often used for styles like Belgian ales, wheat beers, and certain fruit-forward beers.