Cleaning beer lines is an essential part of maintaining a consistent and high-quality pour for your beer. Properly cleaned lines ensure that the beer's flavor is not compromised by any residual flavors from previous brews. This guide will provide a step-by-step process to effectively clean your beer lines, ensuring a fresh and enjoyable drinking experience.
What You'll Learn
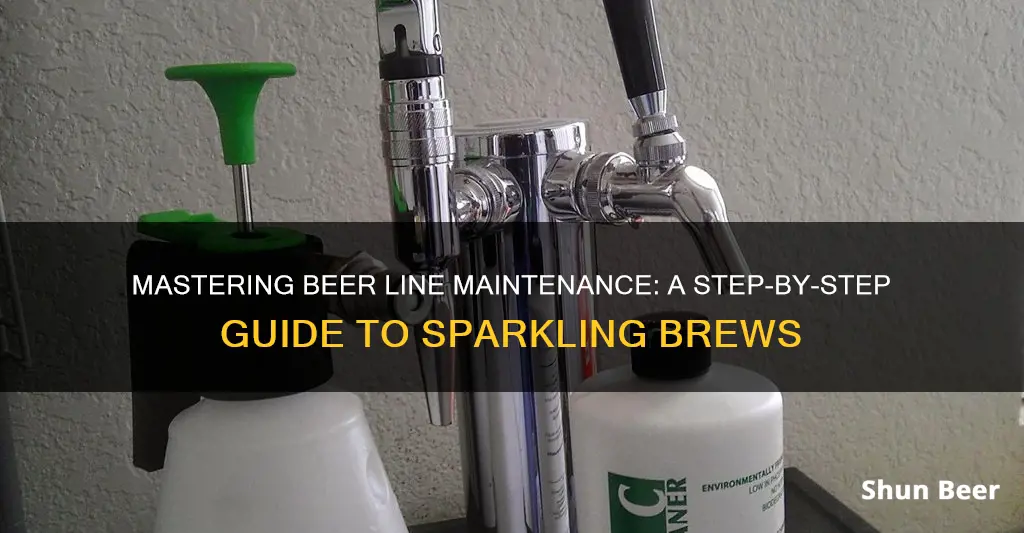
- Prepare the Line: Rinse with hot water, then sanitize with a dedicated cleaner
- Prime the Line: Run a small amount of beer through the line to lubricate
- Use a Line Cleaner: Pour a line cleaner into the line and let it sit
- Backflush: Run beer through the line in reverse to dislodge any residue
- Maintain Regularly: Clean lines weekly or after every 10-15 batches
![]()
Prepare the Line: Rinse with hot water, then sanitize with a dedicated cleaner
Preparing your beer lines for optimal performance and taste is an essential part of the brewing process. Here's a step-by-step guide to ensuring your lines are clean and ready for the next brew:
Rinse with Hot Water: Begin by flushing out any residual beer or sediment from the previous use. Fill the line with hot water, ensuring it reaches the furthest point of the line. Let the water run for a few minutes, allowing it to dislodge any particles. This initial rinse is crucial to prevent any unwanted flavors from the previous brew from affecting the new one. Use a gentle stream of hot water to avoid agitating the line too much, as this can lead to sediment buildup.
Sanitize with a Dedicated Cleaner: After the initial rinse, it's time to sanitize the line to eliminate any bacteria or microorganisms that could spoil your beer. Invest in a dedicated beer line cleaner, which is specifically formulated to kill bacteria without affecting the beer's taste. Pour the cleaner into the line, ensuring an even distribution. Let it sit for the recommended time, usually around 10-15 minutes, allowing the sanitizer to do its job. Different cleaners may have specific instructions, so always follow the manufacturer's guidelines.
When sanitizing, pay attention to all parts of the line, including the tap, fittings, and any connections. This thorough cleaning process ensures that your beer remains fresh and flavorful, free from any off-flavors caused by bacteria. Remember, proper sanitation is key to maintaining the quality of your craft beer.
By following these steps, you'll create a clean and healthy environment for your beer to flow, enhancing the overall brewing experience and the taste of your final product. Regular maintenance and cleaning will contribute to consistent and delicious brews.
Exploring the Art of Mixed Fermentation Beer: A Unique Craft
You may want to see also
![]()
Prime the Line: Run a small amount of beer through the line to lubricate
Before you begin the cleaning process, it's crucial to prime the beer line to ensure optimal performance. Priming the line involves running a small amount of beer through it to lubricate and prepare it for the upcoming cleaning. This step is often overlooked but plays a vital role in maintaining the quality of your beer. Here's a detailed guide on how to prime your beer line effectively:
Start by pouring a small amount of beer into the line, ensuring it's not overfilled. The goal is to create a thin, steady stream of beer flowing through the line. You can use a pitcher or a dedicated beer line cleaner to achieve this. Hold the pitcher or cleaner at a slight angle, allowing the beer to gently trickle into the line. The key is to avoid any sudden bursts of pressure, as this can lead to a messy and potentially wasteful process.
As the beer flows through the line, pay attention to the sound and feel. You should hear a gentle, steady trickle, almost like a whisper. This indicates that the beer is moving smoothly. If you hear a gurgling or bubbling sound, it means the beer is encountering air bubbles, which can be a sign of a poorly primed line. In such cases, gently pour the beer back into the pitcher and try again, ensuring a steady, controlled flow.
The priming process should take only a few seconds. Once you've achieved a smooth, steady stream, stop pouring. You want to leave a small amount of beer in the line, enough to cover the entire length. This initial lubrication will make the subsequent cleaning process more effective and ensure that any residual beer is properly treated.
Remember, priming is an essential step that should not be skipped. It ensures that your beer line is ready to deliver the perfect pour, enhancing the overall drinking experience. By taking the time to prime your line, you're setting the foundation for a clean and enjoyable beer-drinking session.
Exploring the Delicate Balance: Understanding Mild Lager Beer
You may want to see also
![]()
Use a Line Cleaner: Pour a line cleaner into the line and let it sit
To effectively clean your beer lines and ensure the best taste, a simple yet effective method is to use a dedicated line cleaner. This process is particularly useful for homebrewers or those who frequently experiment with different beers, as it helps to eliminate any residual flavors or odors that may accumulate over time. Here's a step-by-step guide on how to do it:
First, acquire a high-quality line cleaner specifically designed for this purpose. These cleaners are typically made from a blend of chemicals and natural ingredients that are safe for beer lines but effective at breaking down and removing any built-up deposits. You can find these products at most homebrew supply stores or online.
Once you have your line cleaner, it's time to get your hands dirty (or rather, your lines clean!). Start by pouring the recommended amount of cleaner into the beer line. The amount needed can vary depending on the length and condition of your line, so always refer to the product instructions for guidance. For longer lines, you might need to repeat this process for each section.
After pouring the cleaner, let it sit for a specified period. This waiting time allows the cleaner to penetrate and dissolve any grime, residue, or even old beer that might have accumulated. The duration can range from 15 minutes to an hour, depending on the product and the level of cleaning required.
During this time, you can prepare for the next step by gathering some cleaning tools. You'll need a brush with firm bristles to scrub away any stubborn deposits and a clean cloth or rag to wipe down the line. Once the cleaner has done its work, use the brush to scrub the line, ensuring you cover all areas, including the tap and any joints. Finally, rinse the line thoroughly with warm water to remove any remaining cleaner and ensure a fresh, clean taste.
Fermentation Under Pressure: Unlocking Beer's True Potential
You may want to see also
![]()
Backflush: Run beer through the line in reverse to dislodge any residue
Backflushing is an effective method to clean and maintain your beer lines, ensuring optimal beer quality and flavor. This technique involves running beer through the line in the opposite direction of its normal flow, which helps to dislodge any residue, buildup, or contaminants that may have accumulated over time. Here's a step-by-step guide on how to perform a backflush:
- Prepare the Equipment: Before starting, ensure you have the necessary tools. You'll need a bucket or container to collect the used beer, a length of flexible tubing (preferably made of food-grade material) to connect the bucket to the line, and a beer line cleaner or a mild detergent. It's important to use a separate container for the used beer to avoid mixing it with the cleaning solution.
- Disconnect the Line: Carefully disconnect the beer line from the tap or kegerator. Make sure to do this in a controlled manner to prevent any sudden release of pressure. You might want to use a small piece of tubing or a temporary connector to maintain a secure connection while you work.
- Backflush Process: Place the flexible tubing into the beer line, ensuring it extends into the line and covers the length you want to clean. Securely attach the other end of the tubing to the bucket or container. Open the tap or kegerator and start pouring the beer into the bucket. The beer will now flow through the line in reverse, carrying away any residue and contaminants. Continue this process until the bucket is nearly full, ensuring you've covered the entire length of the line.
- Rinse and Repeat: After the initial backflush, it's a good practice to rinse the line. Run some clean water through the line in the normal direction to ensure no cleaning solution or residue remains. Repeat the backflush process with fresh beer to ensure thorough cleaning. This step is crucial to remove any cleaning agent and to prepare the line for serving fresh beer.
- Final Rinse: Once you've completed the backflushes, give the line a final rinse with clean water to eliminate any remaining cleaning solution. This final rinse helps to prevent any off-flavors from the cleaning process.
Backflushing is a simple yet powerful technique to maintain the integrity of your beer lines. Regularly performing this process will ensure that your beer remains crisp, flavorful, and free from any unwanted tastes or aromas caused by line residue. Remember to always use clean equipment and follow the manufacturer's guidelines for your specific beer line setup.
Genesee Beer: Unveiling the Lager-Pilsner Mystery
You may want to see also
![]()
Maintain Regularly: Clean lines weekly or after every 10-15 batches
Maintaining the cleanliness of your beer lines is crucial to ensuring the best possible taste and quality of your brew. Regular cleaning is essential to prevent the buildup of bacteria, yeast, and other contaminants that can negatively impact the flavor and aroma of your beer. Here's a detailed guide on why and how to clean your beer lines regularly:
The Importance of Regular Cleaning:
Beer lines, whether they are copper, stainless steel, or plastic, can become a breeding ground for microorganisms over time. These lines can retain and re-introduce flavors and aromas from previous brews, leading to off-tasting beer. Additionally, mineral deposits and residue from the brewing process can accumulate, affecting the clarity and overall appearance of your beer. Regular cleaning helps to eliminate these issues, ensuring that each batch of beer is fresh and flavorful.
Frequency of Cleaning:
It is recommended to clean your beer lines weekly, especially if you brew frequently. However, if you're brewing in smaller batches (10-15 batches or less), you can extend the cleaning interval to once every 10-15 batches. This is because smaller batches may not have enough time for significant contamination to occur. Nevertheless, it's still a good practice to clean regularly to maintain optimal hygiene.
Cleaning Process:
- Rinse: Start by rinsing the beer lines with hot water. This initial step helps to loosen any loose particles and prepares the lines for more thorough cleaning.
- Sanitize: Use a suitable beer line cleaner or a mild bleach solution (typically 1-2% bleach) to sanitize the lines. This step is crucial to kill any bacteria or yeast present. Ensure you follow the instructions on the cleaner or bleach solution carefully.
- Backflush: After sanitization, perform a backflush by running the cleaning solution (or hot water) through the lines in reverse. This process helps to dislodge any remaining particles and ensures a thorough clean.
- Rinse Thoroughly: Rinse the lines multiple times with hot water to remove any cleaning solution residue. Ensure no soap or chemical residue remains, as it can affect the beer's taste.
- Dry and Store: Allow the lines to air dry completely before reassembling and storing them. Proper drying prevents the growth of mold and other microorganisms.
Remember, consistent cleaning will not only improve the taste of your beer but also extend the lifespan of your brewing equipment. It's a simple yet essential task that every home brewer should incorporate into their routine.
Unlocking Flavor: The Ideal Yeast Fermentation Temperature for Beer
You may want to see also
Frequently asked questions
Cleaning your beer lines regularly is essential to maintain the quality of your brew. It is recommended to clean the lines at least once a month, or more frequently if you use your setup daily. Regular cleaning prevents the buildup of bacteria, yeast, and sediment, ensuring that your beer remains fresh and flavorful.
The most effective way to clean beer lines is by using a cleaning solution specifically designed for this purpose. You can opt for a commercial beer line cleaner or create your own using a mixture of warm water, dish soap, and a small amount of bleach. This solution should be run through the lines, ensuring it reaches every part, and then flushed with clean water to remove any residue.
While a pressure washer can be used, it is not the most recommended method for cleaning beer lines. High-pressure water can damage the lines and potentially push bacteria deeper into the system. Instead, opt for a gentle cleaning process using a cleaning solution and warm water to avoid any potential harm to the lines and the overall brewing system.