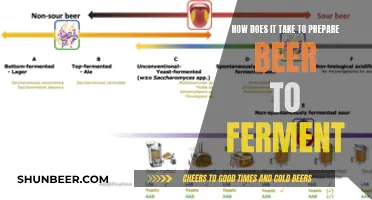
After the fermentation process in brewing, clearing beer is a crucial step to ensure a smooth and appealing final product. This process involves removing any remaining yeast, sediment, and fine particles that may have accumulated during fermentation. There are several methods to achieve this, including filtration, fining, and aging. Filtration uses physical barriers to separate solids from the liquid, while fining agents like isinglass or bentonite clay attract and bind to the sediment, making it easier to separate. Aging the beer for a few weeks allows the sediment to naturally settle at the bottom of the container, making it simpler to decant the clear beer. Each method has its advantages and considerations, and brewers often employ a combination of these techniques to achieve the desired clarity and flavor in their beer.
What You'll Learn
- Racking: Transfer beer to a secondary fermenter, leaving behind yeast and sediment
- Clarification: Use fining agents or centrifugation to remove remaining particles
- Filtration: Employ filters to achieve a clear, smooth beer
- Aging: Age the beer to mature and stabilize, reducing cloudiness
- Bottling: Carefully bottle beer, ensuring minimal sediment enters the bottle
![]()
Racking: Transfer beer to a secondary fermenter, leaving behind yeast and sediment
Racking is a crucial step in the beer-making process that helps to clarify and refine the final product. It involves carefully transferring the beer from the primary fermenter to a secondary container, ensuring that the yeast and sediment remain in the original vessel. This technique is essential for achieving a clear and stable beer, free from unwanted particles and off-flavors.
When you're ready to rack your beer, it's important to have the right equipment. You'll need a sanitized secondary fermenter, which could be a carboy or a plastic bucket, and a siphoning setup. The siphon is a flexible tube that allows you to transfer the liquid without disturbing the sediment. Ensure that all your equipment is clean and sterile to prevent any contamination.
The process begins by opening the primary fermenter and carefully pouring the beer into the secondary fermenter. It's crucial to pour slowly and steadily, giving the yeast and sediment time to settle. Avoid disturbing the sediment by keeping the pour at a gentle angle. Once the beer has been transferred, you can gently swirl the primary fermenter to help release any remaining yeast and sediment. This step ensures that the beer is as clear as possible.
After the transfer, you might notice a layer of sediment at the bottom of the primary fermenter and a small amount of yeast floating on the surface of the beer. This is normal and indicates a successful racking process. You can leave the yeast and sediment in the primary fermenter, as they will continue to work on any remaining sugars, contributing to a clean and crisp beer flavor.
Finally, seal the secondary fermenter and leave the beer to condition for a few days. This allows the flavors to mature and the beer to clear further. Racking is an art that requires practice and precision, but it's a fundamental skill for any homebrewer looking to produce high-quality, clear beer. With patience and attention to detail, you'll master the art of racking and create beers that are truly exceptional.
Revive Your Beer Tap: A Step-by-Step Guide to Reassembly
You may want to see also
![]()
Clarification: Use fining agents or centrifugation to remove remaining particles
When it comes to achieving a clear and stable beer after fermentation, the process of clarification is crucial. This step ensures that your beer not only looks appealing but also has a smooth and refined mouthfeel. One of the primary methods to achieve this is by employing fining agents or utilizing centrifugation, both of which effectively target and remove any remaining particles that might be present in the beer.
Fining Agents:
Fining is an ancient technique used in brewing to clarify beer. It involves adding specific substances known as fining agents to the beer, which bind to and precipitate out the remaining yeast, proteins, and other particles. Common fining agents include isinglass (a gelatinous substance derived from fish bladders), bentonite clay, and various types of fining agents derived from plants like peat moss or rice hulls. These agents are carefully measured and added to the beer at specific stages of the brewing process. After a period of time, the beer is then separated from the fining agent, leaving behind a clearer and more refined beverage. This method is often used in conjunction with yeast settling to ensure a thorough clarification process.
Centrifugation:
Centrifugation is a more modern and efficient approach to beer clarification. It involves spinning the beer at high speeds in a centrifuge, which forces the particles to the bottom of the container due to the centrifugal force. This process effectively separates the solid particles from the liquid, resulting in a clearer beer. Centrifugation is particularly useful for removing fine yeast particles and proteins that might remain after the primary fermentation. By carefully adjusting the speed and duration of the centrifugation process, brewers can control the level of clarity achieved. This method is often employed in commercial brewing operations due to its efficiency and ability to handle large volumes of beer.
Both fining agents and centrifugation offer unique advantages in the clarification process. Fining agents provide a gentle and controlled approach, allowing brewers to fine-tune the clarity of the beer. They are especially useful for small-batch brewing and can be tailored to specific beer styles. On the other hand, centrifugation is a rapid and powerful method, ideal for large-scale production. It ensures a consistent and thorough clarification, making it a popular choice for commercial breweries.
In summary, achieving clear beer after fermentation is essential for a high-quality product. By utilizing fining agents or centrifugation, brewers can effectively remove the remaining particles, resulting in a smooth, stable, and visually appealing beer. These methods are integral to the art of brewing, ensuring that the final product meets the highest standards of quality and taste.
Egg in Beer: Uncovering the Surprising Science Behind This Ancient Practice
You may want to see also
![]()
Filtration: Employ filters to achieve a clear, smooth beer
Filtration is an essential step in the beer-making process that can significantly enhance the clarity and smoothness of your brew. After fermentation, the beer may still contain yeast, proteins, and other particles that can affect its appearance and taste. Employing filters is a practical method to remove these unwanted elements and create a more refined and appealing beverage.
There are various filtration techniques and tools available to brewers, each offering unique advantages. One common approach is using a brewing filter, which can be a mesh bag or a specialized filter cloth. These filters are designed to trap solids while allowing beer to pass through. Before filtering, ensure that the yeast has settled at the bottom of the fermenter. This can be achieved by gently transferring the beer to a separate vessel, leaving the yeast behind. Then, carefully pour the beer through the filter, collecting the clear liquid in a clean container. This method is straightforward and effective for removing most yeast and sediment.
Another option is to utilize a plate and frame filter, which is a more industrial-scale filtration system. This type of filter consists of a series of plates with small pores, allowing for precise control over the filtration process. By adjusting the pressure and flow rate, you can ensure that the beer is filtered thoroughly while retaining its desired characteristics. Plate and frame filters are particularly useful for commercial breweries producing large batches of beer.
When employing filters, it's crucial to maintain proper sanitation to avoid any off-flavors or contamination. Clean your filters and equipment regularly to prevent the buildup of bacteria or other microorganisms. Additionally, consider using filter aids, such as diatomaceous earth (DE), which can help improve filtration efficiency by attracting and capturing yeast and sediment particles.
Remember, the goal of filtration is to achieve a smooth and clear beer while preserving its unique flavors. Experiment with different filtration methods and techniques to find the approach that best suits your brewing style and preferences. With practice and attention to detail, you'll be able to produce consistently high-quality beer with a professional-looking finish.
The Magic of Beer Bottles: How Bars Keep Beer Fresh
You may want to see also
![]()
Aging: Age the beer to mature and stabilize, reducing cloudiness
Aging beer is a crucial step in the process of achieving a clear and refined final product. After the fermentation process, the beer is often cloudy and may contain sediment, which can be an indication of residual yeast or other particles. Aging the beer allows for the natural clarification process to occur, resulting in a smoother and more refined beverage.
The aging process typically involves transferring the beer into a secondary fermenter or a clean, sanitized container. This step is essential as it provides an opportunity to separate the beer from any remaining yeast or sediment. During this period, the beer will continue to undergo a slow fermentation process, which helps to refine the flavors and aromas. It is recommended to age the beer for a minimum of 2-3 weeks, but longer aging periods can be beneficial for achieving a more complex and balanced beer.
During the aging process, the beer's clarity will gradually improve. The sediment will settle at the bottom of the container, and the beer will become clearer over time. This is due to the natural clarification that occurs as the beer ages, allowing the yeast and other particles to separate from the liquid. It is important to regularly check the beer's clarity during this period to ensure it meets your desired standards.
Aging also contributes to the overall maturation of the beer. As the beer ages, the flavors become more balanced and harmonious. The harsher, more aggressive flavors that may be present immediately after fermentation soften and meld together. This process allows for the development of more subtle notes and a smoother drinking experience. Additionally, aging can help to reduce any potential off-flavors or esters that may have formed during the fermentation process.
To ensure the best results, it is crucial to maintain proper sanitation throughout the aging process. Regularly clean and sanitize your equipment to prevent any unwanted bacteria or contaminants from affecting the beer's clarity and flavor. By following this step, you can achieve a high-quality, clear beer that is ready to be bottled or served.
One Beer: Is It Legal? Understanding the Limits
You may want to see also
![]()
Bottling: Carefully bottle beer, ensuring minimal sediment enters the bottle
Bottling beer is an art that requires precision and attention to detail, especially when it comes to minimizing sediment in the final product. Here's a step-by-step guide to achieving clear and crisp beer in your bottles:
Pre-Bottling Preparation: Before you begin the bottling process, it's crucial to ensure your beer is properly conditioned and has settled. After fermentation, leave the beer to rest for a few days to a week. This resting period allows the yeast to die off and the beer to clarify. During this time, the beer will naturally separate, with the majority of the sediment settling at the bottom of the fermenter. This initial settling is a vital step to reduce the amount of sediment that might otherwise end up in your bottles.
Bottling Technique: When it's time to bottle, use a siphoning method to transfer the beer from the fermenter to the bottles. This technique minimizes the disturbance of the sediment that has settled at the bottom. Hold the bottle at an angle, ensuring the neck is slightly lower than the bottom of the fermenter. As you siphon, the beer will flow through the bottle, leaving most of the sediment behind in the fermenter. For an even cleaner process, consider using a bottle brush to gently clean the bottle's interior, removing any residual yeast or sediment.
Sediment Removal: To further reduce sediment, you can employ a few techniques. One method is to use a fine-mesh strainer or cheesecloth over the bottle's opening to catch any remaining particles. Another approach is to carefully pour the beer into the bottle, holding the bottle at an angle to allow any sediment to settle at the bottom before it enters the bottle. For an even more precise method, consider using a hydrometer to measure the specific gravity of the beer. If the reading indicates a high sediment content, you can carefully decant the beer, leaving the sediment behind.
Capping and Storage: Once the beer is in the bottles, it's essential to cap them securely. Use a bottle capper to ensure an airtight seal. After capping, store the bottles horizontally for a few days. This practice allows the beer to settle further, ensuring minimal sediment is left in the bottle. Finally, keep the bottles in a cool, dark place to allow the beer to mature and clarify.
By following these steps, you can master the art of bottling beer with minimal sediment, resulting in a clear, crisp, and enjoyable beverage. This process requires patience and attention to detail, but the reward is a well-crafted beer that showcases your brewing skills.
Uncovering the Yeast's Role: Does Beer Ferment with Yeast?
You may want to see also
Frequently asked questions
Clearing beer is a crucial step in the brewing process as it involves removing any remaining yeast, sediment, and fine particles that may affect the beer's clarity and overall quality. This process ensures that the final product is smooth, crisp, and visually appealing.
There are several methods to achieve beer clarity. One common technique is rack filtering, where you carefully transfer the beer from the fermenter to a secondary container, leaving behind any sediment. This can be done using a siphon or by gravity. Another method is to use a fining agent like gelatin or isinglass, which helps to attract and bind particles, making them settle at the bottom.
Yes, timing is essential. After fermentation, allow the beer to rest for a few days to a week. This resting period enables the yeast to settle and the beer to clarify naturally. During this time, you can gently rack the beer to a clean container, leaving behind any remaining sediment. Additionally, using a clear glass or plastic container will make it easier to observe the clearing process and ensure a successful outcome.