Understanding how to clear beer in the secondary stage of the brewing process is crucial for achieving a smooth and clear final product. This guide will explore the techniques and methods that brewers can employ to effectively clarify their beer, ensuring a clean and refreshing taste. From using fining agents to the role of sedimentation, we'll delve into the science and art of secondary fermentation and its impact on the beer's clarity and overall quality.
What You'll Learn
- Fermentation Control: Maintain optimal temperature and yeast activity for clear beer
- Clarification Techniques: Use filtration, fining agents, or cold stabilization to remove particles
- Aging and Conditioning: Age beer in secondary to mature and clarify
- Oxygen Management: Minimize oxygen exposure to prevent haze formation
- Sanitation: Keep equipment clean to prevent yeast and bacteria contamination
![]()
Fermentation Control: Maintain optimal temperature and yeast activity for clear beer
Fermentation control is a critical aspect of brewing, especially when aiming for a clear and well-defined beer. The secondary fermentation stage is where you can fine-tune the process to achieve the desired clarity and flavor. One of the key factors to consider is temperature management. Yeast activity is highly temperature-sensitive, and maintaining the optimal range is essential for a successful fermentation.
For most beer styles, the ideal fermentation temperature is between 65°F and 72°F (18°C and 22°C). At this range, yeast activity is vigorous, promoting efficient fermentation and the production of desirable flavors and aromas. However, it's important to note that different yeast strains may have specific temperature preferences, so always refer to your yeast's recommended guidelines. If the temperature is too low, yeast activity slows down, leading to a longer fermentation process and potentially off-flavors. Conversely, high temperatures can cause the yeast to become inactive or even die, resulting in a stuck fermentation.
To maintain the optimal temperature, consider using a fermentation chamber or a temperature-controlled fermenter. These devices allow you to set and regulate the temperature precisely. During the fermentation process, regularly monitor the temperature to ensure it remains stable. If you're using a larger brewing setup, you might need to employ additional cooling or heating methods to keep the beer at the desired temperature, especially during the initial stages of fermentation.
Another crucial aspect of fermentation control is yeast activity. Yeast plays a vital role in converting sugars into alcohol and carbon dioxide, and their activity directly impacts the beer's clarity. Active yeast ensures a robust fermentation, producing a beer with the right alcohol content and flavor profile. To encourage yeast activity, ensure that your yeast is properly hydrated and activated according to the brewing instructions.
Additionally, consider the type of yeast you are using. Some yeast strains are known for their clarity-enhancing properties. For example, some ale yeasts can produce a higher level of esters, which contribute to a fruity aroma but may also cause haze if not managed properly. On the other hand, certain lager yeasts are designed to produce a cleaner, clearer beer with minimal off-flavors. Choosing the right yeast strain for your beer style can significantly impact the final product's clarity.
In summary, achieving clear beer during the secondary fermentation stage requires precise temperature control and an understanding of yeast activity. By maintaining the optimal temperature range and selecting the appropriate yeast strain, you can ensure a successful fermentation process, resulting in a beer that is not only flavorful but also crystal clear. Remember, consistency and attention to detail are key to mastering the art of brewing.
One Beer: Is It Legal? Understanding the Limits
You may want to see also
![]()
Clarification Techniques: Use filtration, fining agents, or cold stabilization to remove particles
Clarification is an essential step in the beer-making process, especially when transferring beer from the primary fermentation vessel to the secondary fermenter. This process ensures that the beer is clear, stable, and ready for packaging or aging. There are several techniques to achieve this, and each has its own advantages and applications. Here's an overview of the clarification techniques you can employ:
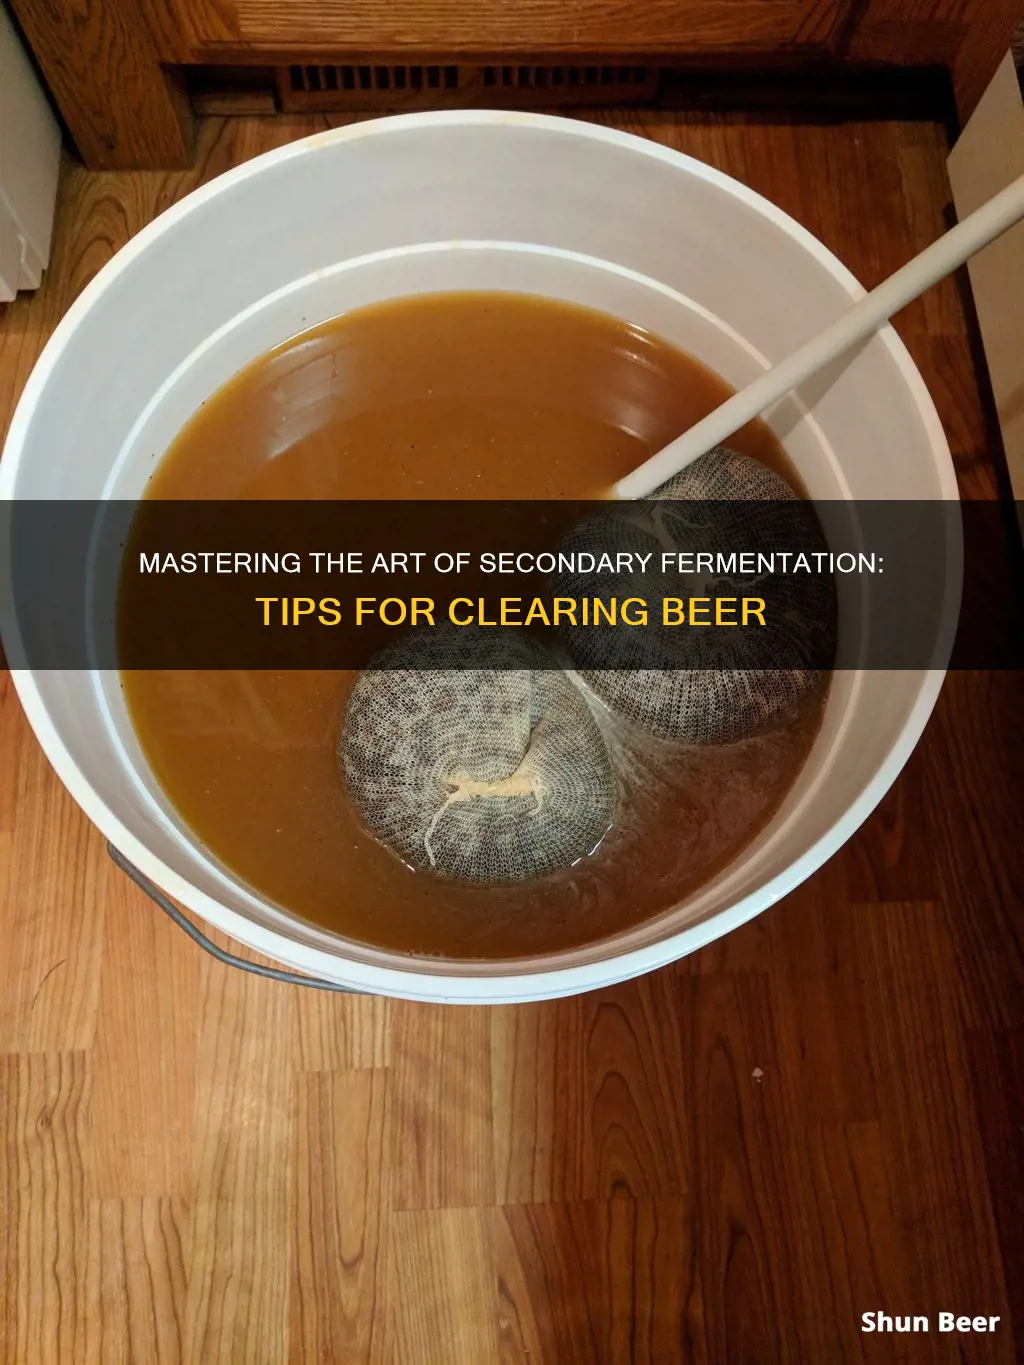
Filtration: One of the most common and effective methods for clarification is filtration. This technique involves passing the beer through a filter to remove solid particles and fine sediment. There are various types of filters available, such as diatomaceous earth (DE) filters, which are widely used in the brewing industry. When using filtration, it's crucial to choose the right filter media and setting. For example, a 0.5-micron filter is often recommended for beer clarification, ensuring that most particles are trapped while allowing the beer to flow freely. After filtration, the beer can be transferred to the secondary fermenter, resulting in a clear and stable beverage.
Fining Agents: Fining agents are substances added to the beer to help remove fine particles and proteins that may cause cloudiness. These agents work by binding to the particles, causing them to precipitate out of the beer. Common fining agents include isinglass (a gelatin derived from fish bladders), Irish moss, and various types of fining agents derived from yeast. For instance, yeast fining involves using active yeast to consume sugars and proteins, leaving behind a clear beer. This method is particularly useful for removing proteins and can be applied before or after primary fermentation. Fining agents are often used in conjunction with filtration to enhance the clarity of the beer.
Cold Stabilization: This technique takes advantage of the fact that beer particles tend to settle at lower temperatures. By cooling the beer to a specific temperature, typically around 35-40°F (2-4°C), you can encourage the particles to settle and separate from the liquid. This process is often used in conjunction with filtration. After cold stabilization, the beer is filtered to remove the settled particles, resulting in a clear and stable product. Cold stabilization is a gentle process and can be applied to beer of various styles and ages.
Each of these clarification techniques offers a unique approach to achieving clear beer. Filtration provides a physical barrier, fining agents target specific particles, and cold stabilization utilizes temperature differences. Brewers often combine these methods to ensure the best possible clarity. It's important to note that the choice of technique depends on the style of beer, the brewing process, and the desired outcome. Experimentation and understanding the beer's characteristics will guide brewers in selecting the most appropriate clarification method.
Is Busch Beer a Lager? Uncovering the Truth
You may want to see also
![]()
Aging and Conditioning: Age beer in secondary to mature and clarify
Aging and conditioning beer in a secondary fermenter is a crucial step to enhance flavor, improve clarity, and develop the desired characteristics of your brew. This process allows the beer to mature and refine its taste, resulting in a more refined and enjoyable beverage. Here's a detailed guide on how to age and condition your beer in the secondary stage:
Understanding the Process: Aging and conditioning are essential steps in the beer-making journey, especially for homebrewers. After the primary fermentation, where the beer is actively carbonating and developing its initial flavors, the secondary stage focuses on maturation. This phase can be likened to fine wine aging, where the beer's flavors evolve and mature over time. The secondary fermenter provides a controlled environment, allowing you to manage temperature, oxygen exposure, and yeast activity, all of which contribute to the beer's overall quality.
Preparing the Secondary Fermenter: Before transferring your beer to the secondary, ensure the fermenter is clean and sanitized. This step is vital to prevent any off-flavors or contamination. Rinse the fermenter with hot water to remove any residual yeast or sediment from the primary fermenter. Then, sanitize it using a suitable brewing sanitizer to create a clean and safe environment for your beer's continued journey.
Transferring the Beer: Carefully transfer the beer from the primary fermenter to the secondary fermenter. Leave a small amount of yeast or sediment behind in the primary fermenter, as this can contribute to the aging process. This transfer ensures that the beer continues to ferment and condition in the secondary, allowing for a smoother and more refined flavor profile.
Aging and Conditioning Techniques: The duration and conditions of aging can vary depending on your beer style and preferences. Here are some key considerations:
- Temperature Control: Maintain a consistent and relatively cool temperature in the secondary fermenter. A temperature range of 55-65°F (13-18°C) is often recommended for aging, as it slows down yeast activity and allows flavors to develop.
- Oxygen Management: Limit oxygen exposure to prevent oxidation and off-flavors. Consider using an airlock or a small amount of CO2 to provide a gentle flow of gas without excessive oxygen.
- Yeast Activity: During aging, the yeast continues to work, but at a much slower pace. This process can help clarify the beer by encouraging the yeast to consume sugars and produce alcohol, leaving behind clearer liquid.
- Aging Duration: The length of aging depends on your beer's style and desired outcome. For lagers, a longer aging period of 2-4 weeks is common, while ales might benefit from shorter aging times of 1-2 weeks.
Clarification and Bottling: After the aging process, your beer will likely benefit from clarification. This step ensures a smooth and clear final product. Use a brewing siphon to carefully transfer the beer from the secondary fermenter, leaving any remaining yeast or sediment behind. Filter the beer if needed, but be cautious not to remove too much of the yeast, as it contributes to the flavor. Finally, bottle or keg your aged and conditioned beer, ensuring a proper carbonation level for a refreshing drinking experience.
Aging and conditioning in the secondary fermenter is an art that allows you to craft unique and exceptional beers. By controlling temperature, managing yeast activity, and allowing time for maturation, you can create a beer that is not only delicious but also visually appealing and satisfying to drink.
Unraveling the Mystery: Is White Claw Beer Fermented?
You may want to see also
![]()
Oxygen Management: Minimize oxygen exposure to prevent haze formation
Oxygen is a critical factor in the beer-making process, especially when it comes to preventing haze formation in your secondary fermentation vessel. Haze in beer is primarily caused by the presence of proteins and yeast remnants, which can be exacerbated by oxygen exposure. Here's a detailed guide on how to manage oxygen levels to keep your beer clear and crisp:
- Use an Airlock and Fermentation Lock: When transferring your beer from the primary to the secondary fermenter, ensure you use an airlock to allow carbon dioxide (CO2) to escape while preventing oxygen from entering. A fermentation lock is an even better option as it creates an airtight seal, minimizing oxygen contact with the beer. This simple step can significantly reduce the risk of haze formation.
- Maintain a Closed System: Aim to keep your secondary fermenter closed as much as possible. Open the fermenter only when necessary, such as during transfers or when taking samples. Each time you open the fermenter, you introduce a burst of oxygen, which can lead to haze. By minimizing these openings, you reduce the overall oxygen exposure.
- Use an Oxygen Absorber: Consider adding an oxygen absorber to your secondary fermenter. These absorbers, often in the form of sachets or tablets, contain ingredients like iron or activated carbon that react with and absorb oxygen. This helps to create an oxygen-free environment, which is crucial for preventing haze. You can find these absorbers at most homebrew supply stores.
- Monitor Carbon Dioxide Levels: While you want to minimize oxygen, it's also essential to maintain adequate carbon dioxide levels. CO2 helps to push proteins and yeast remnants out of the beer, contributing to clarity. Use a hydrometer to monitor the specific gravity of your beer and adjust the fermentation process accordingly. If the beer becomes too clear too quickly, you might need to add a small amount of sugar to encourage a slower fermentation and maintain a healthy level of CO2.
- Consider the Fermentation Process: Different beer styles may require varying approaches to oxygen management. For example, wheat beers often benefit from a longer, cooler fermentation, which can help reduce haze-causing proteins. On the other hand, some hoppy IPAs might benefit from a brief period of oxygen exposure to enhance their aroma. Understanding your beer style and its specific needs will guide your oxygen management strategy.
By implementing these oxygen management techniques, you can significantly reduce the chances of haze formation in your beer. Remember, the goal is to create an environment that encourages healthy fermentation while minimizing the negative effects of oxygen. With careful attention to these details, you'll be able to produce clear, crisp beers that showcase the best of your brewing skills.
Mastering the Art of Beer Barrel Cleaning: A Step-by-Step Guide
You may want to see also
![]()
Sanitation: Keep equipment clean to prevent yeast and bacteria contamination
Sanitation is a critical aspect of brewing beer, especially when it comes to clearing your secondary fermenter. Proper cleaning and sanitization techniques are essential to prevent yeast and bacteria contamination, which can negatively impact the flavor, clarity, and overall quality of your beer. Here's a detailed guide on how to maintain a clean and sterile environment during the secondary fermentation process:
Understanding the Importance of Sanitation: Before diving into the cleaning process, it's crucial to understand why sanitation is so vital. Yeast and bacteria are naturally present in the air, water, and even on your hands. During fermentation, these microorganisms can contaminate your beer, leading to off-flavors, unwanted aromas, and cloudiness. Contamination can also result in a slow fermentation process or even a stuck fermentation, where the yeast becomes inactive. Therefore, keeping your equipment clean is the first line of defense against these unwanted guests.
Equipment and Supplies: To ensure effective sanitation, you'll need a few essential tools and supplies. Start with a good quality sanitizer, such as iodine or a chlorine-based solution. Iodophor and Star San are popular choices for brewers. You'll also require a clean water source, preferably filtered or distilled, to rinse your equipment. Additionally, have a dedicated cleaning brush or sponge for scrubbing surfaces, and consider using a sterile air gun or blowgun for precise sanitization.
Cleaning Procedure: Begin by disassembling your secondary fermenter, including the airlock, lid, and any other removable parts. Rinse all components with clean water to remove any loose debris or yeast sediment. Then, use your cleaning brush to scrub the interior of the fermenter, paying extra attention to corners and crevices where contaminants may hide. For glass carboys, ensure you clean the inside and outside thoroughly. After scrubbing, rinse all parts again to remove any cleaning solution residue.
Sanitizing the Equipment: Once your equipment is clean, it's time to sanitize. Fill the fermenter with your sanitized water and add the chosen sanitizer according to the manufacturer's instructions. Let the solution soak for the recommended time, typically around 10-15 minutes. For glass carboys, you can use a sterile cloth or paper towel to wipe down the exterior, ensuring no sanitizer residue remains. Always follow the sanitization guidelines to avoid over-sanitizing, which can be harmful to yeast health.
Avoiding Cross-Contamination: Sanitation doesn't end with the fermenter. It's crucial to maintain a clean and sterile environment throughout the brewing process. Use separate utensils and containers for yeast, sugar, and other ingredients to prevent cross-contamination. Regularly clean and sanitize your work area, including counters, taps, and any brewing tools. By keeping your workspace clean, you reduce the risk of introducing unwanted bacteria or yeast strains into your beer.
Regular Maintenance: Sanitation is an ongoing process in brewing. Implement a regular cleaning schedule to ensure your equipment remains in top condition. After each fermentation, clean and sanitize your fermenter and utensils promptly. This practice will make the process more efficient and consistent. Remember, proper sanitation is a key factor in achieving clear, flavorful, and high-quality beer.
Mastering Beer Fermentation: A Guide to CO2 Fermentation Techniques
You may want to see also
Frequently asked questions
Clearing beer in the secondary fermenter is a crucial step to ensure a smooth and stable beer. It involves separating the beer from any remaining yeast, sediment, or proteins, resulting in a clearer and more aesthetically pleasing beverage.
The duration for clearing beer can vary depending on the beer style and personal preference. Typically, it is recommended to leave the beer in the secondary fermenter for at least one week. During this time, the beer will continue to mature, and the yeast will settle at the bottom, making it easier to decant a clear beer.
Yes, there are a few techniques to improve clarity. One method is to use a brewing blank or a clear liquid like water or a neutral-tasting beer to wash the yeast from the bottom of the fermenter. This helps to gently remove any remaining sediment. Additionally, chilling the beer before bottling or kegging can cause the yeast to settle faster, making the clearing process more efficient.